sherryjenix
Member
- First Name
- Sherry
- Joined
- Jul 25, 2020
- Threads
- 6
- Messages
- 28
- Reaction score
- 82
- Location
- San Gabriel
- Vehicle(s)
- 2020 CW Civic Type R (FK8)
- Thread starter
- #1
Hey All!
I just installed the Joying 9" headunit into my 2020 Civic Type R. There were almost no instructions that came with it, so I thought it would be helpful to do an installation guide! I searched up Youtube videos, but none of the videos showed the connections to the back of the headunit.
Here is a link to the specific headunit I purchased. Since I have a Type R, I had to purchase it with Option C (with factory amplifier). I also added the AHD Reverse Camera option: https://www.joyingauto.com/newest-9...ivic-2016-2017-with-carplay-android-auto.html
It took about a week for it to come in. Here's what comes inside the box (pulled images from the site since it was accurate):
And the AHD Reverse Camera:

Installation Guide:
Step 1: Remove OEM headunit and unplug climate control.
You just have to carefully pull out the two plastic pieces on the side to pull out the climate control and oem headunit. I believe there is one or two screws that are also holding the OEM headunit in place that should be revealed after you pull out the climate control.
Before and after OEM headunit/climate control removal.
Step 2: Plug in the harness from Joying to factory cables.
The harness is pretty much plug and play. I find it easier to plug in the harness to the factory cables before plugging it into the headunit.
The side with grey fittings on the harness (circled in red) is what would be plugging into the factory cables. They're all different sizes, so it should be fairly simple matching which one goes to what. One of them slid in kind of loosely, but it still worked.
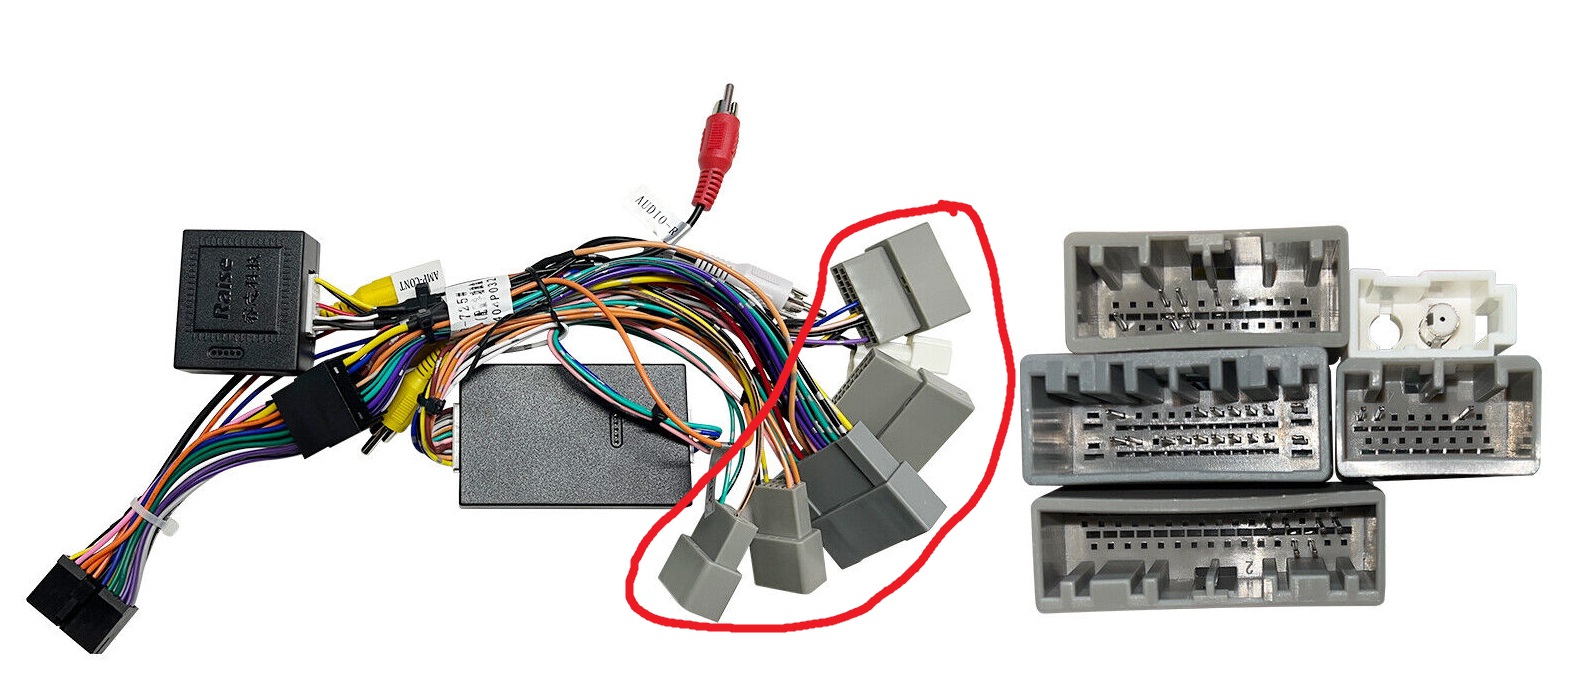
Harness that comes with Joying 9" Headunit.
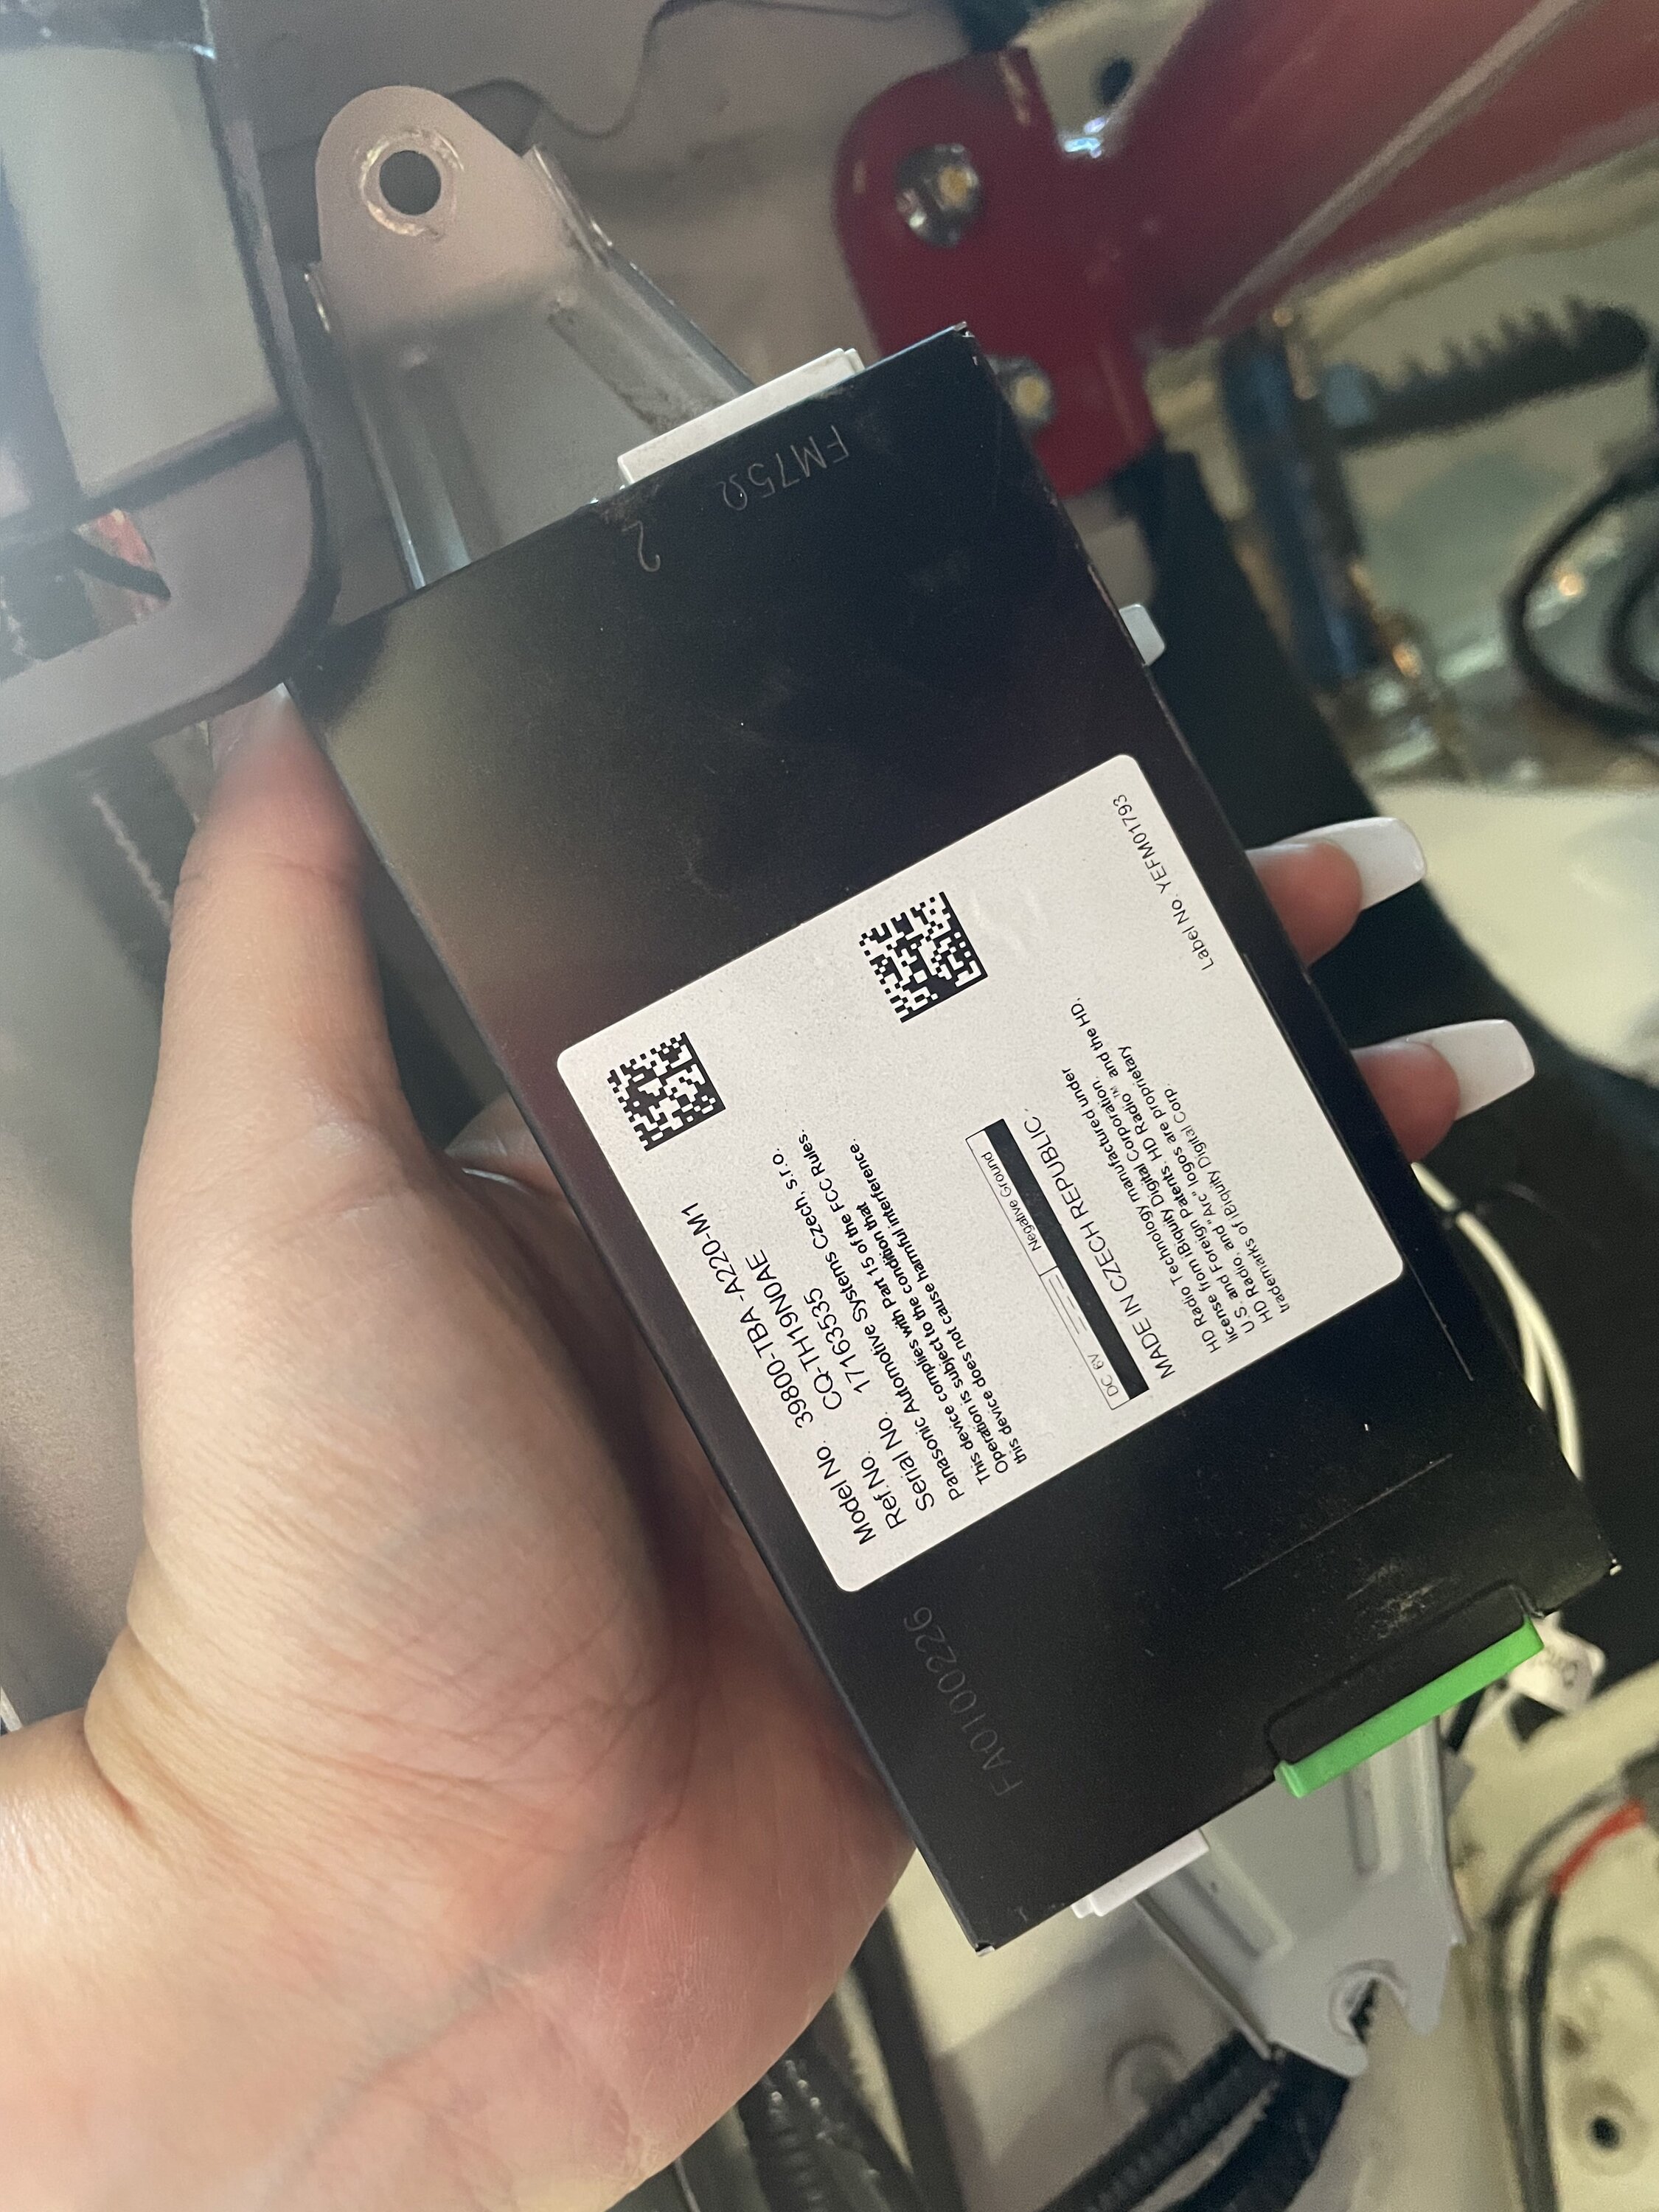
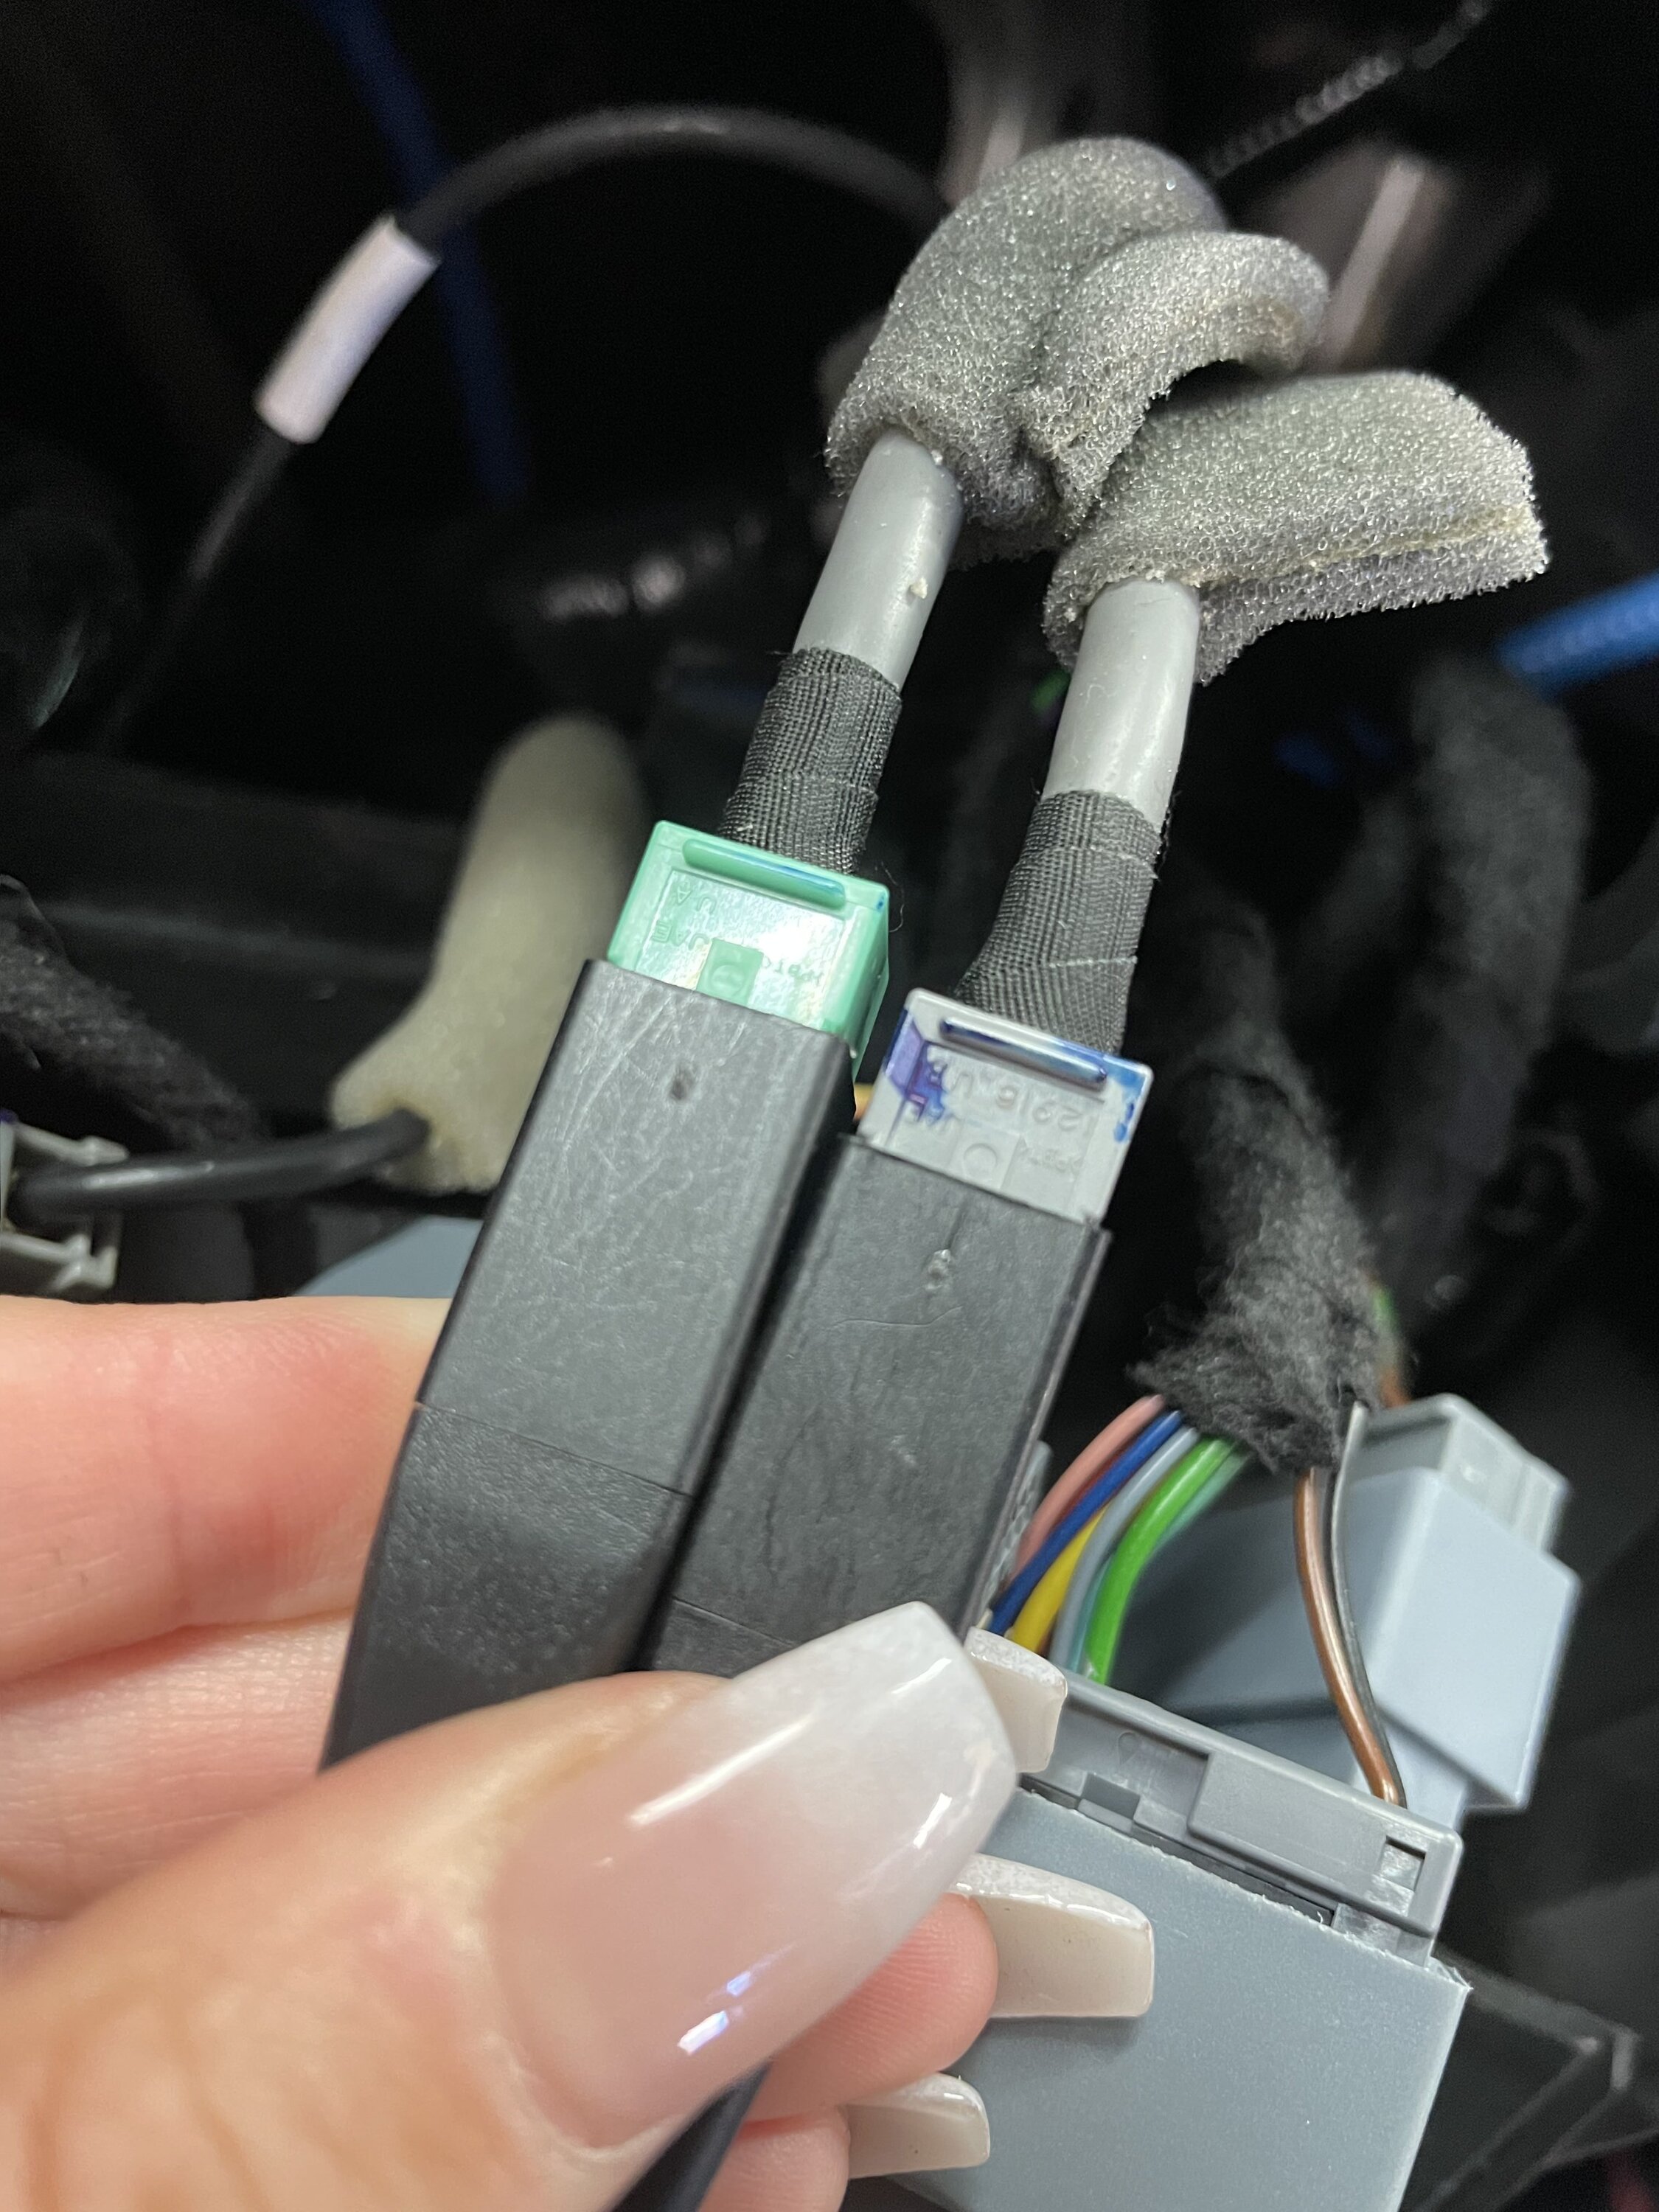
Step 3: Attach the CAN BUS DECODER and HD Amplifier to the Joying Harness.
The CAN BUS Decoder and HD Amplifier should have came detached from the Joying harness. Make sure both are plugged in to the WHITE fittings of the harness. The HD Amplifier only has one plug and the CAN BUS Decoder has two plugs. It should look like this after plugged in:
Left is HD Amplifier, one plug. Right is CAN BUS DECORDER, two plugs.
Once they are plugged into the harness, you can just let them hang around.
Step 4: Reroute radio cables to headunit.
You can skip this step if you don't want to have radio, but just in case you still want to keep it like I do!
The radio box is actually located by the rear passenger door, right behind this panel:

Just remove the panel and then you'll see the radio box mounted with a 1 cable at the top, two at the bottom. It should look like this:
OEM radio "box" unmounted.
Now unplug all cables and take the radio harness that came with the Joying headunit. It should look similar to this. Just look for the two grey and one green fitting:
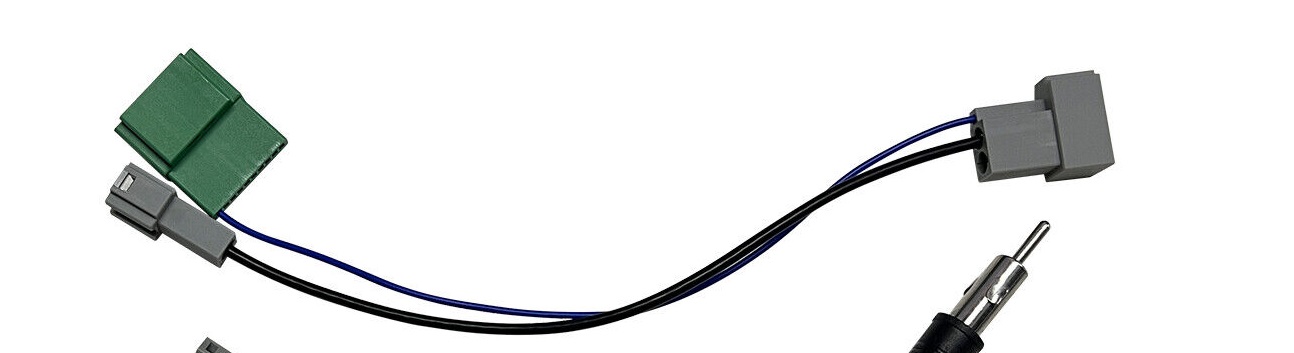
Radio harness from Joying.
After being plugged in, it should look like this:
and can now unmount the radio box and remove it from the civic.
Back to your dash/headunit area, the Radio wiring needs to be plugged in. It should look like this cable:
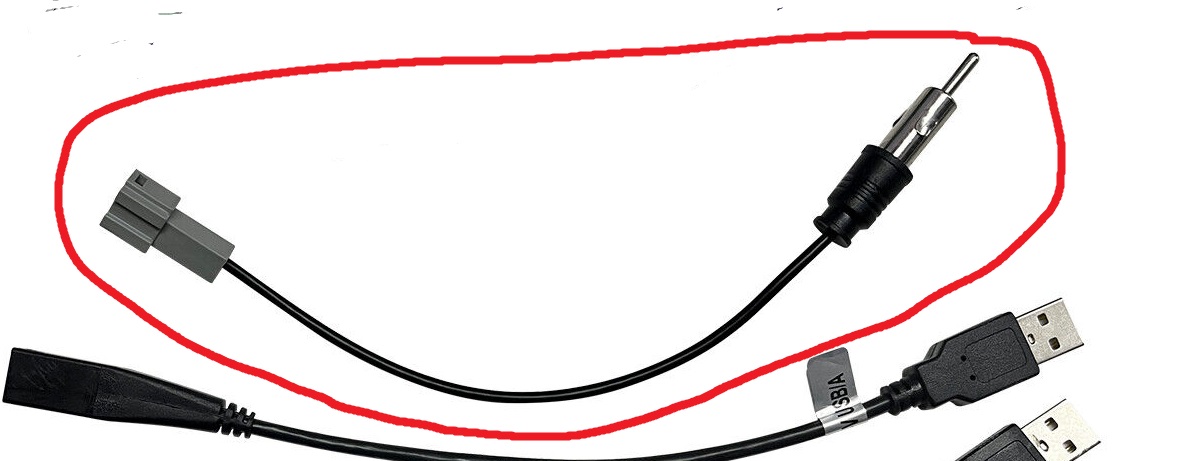
Antenna wiring from Joying.
Just find the OEM female side that fits this (there's only one):
Connected Joying radio wiring to factory wiring.
The other side will plug straight into the headunit where it says "Radio ANT".
Step 5: AHD Rearview Camera. You can skip this step if you did not purchase one.
Just a heads up, this was probably the most tedious part of the install! It requires a lot of panel removal and some mickey mousing with the wiring.
If you purchased the AHD rearview camera, it should have came in a plastic baggie with these contents:
AHD Reverse Camera and wiring from Joying.
The mount I found was useless, so I just removed my OEM rearview camera and heavily double sided tape the Joying camera to the mount.
Now, this really long cable is what will connect the camera to your headunit. The Yellow male and Red female will be going to your camera side, with the Yellow male going into your headunit. There is a green ground wire that also is connected to the Yellow male side to the headunit. I found it unnecessary to connect to anything since camera worked without that wire being grounded.
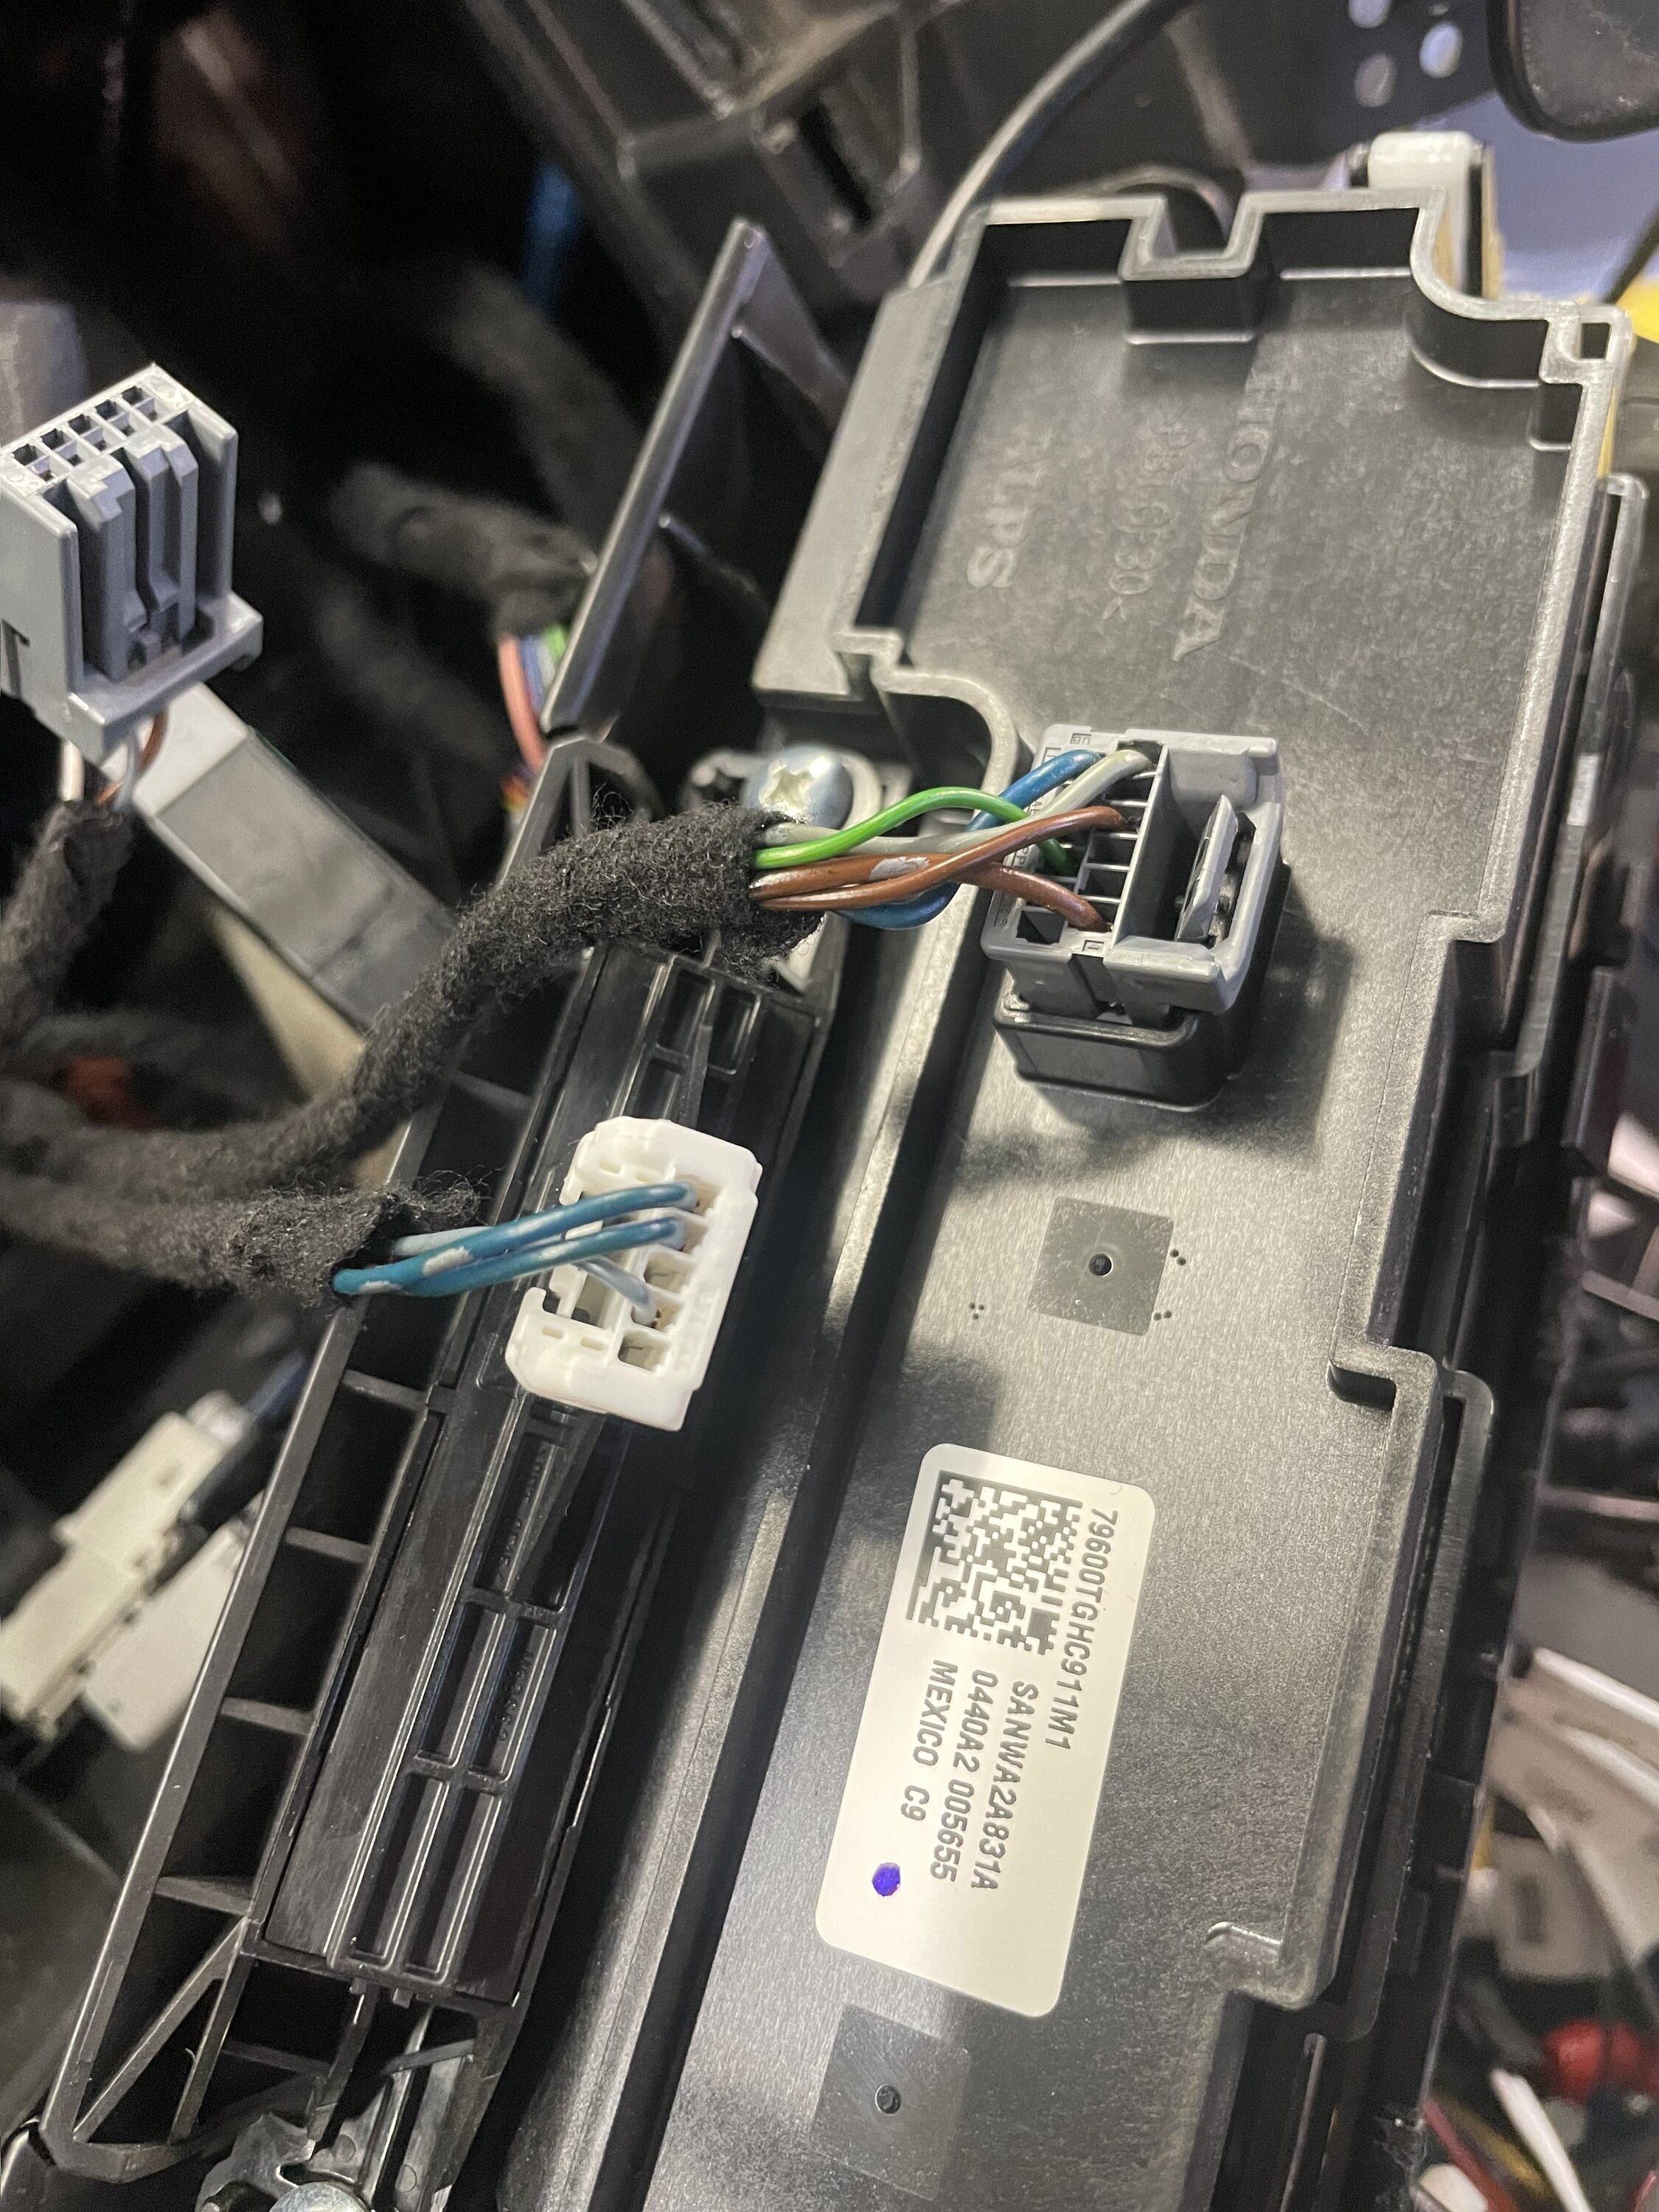
There is a red and black wire coming from the camera side of the wiring. These are the power cables that the reverse camera needs to turn on. It needs a 12V source, so routing it into the reverse light wiring was the best choice. This required finding the positive wiring of the reverse light (the TEAL wiring circled in blue). Stole this image off a fellow CivicX poster since I was too dumb to take a picture of it:
Reverse light positive teal wiring, circled in blue.
Now, the tedious part. I chose to tuck the wiring through the driver's side of my civic. This meant that I had to route the long cable through the trunk, through the rubber boot, and into the rear driver's side paneling.
We extended the red and black wiring so it could reach the teal cable behind the rear driver's side paneling for power.
The cleanest way to hide the wiring was to have it connected to the teal cable behind this panel on the rear driver's side:
Here is the where I connected the positive wiring to the TEAL wire (reverse light wire):
Here is a picture of the wiring route in red:
After doing all that, we routed the cable to go to the headunit by tucking it along the floor all the way on the driver's side > behind the steering > up into the headunit area.
Now you're ready to plug everything into the headunit!
Step 6: Plugging everything into the headunit/climate control.
If you want your OEM USB ports to work, you should use the two cables provided from Joying:
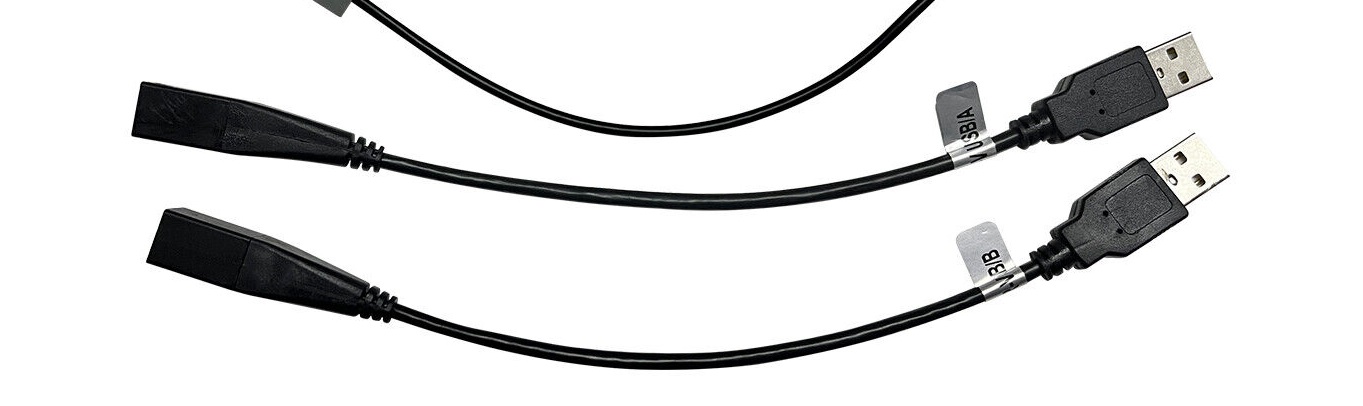
USB adapter cables from Joying.
and connect them to these two factory fittings:
Now, we can begin to plug everything into the headunit. The back should end up looking something like this:
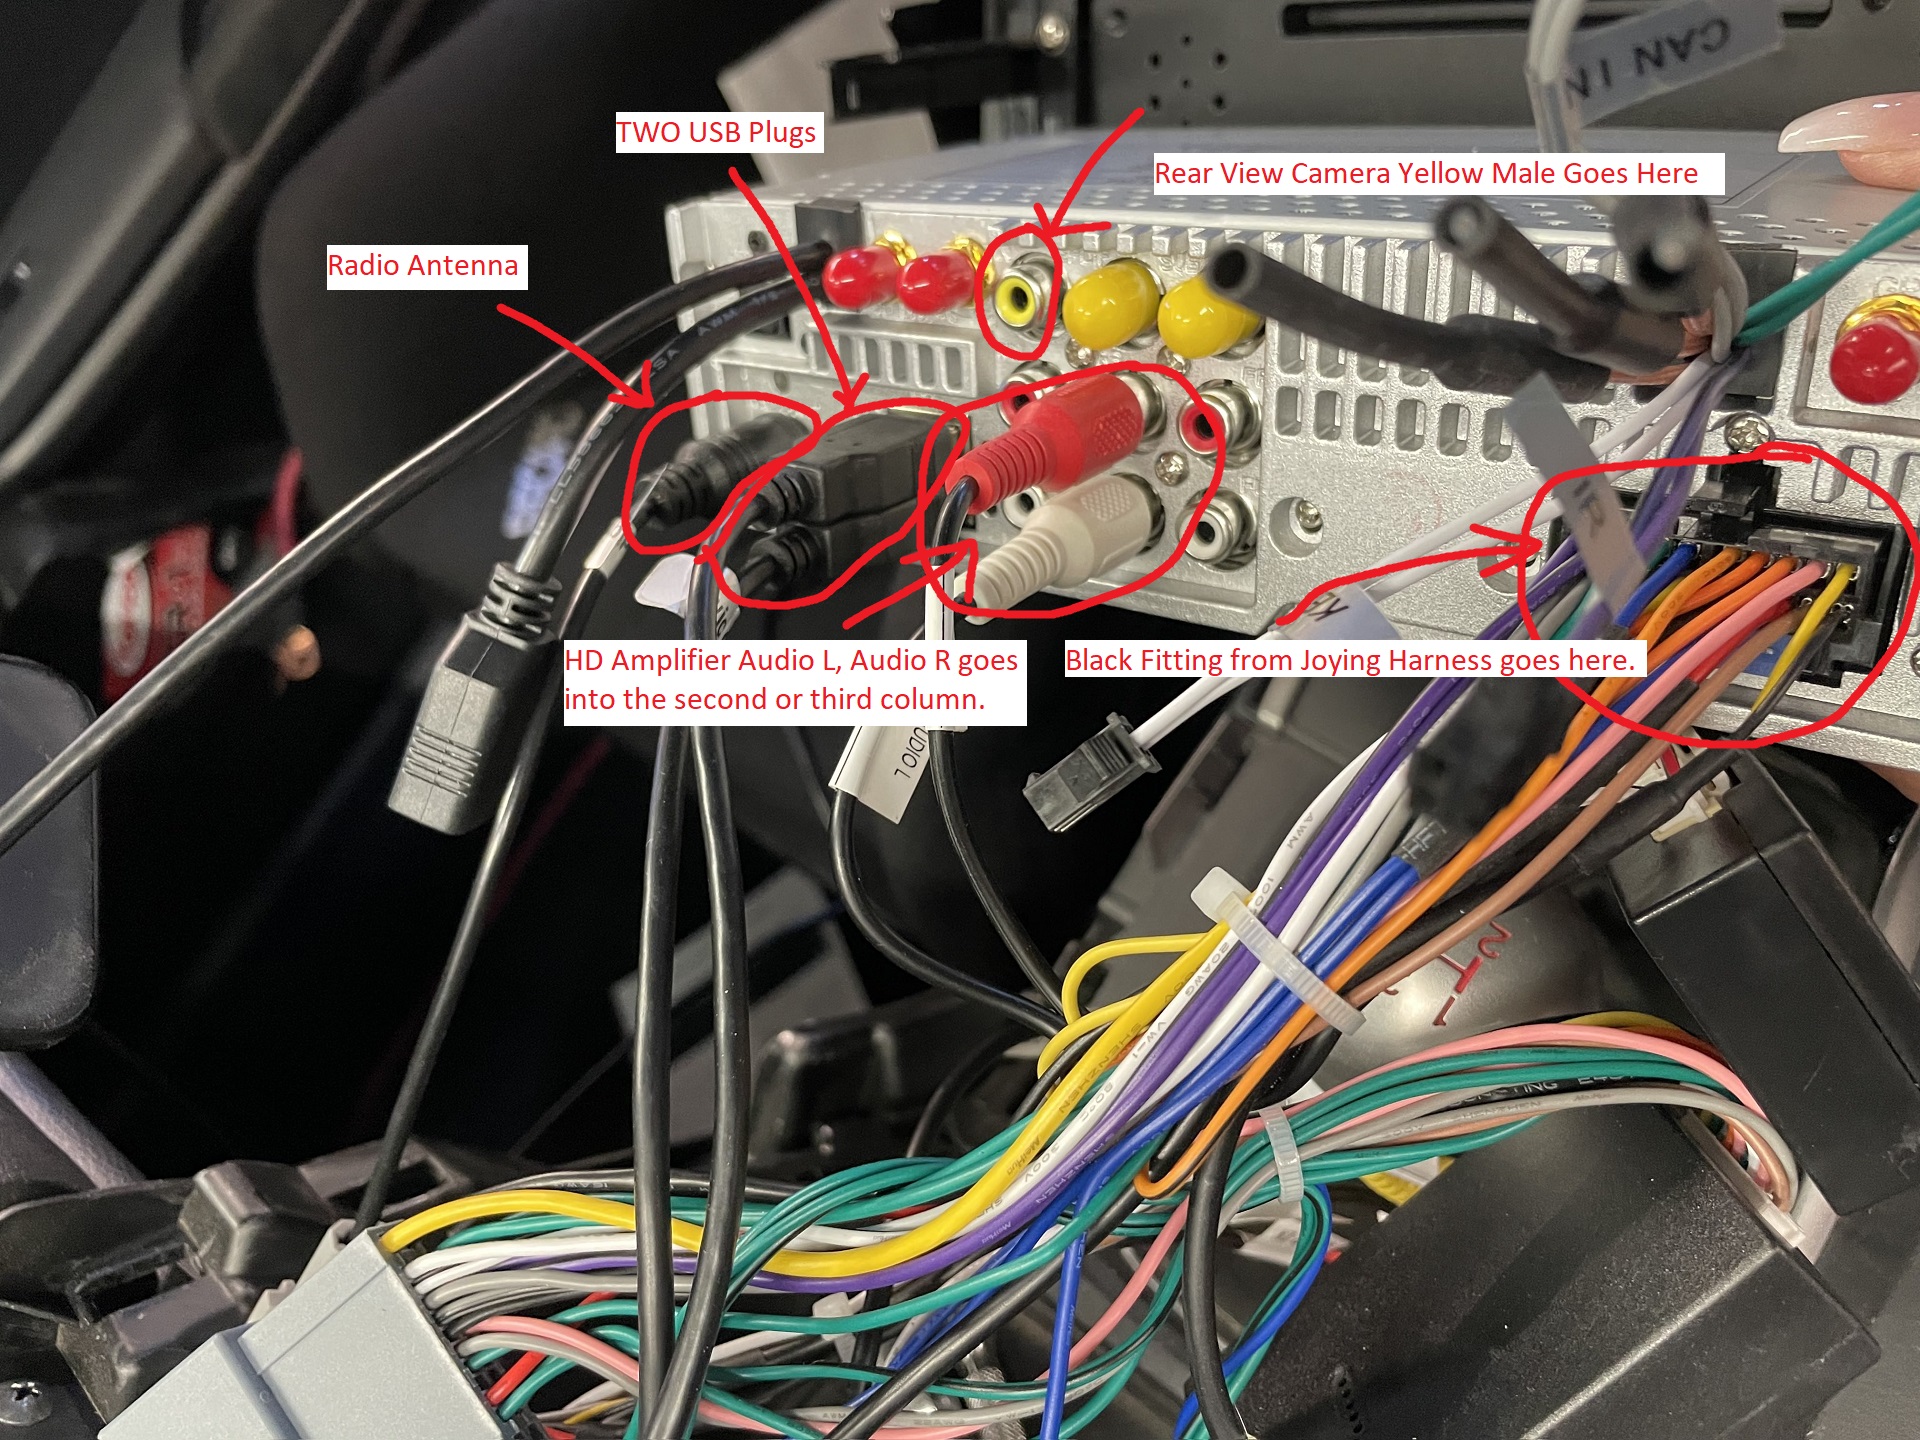
It looks like a mess, because it is. You can try to clean it up a bit, but at this point, everything should be working! Make sure to turn it on and test everything out before mounting the headunit back in. To connect the climate control, one of the cables will NOT be connected:
Back of climate control panel.
Here's how it looks when completed:
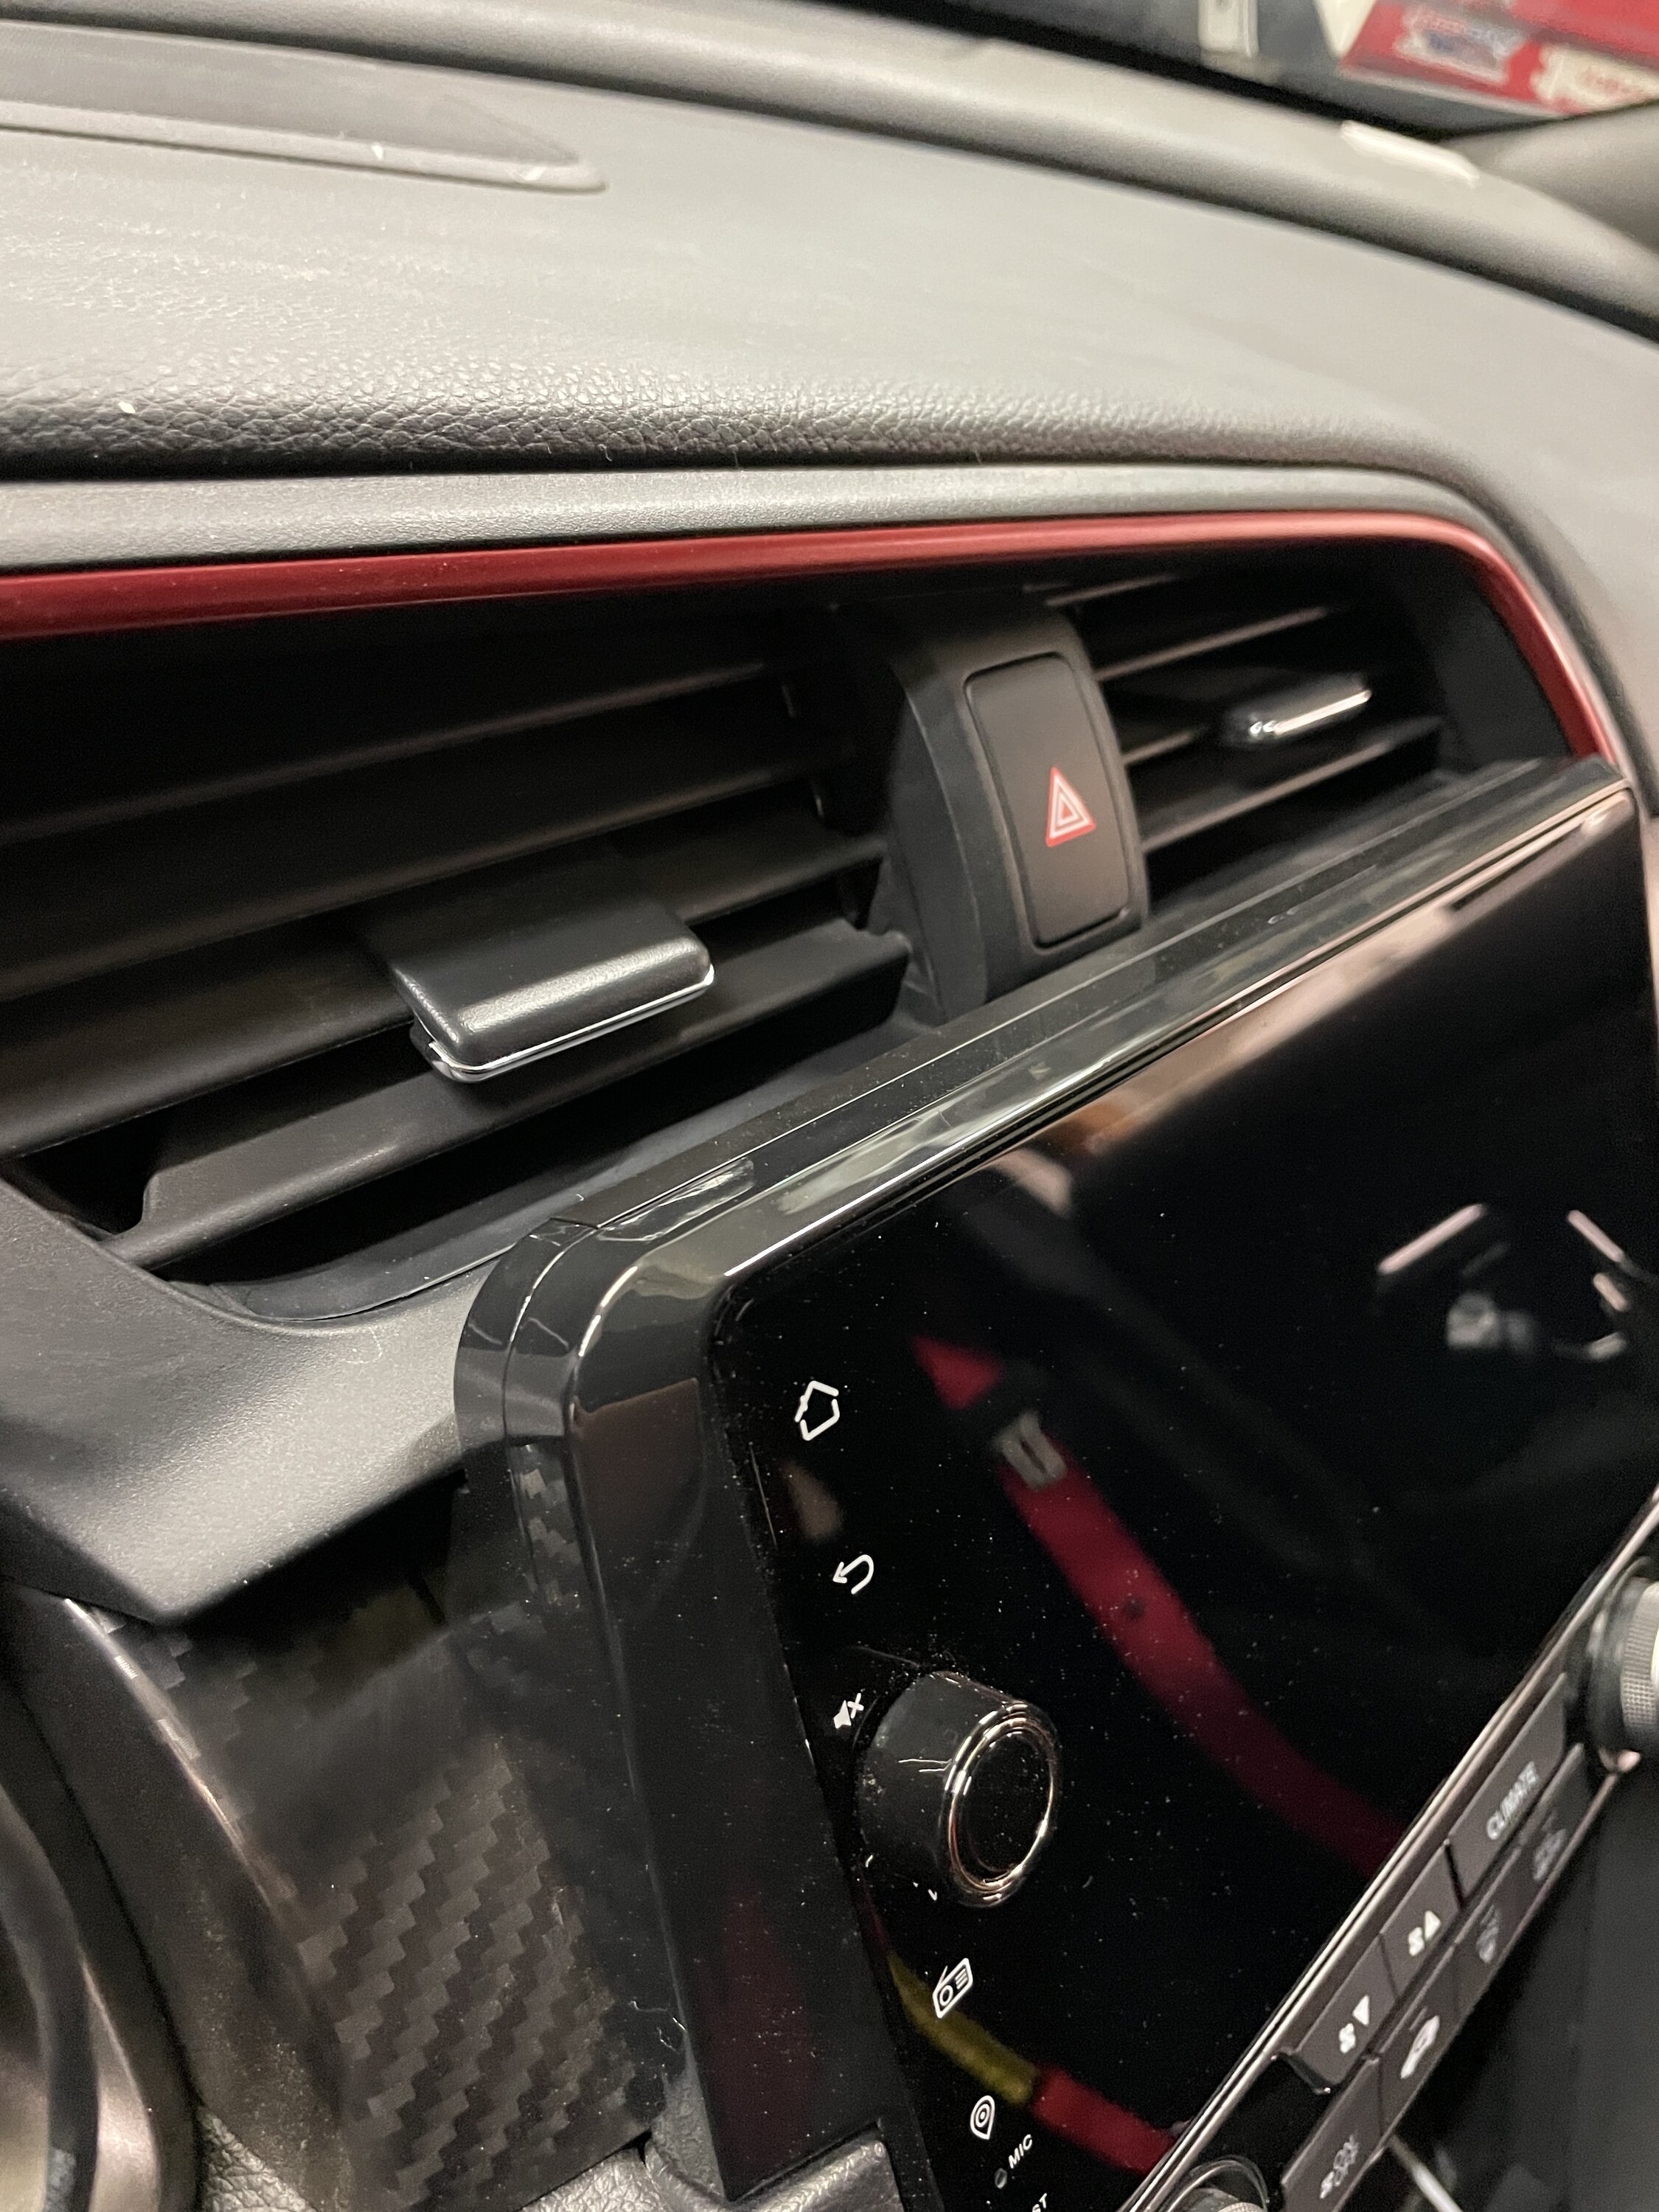
It doesn't block out the AC really:
There's a thread where other users spoke about firmware issues/volume issues, etc that you can find here - https://www.civicx.com/forum/threads/infotainment-failure.59729/page-35#post-1156711
I just installed it so I have no issues experienced... yet. Hope this install guide helped! Just DM or leave comments if you have any questions.
Before anyone asks, yes, my dual climate works. As far as TPMS calibration, oil reset, I do see the settings on the headunit. Manufacturer claims that it works. However, I don't have a stock ECU so none of that applies to me and I'm unable to test it.
I just installed the Joying 9" headunit into my 2020 Civic Type R. There were almost no instructions that came with it, so I thought it would be helpful to do an installation guide! I searched up Youtube videos, but none of the videos showed the connections to the back of the headunit.
Here is a link to the specific headunit I purchased. Since I have a Type R, I had to purchase it with Option C (with factory amplifier). I also added the AHD Reverse Camera option: https://www.joyingauto.com/newest-9...ivic-2016-2017-with-carplay-android-auto.html
It took about a week for it to come in. Here's what comes inside the box (pulled images from the site since it was accurate):
|
|
|
And the AHD Reverse Camera:
Installation Guide:
Step 1: Remove OEM headunit and unplug climate control.
You just have to carefully pull out the two plastic pieces on the side to pull out the climate control and oem headunit. I believe there is one or two screws that are also holding the OEM headunit in place that should be revealed after you pull out the climate control.
|
|
|
Step 2: Plug in the harness from Joying to factory cables.
The harness is pretty much plug and play. I find it easier to plug in the harness to the factory cables before plugging it into the headunit.
The side with grey fittings on the harness (circled in red) is what would be plugging into the factory cables. They're all different sizes, so it should be fairly simple matching which one goes to what. One of them slid in kind of loosely, but it still worked.
Harness that comes with Joying 9" Headunit.
Step 3: Attach the CAN BUS DECODER and HD Amplifier to the Joying Harness.
The CAN BUS Decoder and HD Amplifier should have came detached from the Joying harness. Make sure both are plugged in to the WHITE fittings of the harness. The HD Amplifier only has one plug and the CAN BUS Decoder has two plugs. It should look like this after plugged in:
|
|
|
Once they are plugged into the harness, you can just let them hang around.
Step 4: Reroute radio cables to headunit.
You can skip this step if you don't want to have radio, but just in case you still want to keep it like I do!
The radio box is actually located by the rear passenger door, right behind this panel:
Just remove the panel and then you'll see the radio box mounted with a 1 cable at the top, two at the bottom. It should look like this:
OEM radio "box" unmounted.
Now unplug all cables and take the radio harness that came with the Joying headunit. It should look similar to this. Just look for the two grey and one green fitting:
Radio harness from Joying.
After being plugged in, it should look like this:
|
|
|
Back to your dash/headunit area, the Radio wiring needs to be plugged in. It should look like this cable:
Antenna wiring from Joying.
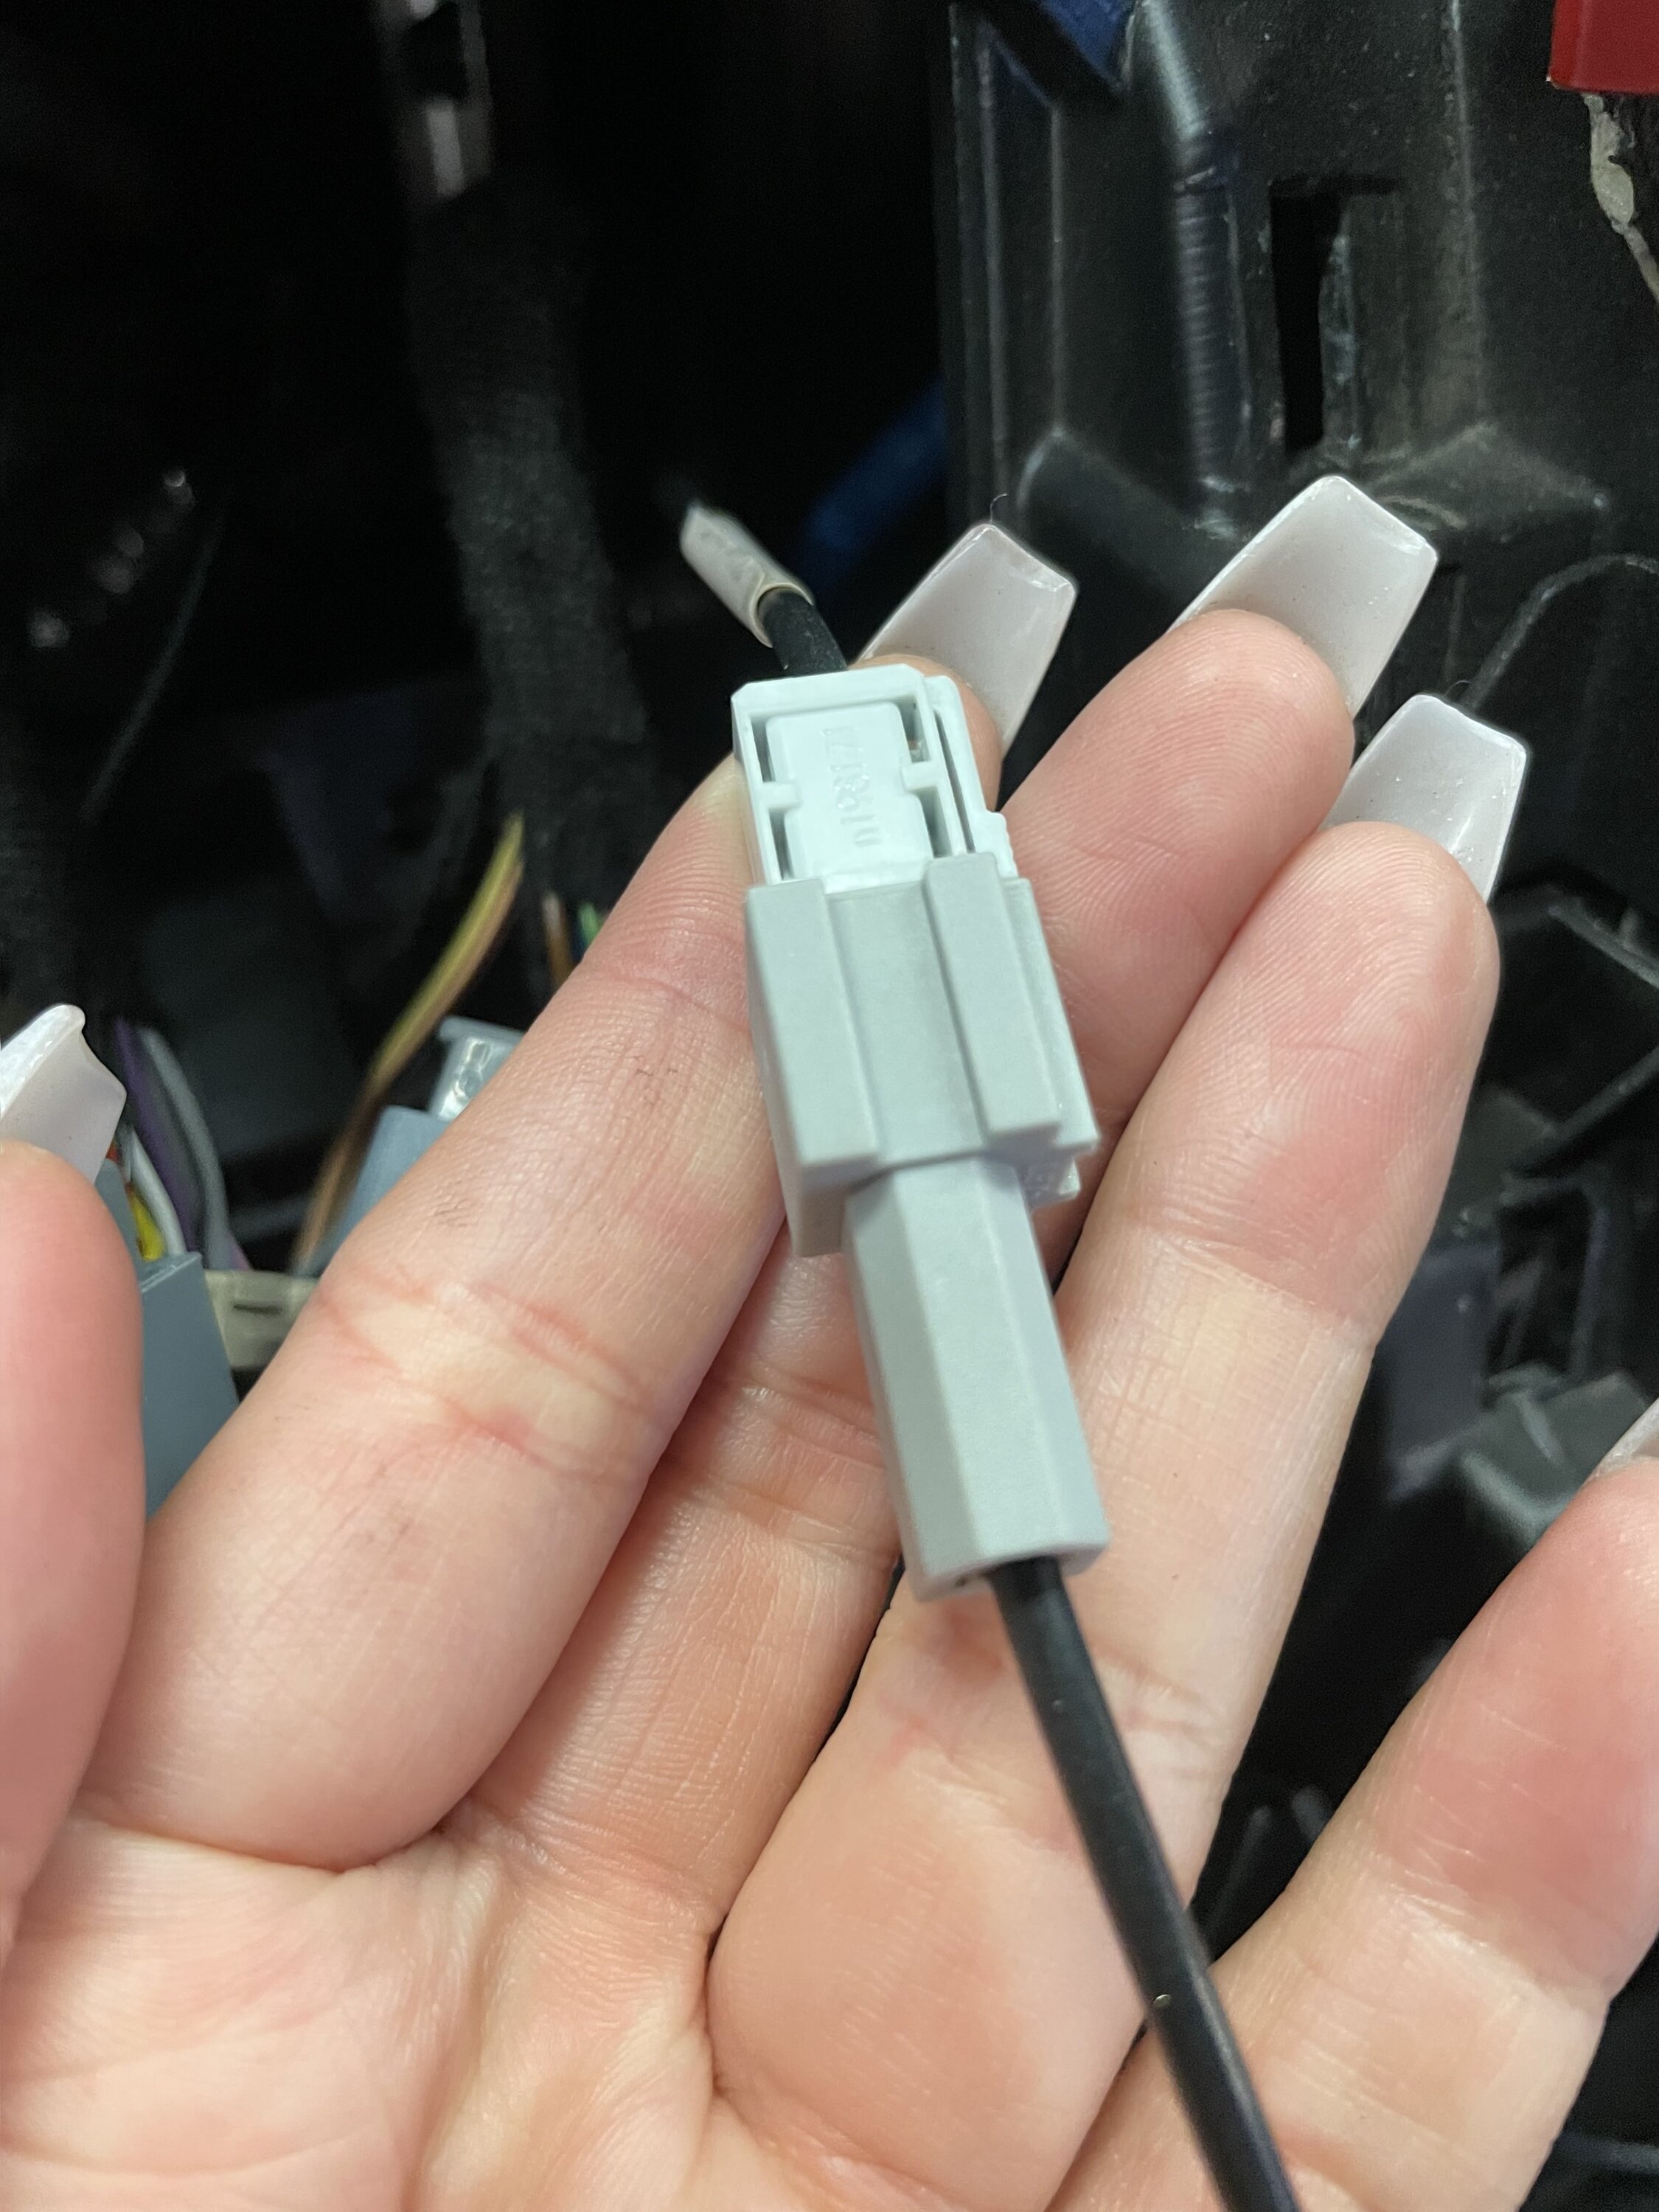
Just find the OEM female side that fits this (there's only one):
Connected Joying radio wiring to factory wiring.
The other side will plug straight into the headunit where it says "Radio ANT".
Step 5: AHD Rearview Camera. You can skip this step if you did not purchase one.
Just a heads up, this was probably the most tedious part of the install! It requires a lot of panel removal and some mickey mousing with the wiring.
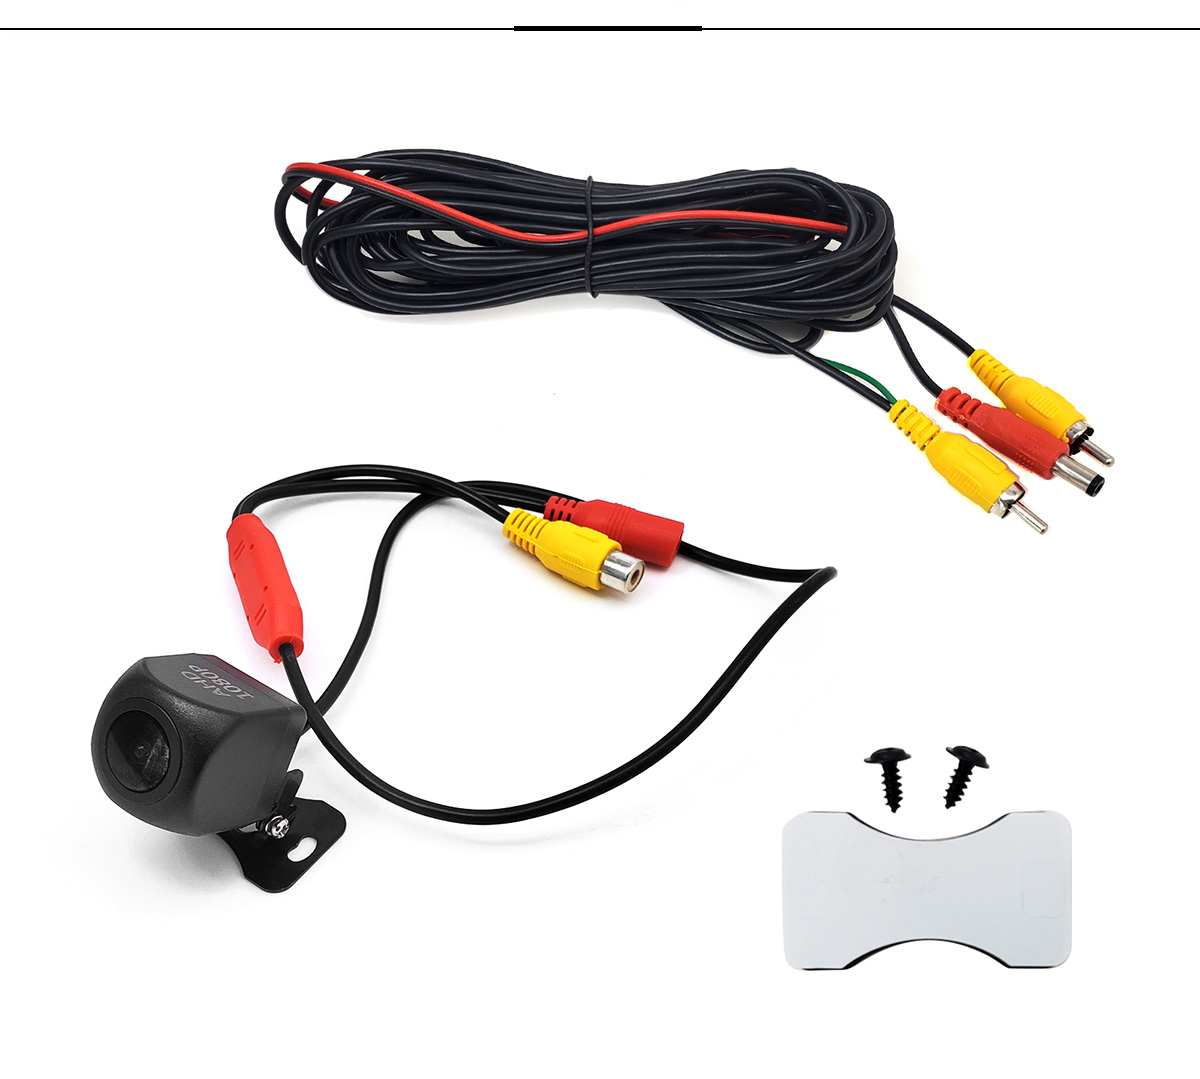
If you purchased the AHD rearview camera, it should have came in a plastic baggie with these contents:
AHD Reverse Camera and wiring from Joying.
The mount I found was useless, so I just removed my OEM rearview camera and heavily double sided tape the Joying camera to the mount.
Now, this really long cable is what will connect the camera to your headunit. The Yellow male and Red female will be going to your camera side, with the Yellow male going into your headunit. There is a green ground wire that also is connected to the Yellow male side to the headunit. I found it unnecessary to connect to anything since camera worked without that wire being grounded.
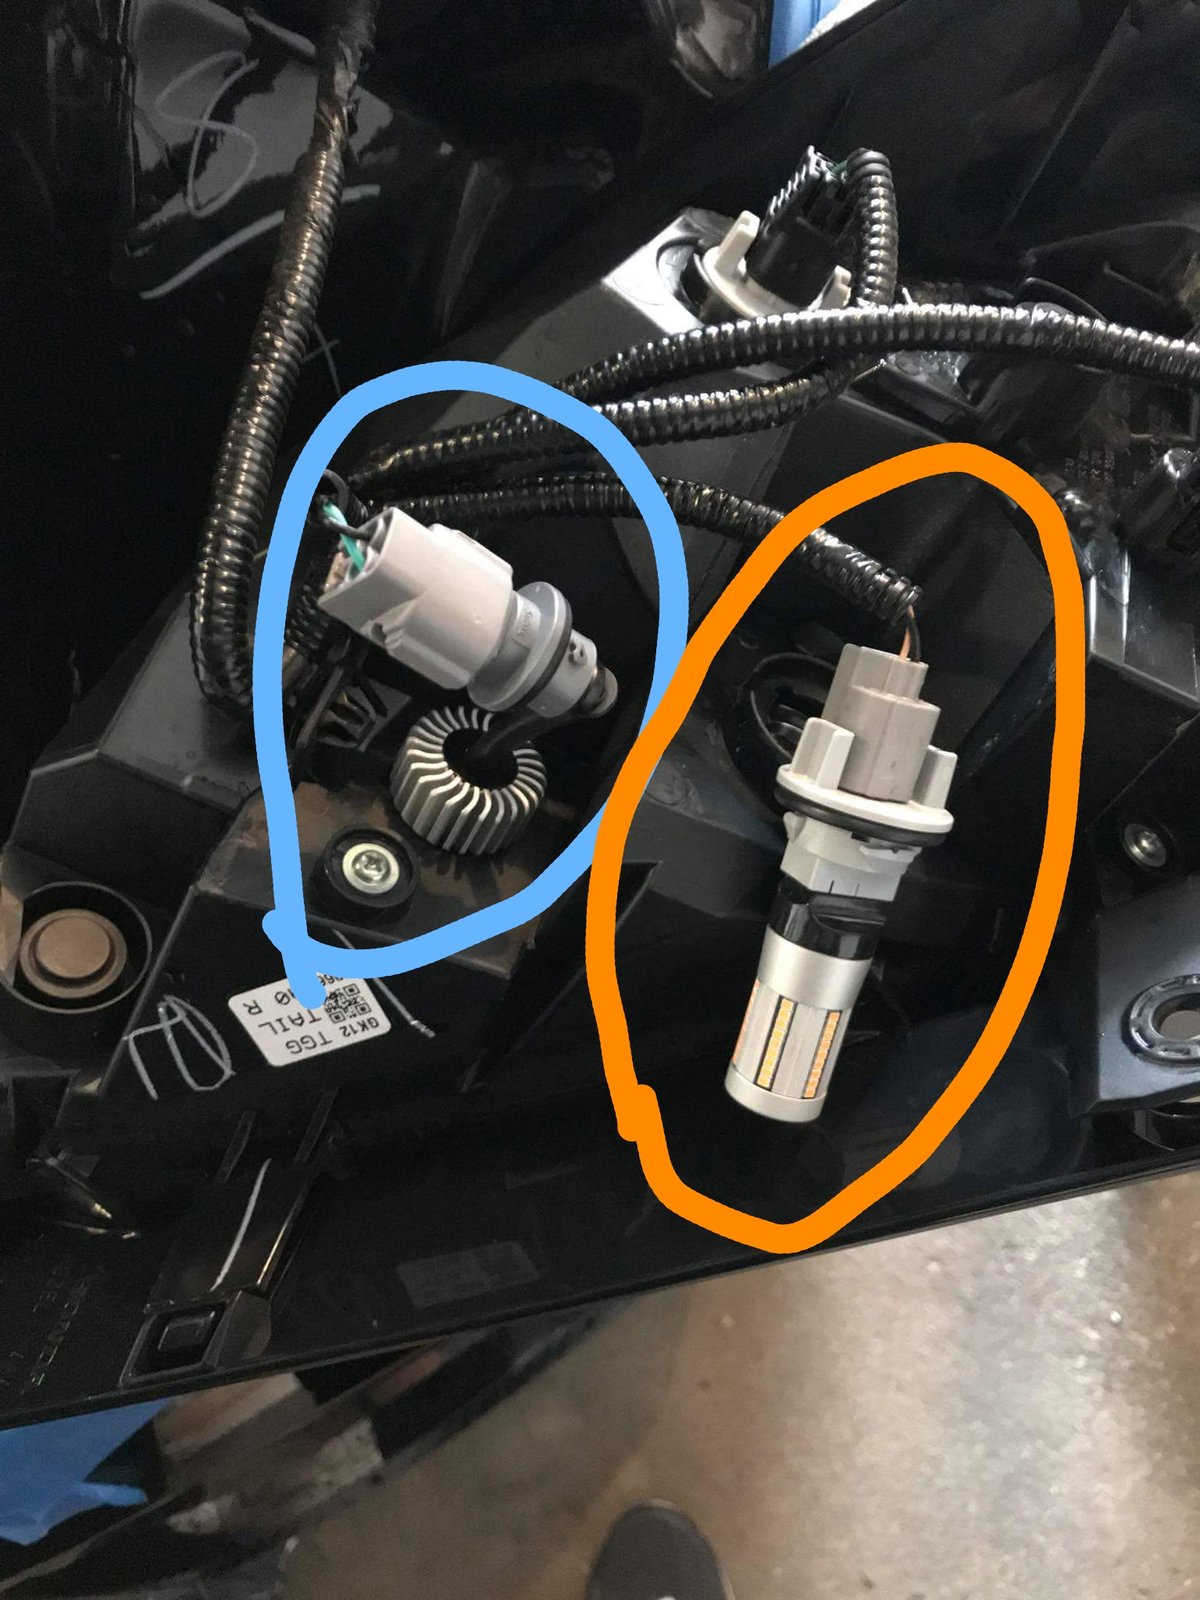
There is a red and black wire coming from the camera side of the wiring. These are the power cables that the reverse camera needs to turn on. It needs a 12V source, so routing it into the reverse light wiring was the best choice. This required finding the positive wiring of the reverse light (the TEAL wiring circled in blue). Stole this image off a fellow CivicX poster since I was too dumb to take a picture of it:
Reverse light positive teal wiring, circled in blue.
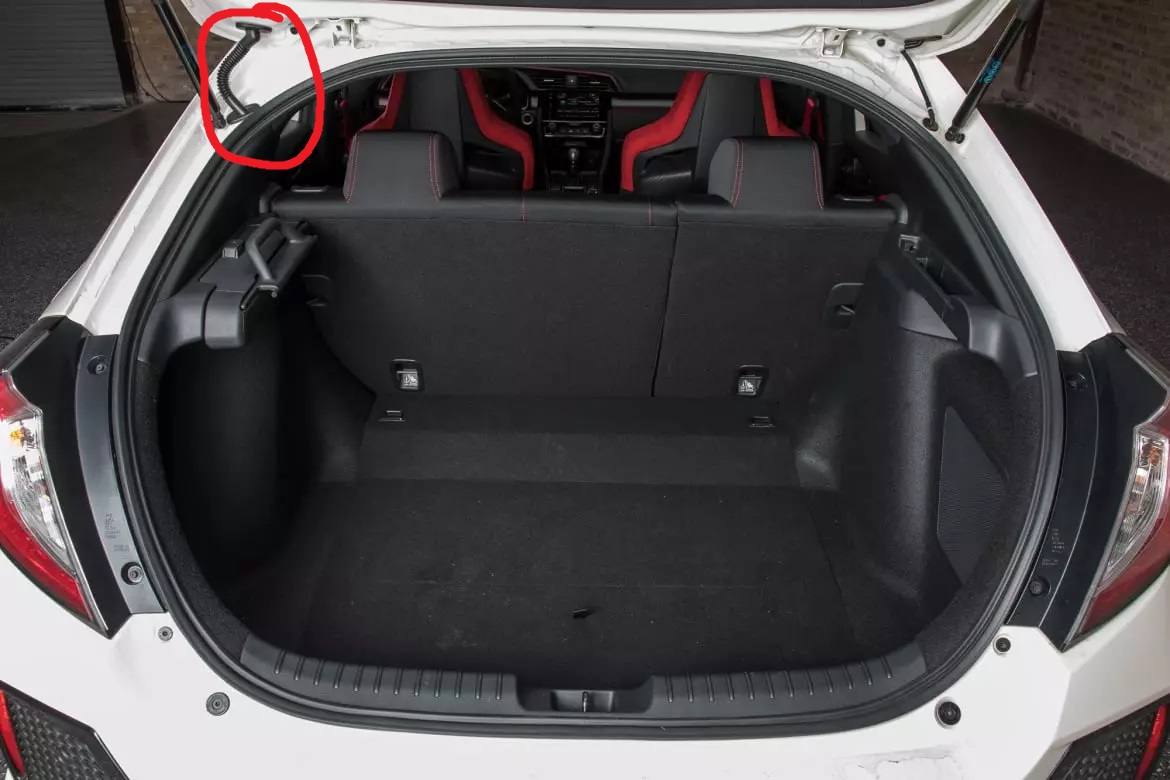
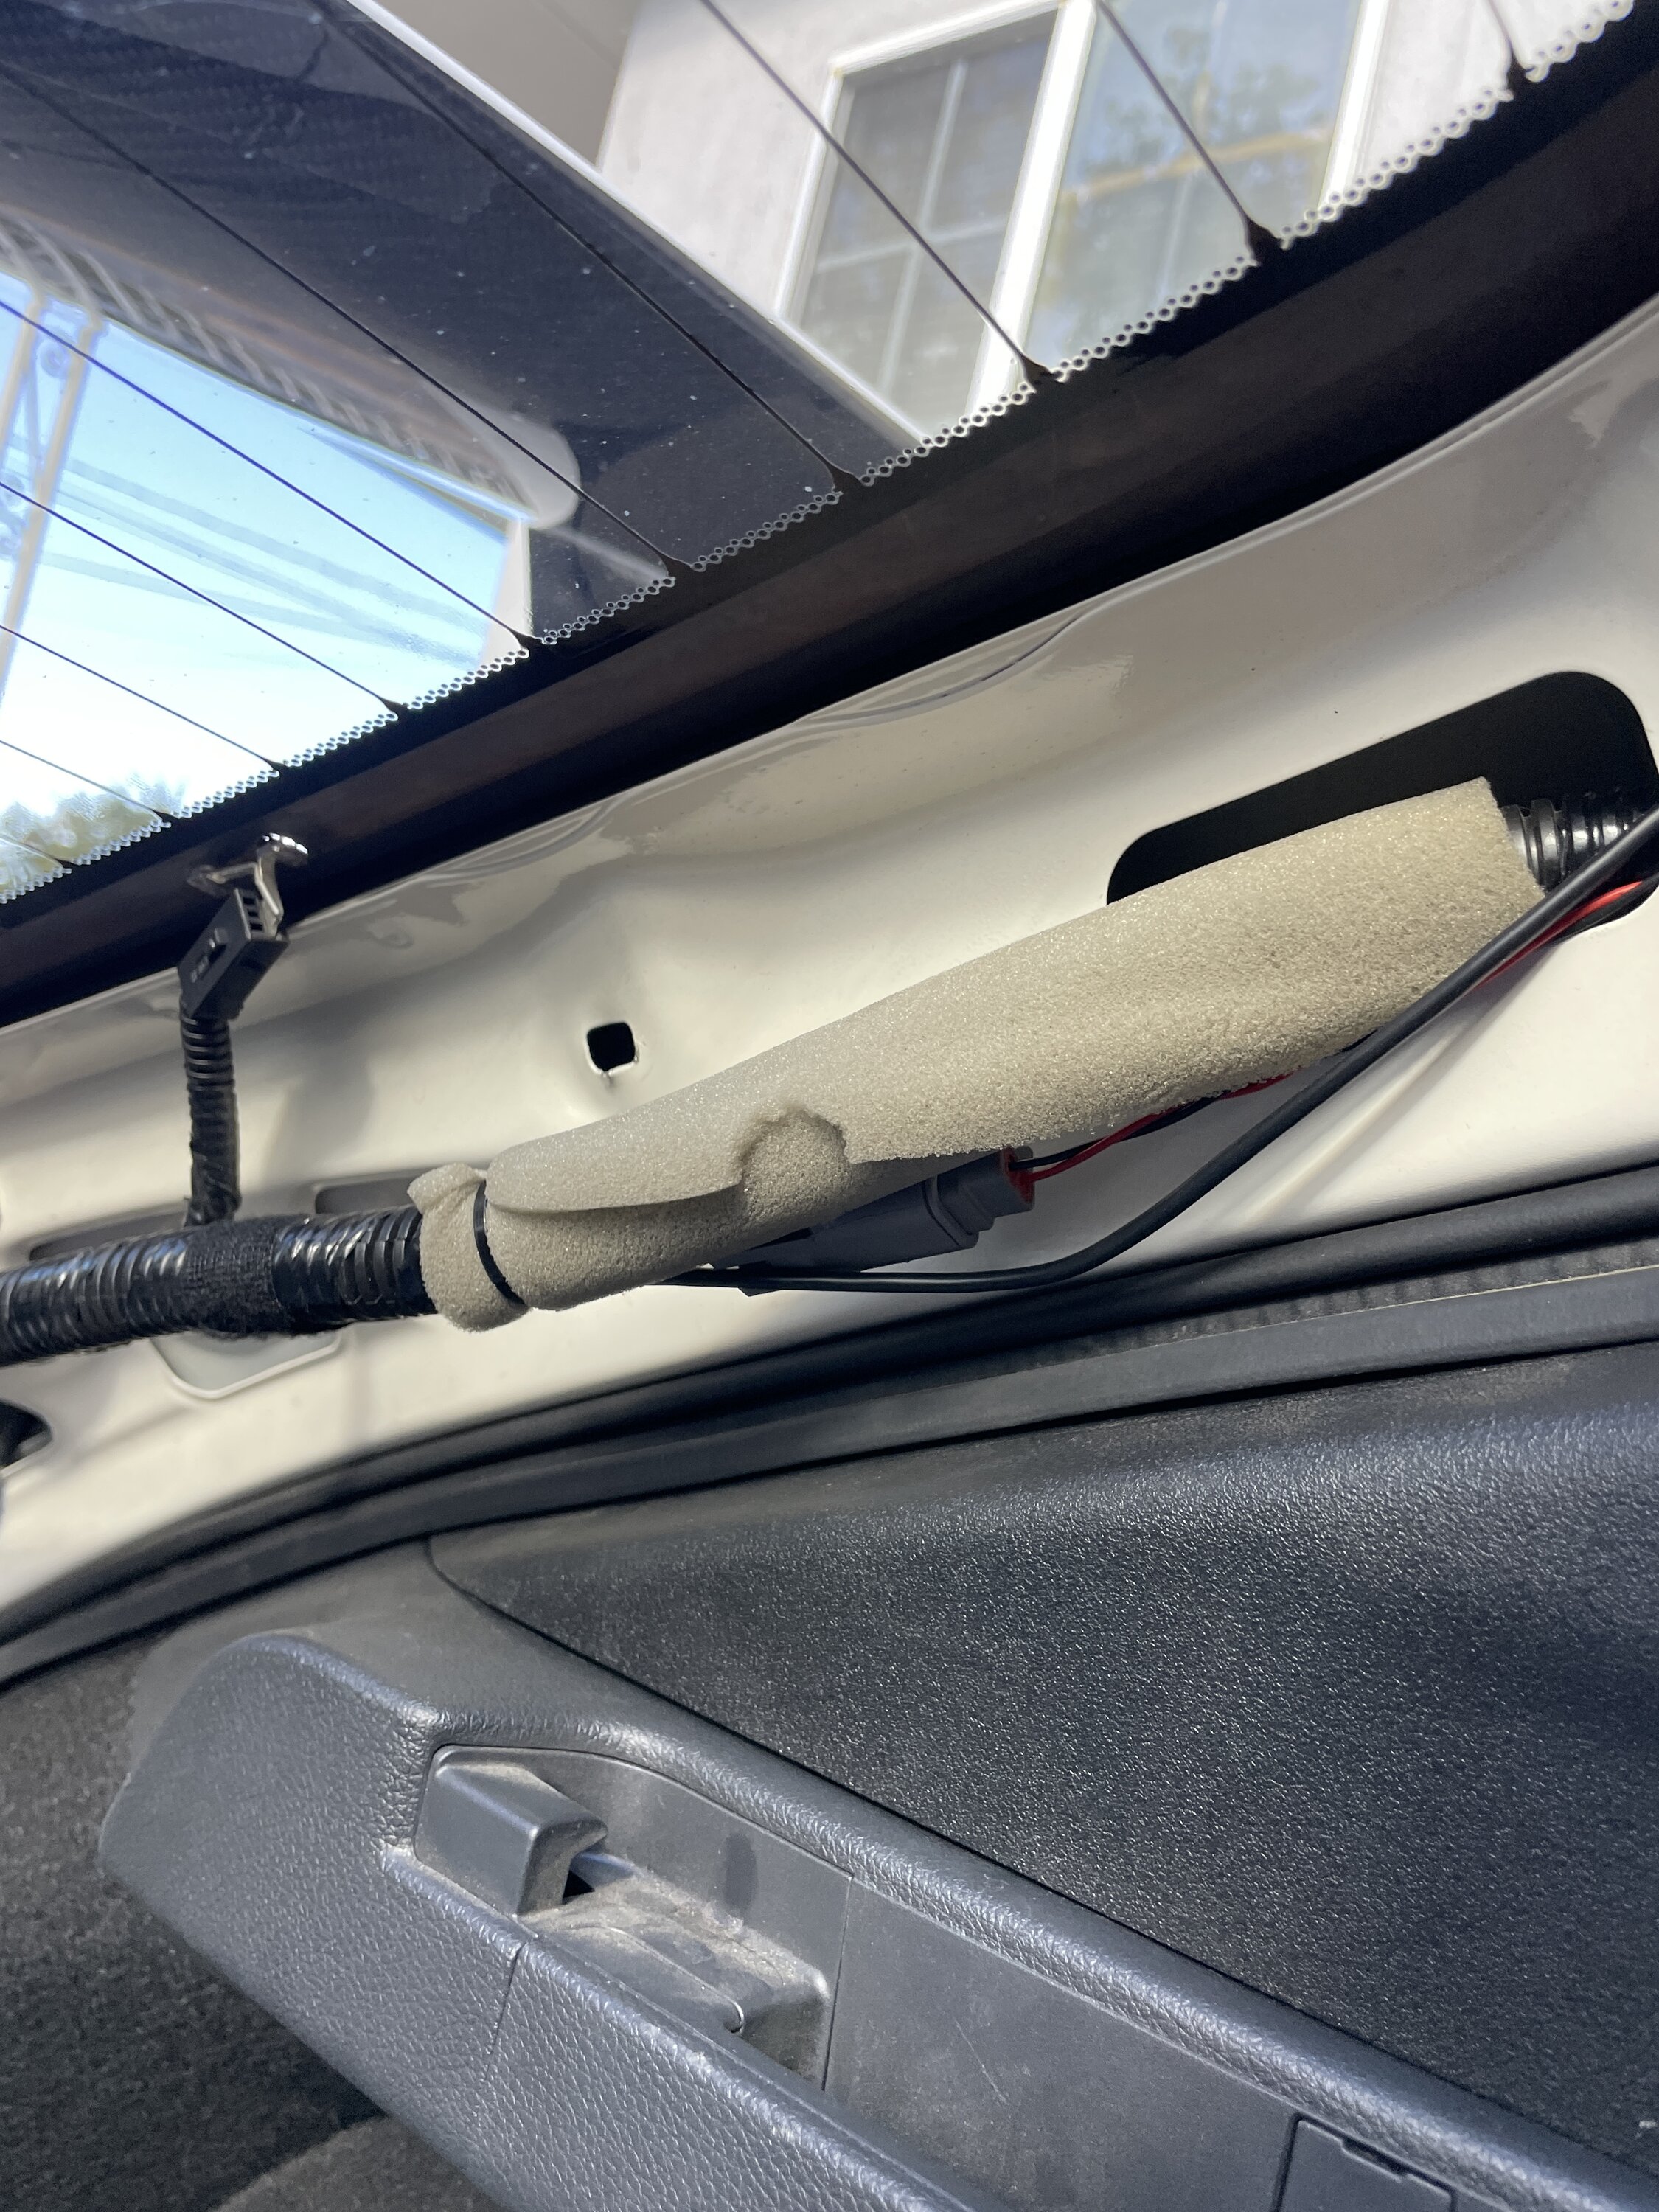
Now, the tedious part. I chose to tuck the wiring through the driver's side of my civic. This meant that I had to route the long cable through the trunk, through the rubber boot, and into the rear driver's side paneling.
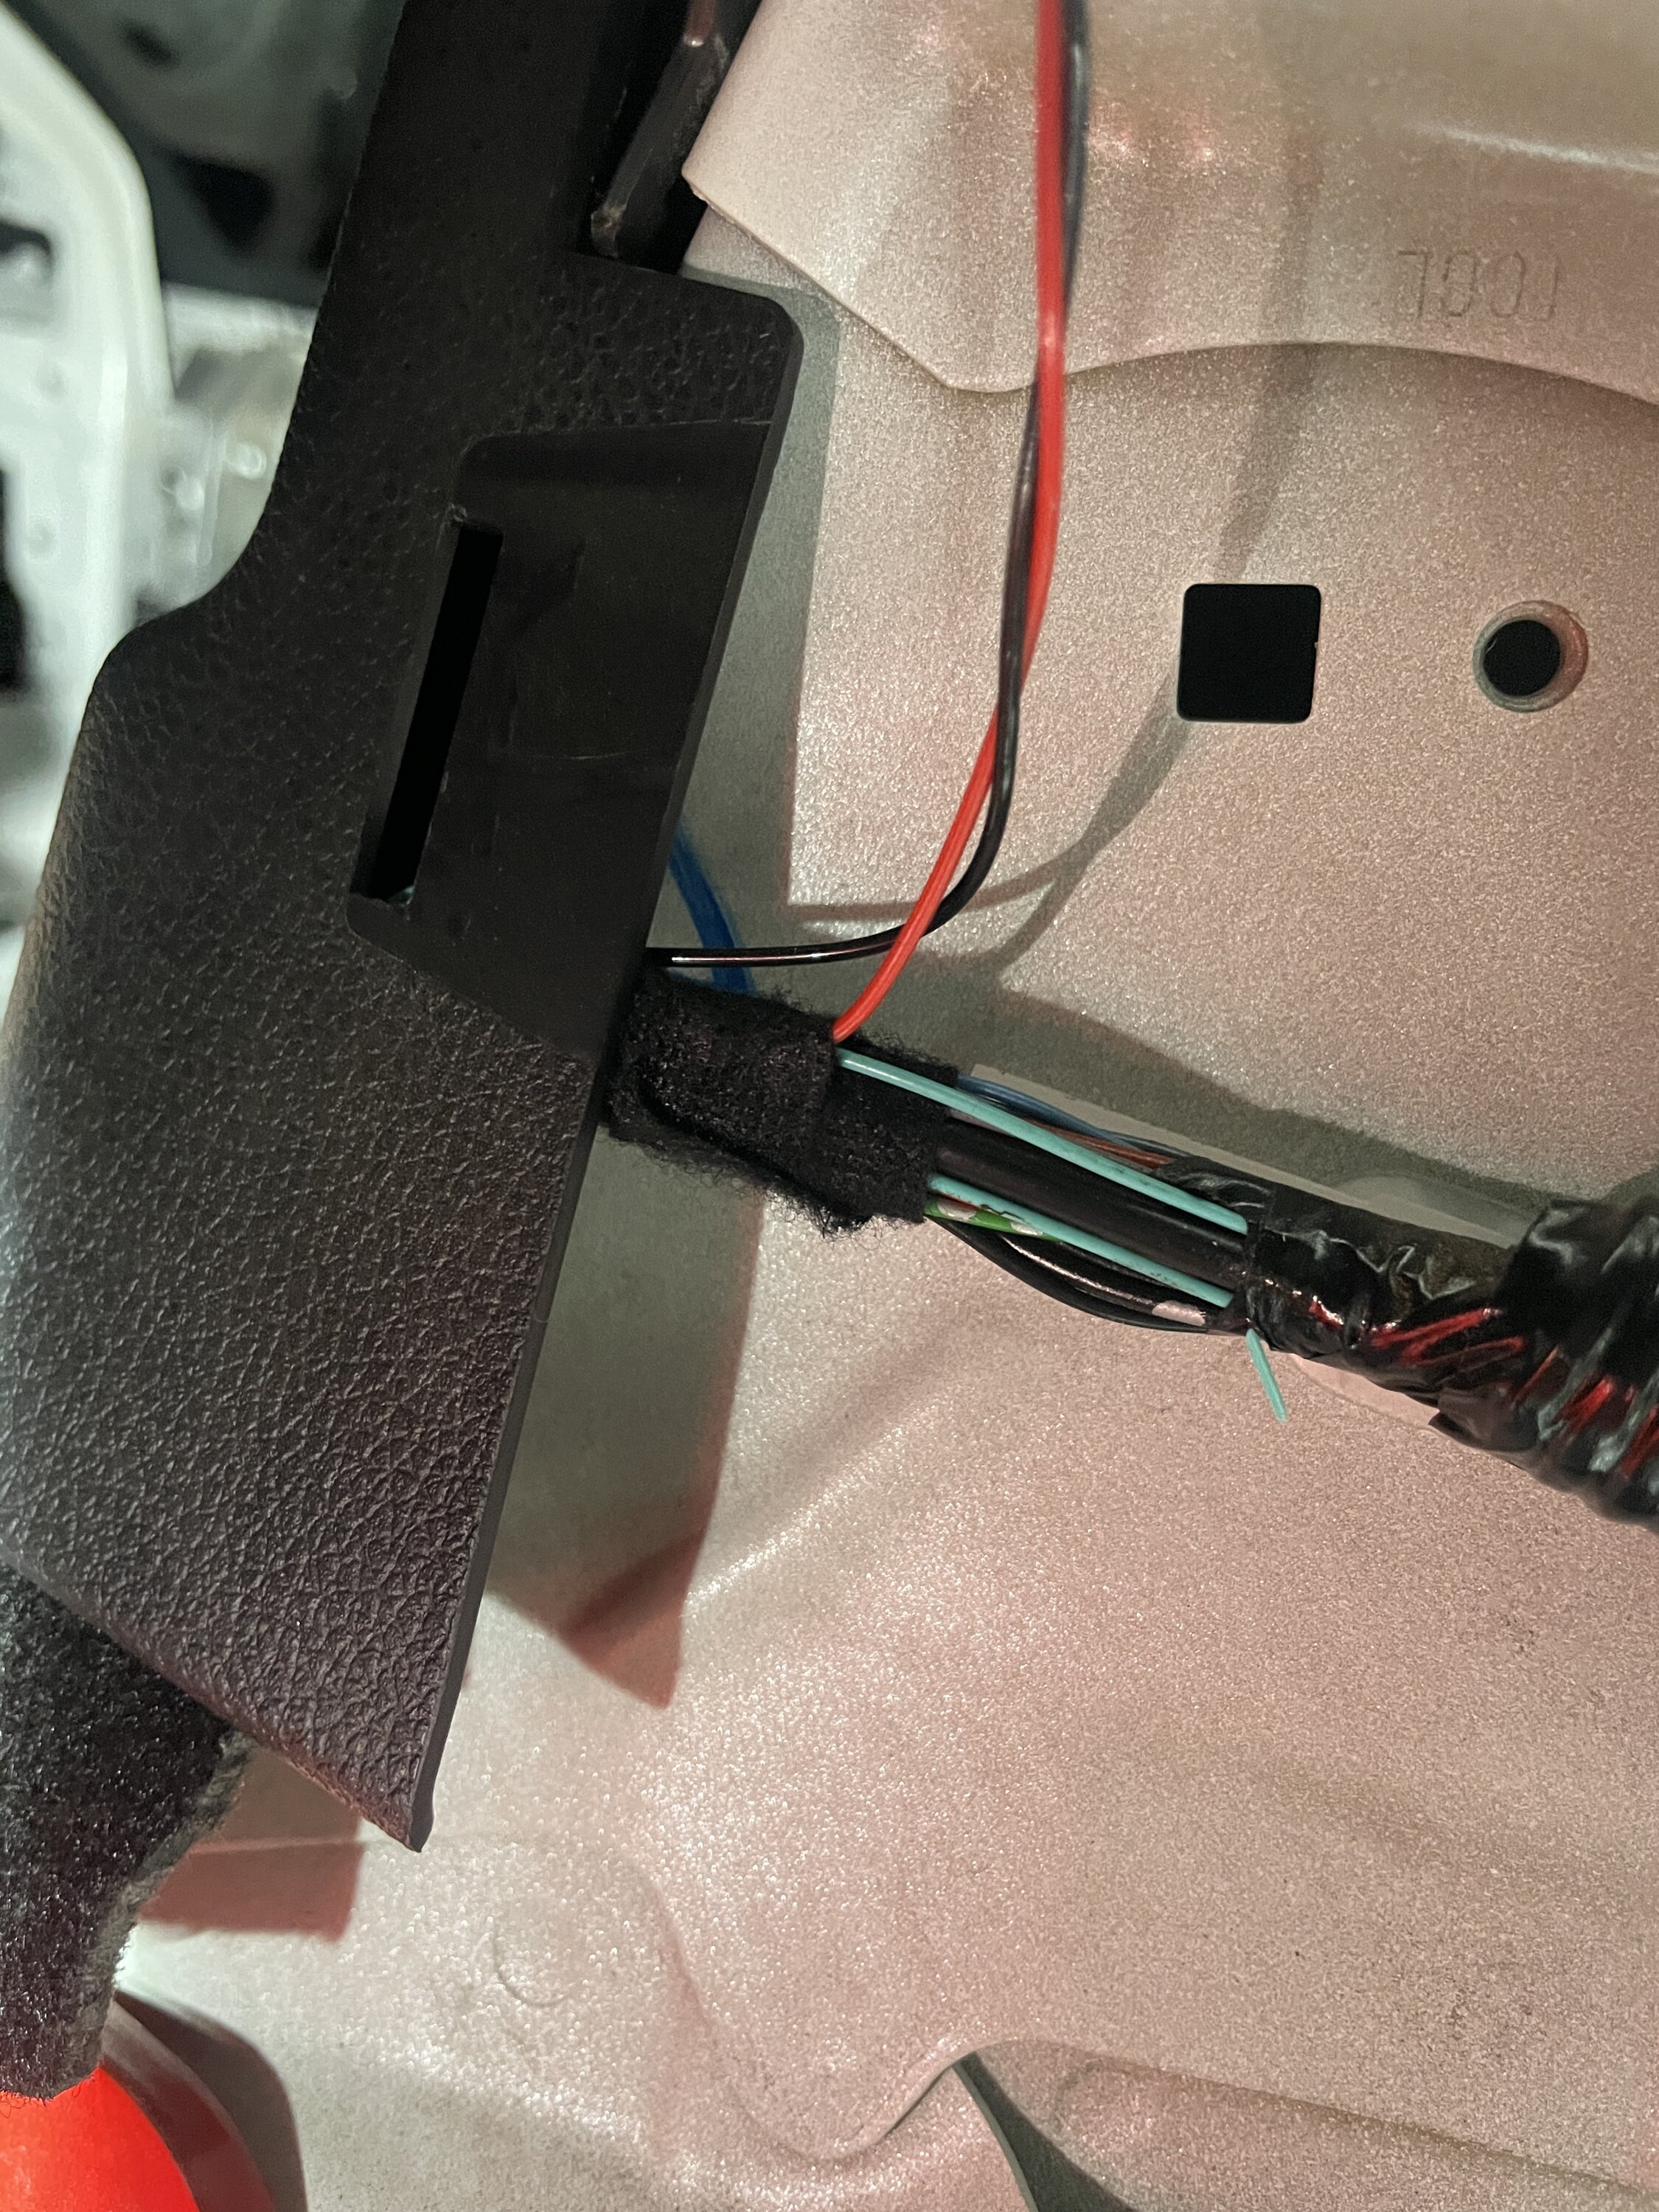
We extended the red and black wiring so it could reach the teal cable behind the rear driver's side paneling for power.
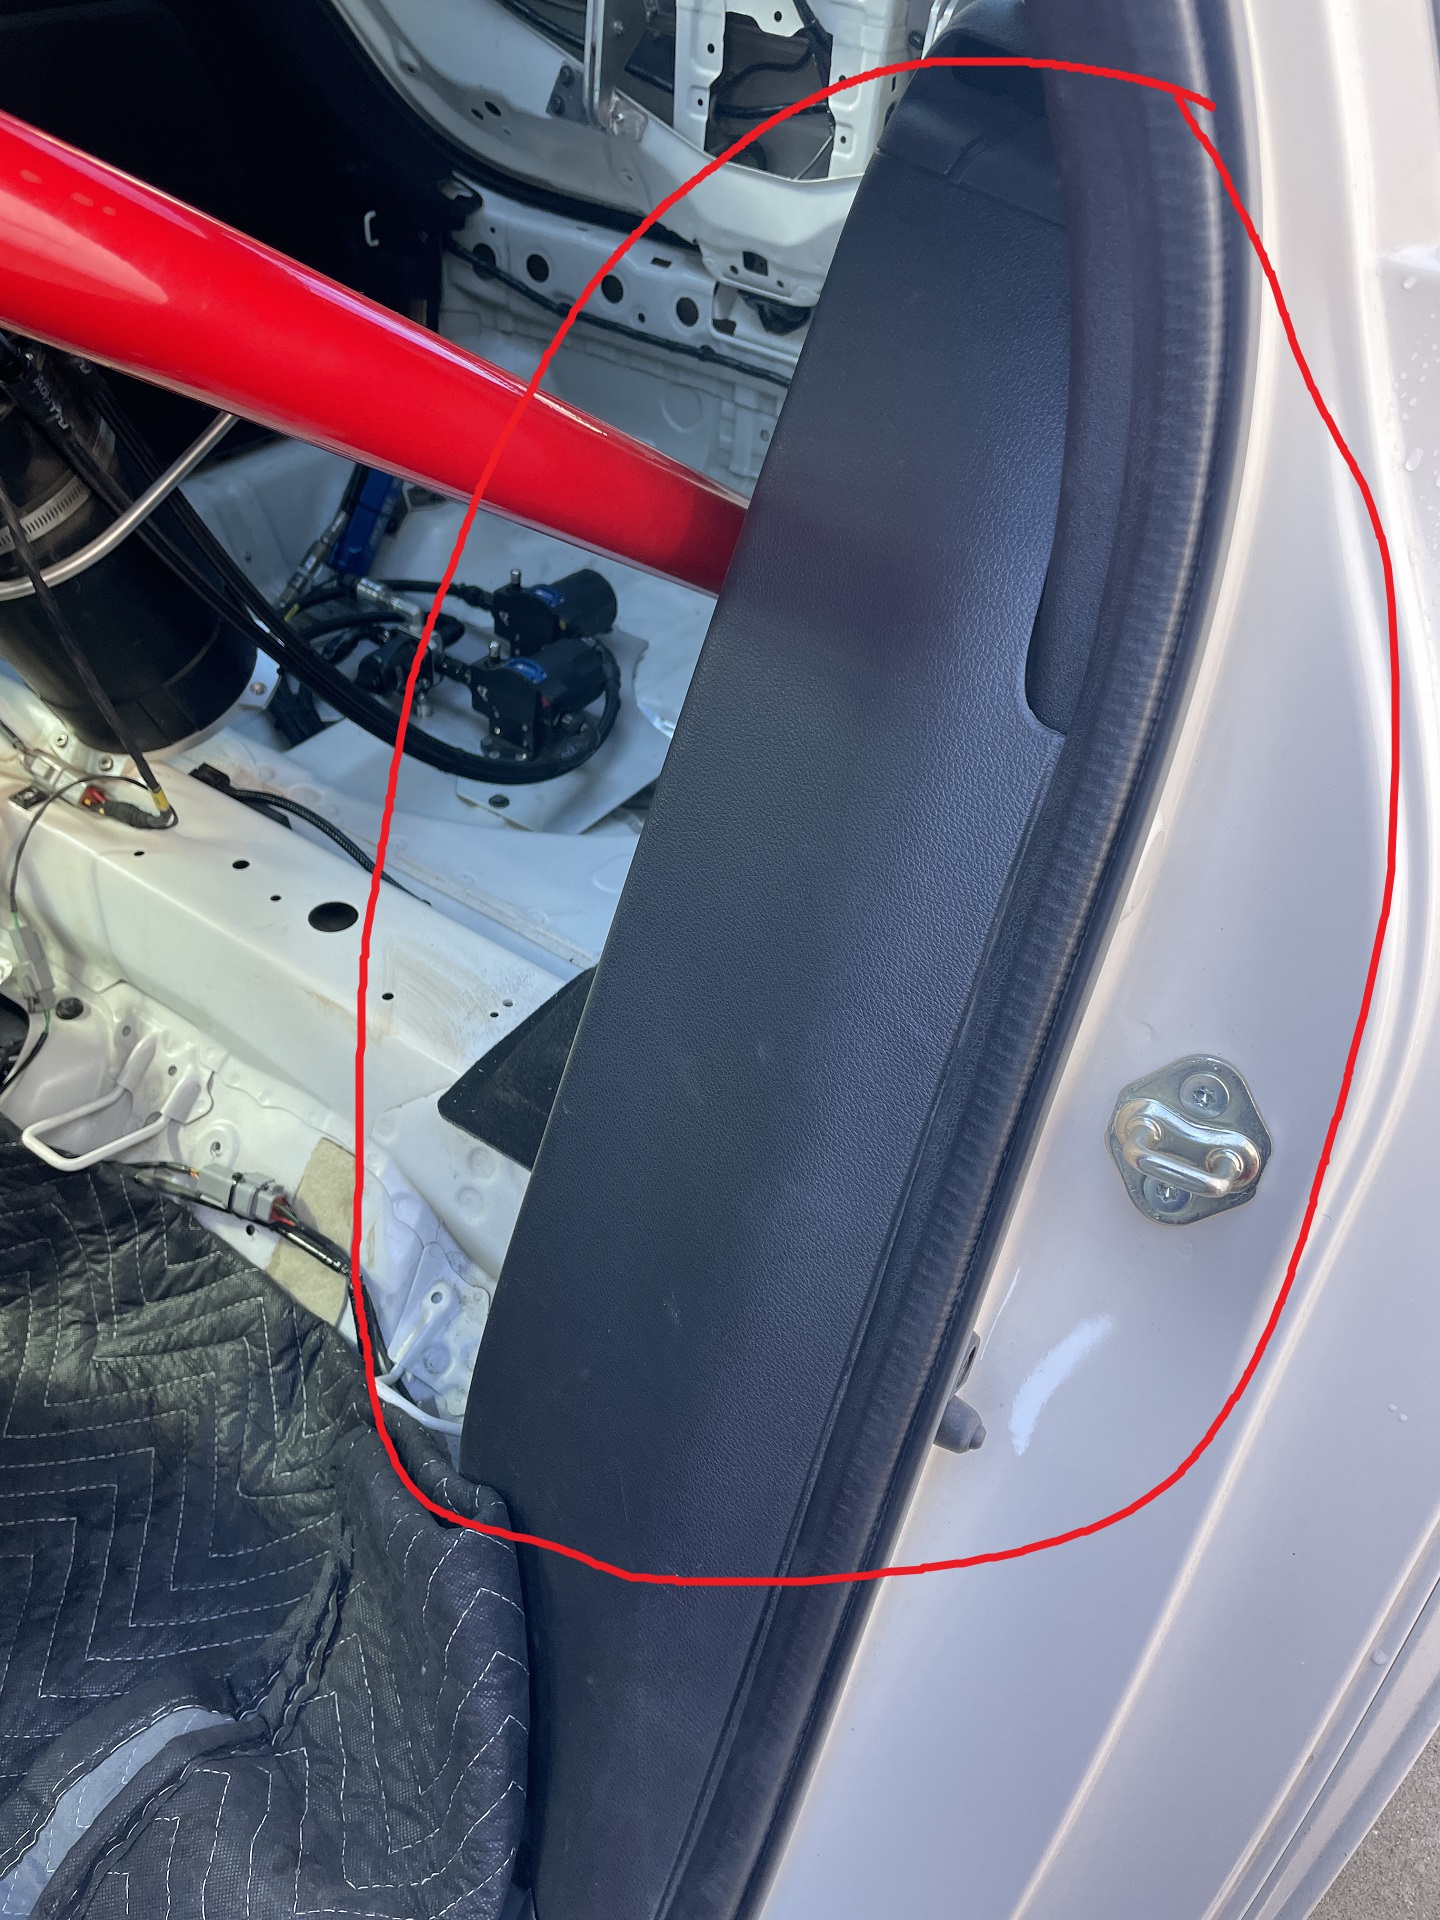
The cleanest way to hide the wiring was to have it connected to the teal cable behind this panel on the rear driver's side:
Here is the where I connected the positive wiring to the TEAL wire (reverse light wire):
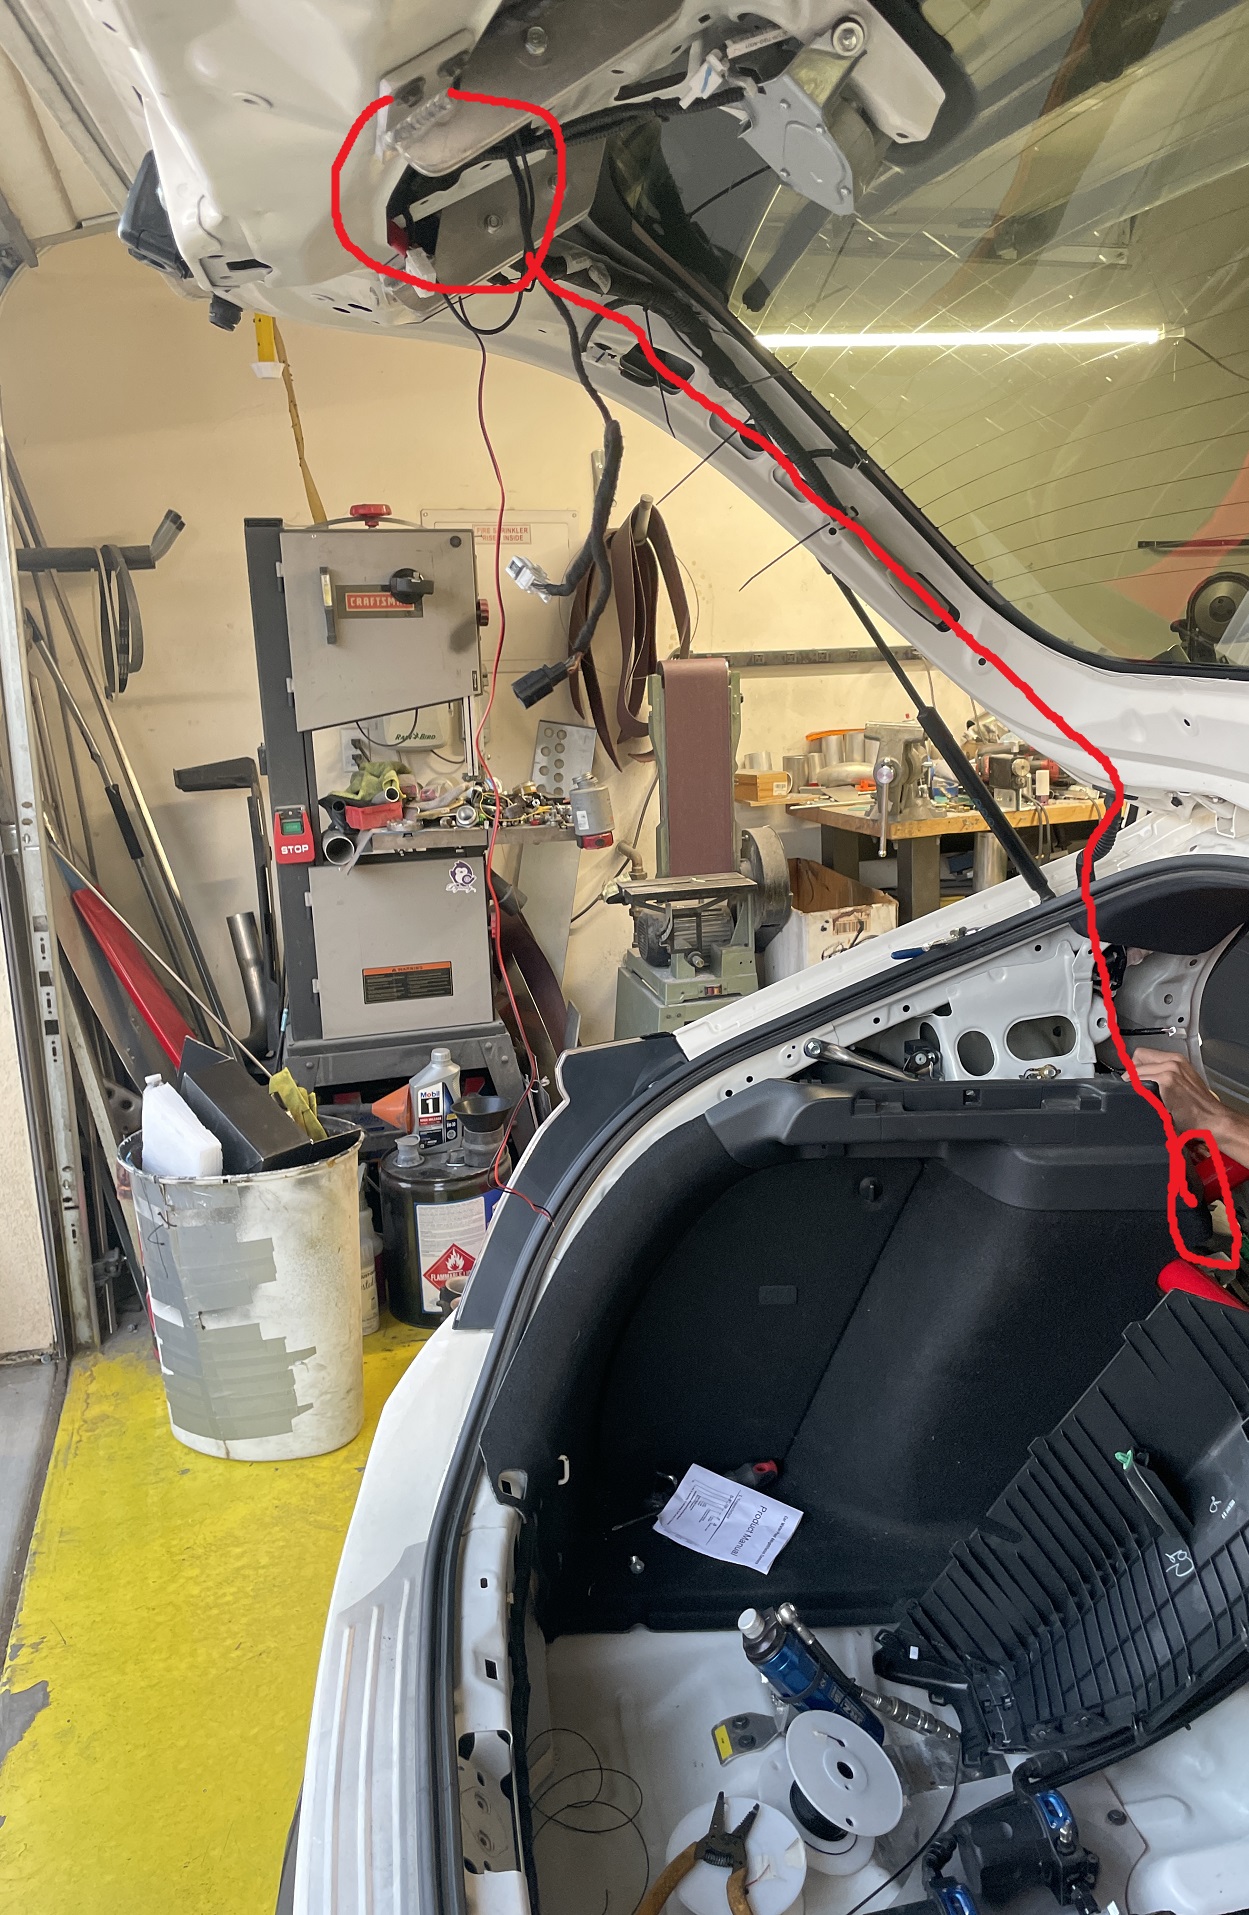
Here is a picture of the wiring route in red:
After doing all that, we routed the cable to go to the headunit by tucking it along the floor all the way on the driver's side > behind the steering > up into the headunit area.
Now you're ready to plug everything into the headunit!
Step 6: Plugging everything into the headunit/climate control.
If you want your OEM USB ports to work, you should use the two cables provided from Joying:
USB adapter cables from Joying.
and connect them to these two factory fittings:
Now, we can begin to plug everything into the headunit. The back should end up looking something like this:
It looks like a mess, because it is. You can try to clean it up a bit, but at this point, everything should be working! Make sure to turn it on and test everything out before mounting the headunit back in. To connect the climate control, one of the cables will NOT be connected:
Back of climate control panel.
Here's how it looks when completed:
|
|
|
It doesn't block out the AC really:
There's a thread where other users spoke about firmware issues/volume issues, etc that you can find here - https://www.civicx.com/forum/threads/infotainment-failure.59729/page-35#post-1156711
I just installed it so I have no issues experienced... yet. Hope this install guide helped! Just DM or leave comments if you have any questions.
Before anyone asks, yes, my dual climate works. As far as TPMS calibration, oil reset, I do see the settings on the headunit. Manufacturer claims that it works. However, I don't have a stock ECU so none of that applies to me and I'm unable to test it.
Last edited: