AlphaDigital
Senior Member
- First Name
- Alex
- Joined
- May 21, 2020
- Threads
- 7
- Messages
- 2,525
- Reaction score
- 3,681
- Location
- MW
- Vehicle(s)
- civic
- Thread starter
- #1
With my next track day coming up, its looking like temps are going to be well into the 80s if not 90s, so I made the executive decision to install the secondary/auxiliary radiator so that I can enjoy the track day without needing to worry about coolant temps as much.
Many of you are aware of the @.grimace and @siwelnosaj style secondary radiator setup that utilizes a universal air to water radiator that is tapped into the cooling system. This allows the hotter coolant to circulate through the secondary radiator before going into the heater core and back into the motor. This setup has proved to be beneficial for all of those utilizing it including Gridlife competitors @DPL8 and @AR-Delta
I tried my best to take photos and document my process when putting this together. I started on Friday afternoon and finished Sunday morning. I likely couldve been done Saturday, but I had plans that didnt jive with my car work. This install wasnt too difficult, but it definitely required a good bit of work rigging up how to mount it. A second set of hands definitely wouldve been helpful.
Heres what I used, and some links
Materials
Things that I wish I had, but needed to borrow
So Friday I started off by taking my bumper off and then getting all of my stuff together
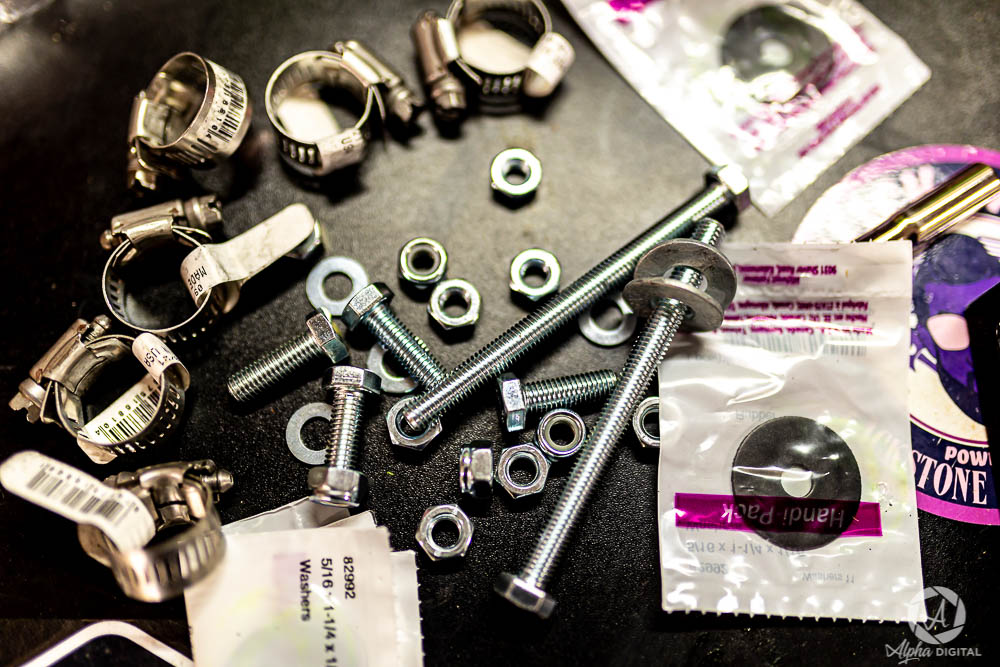
Here youll see various bolts, washers, nuts, hose clamps, and some rubber washers so I could help control any sort of vibration the added cooler would make. Note: I dont really know if this makes a difference or would help. But I bought them anyways. The shorter M8 bolts were for mounting the L bracket to the brace and then to the radiator. The longer ones were meant to be used for the crash bar portion, The hose clamps are hopefully self explanatory.
With the bumper off and mocking up the install, it was clear that there were going to be things that needed to be trimmed and relocated.
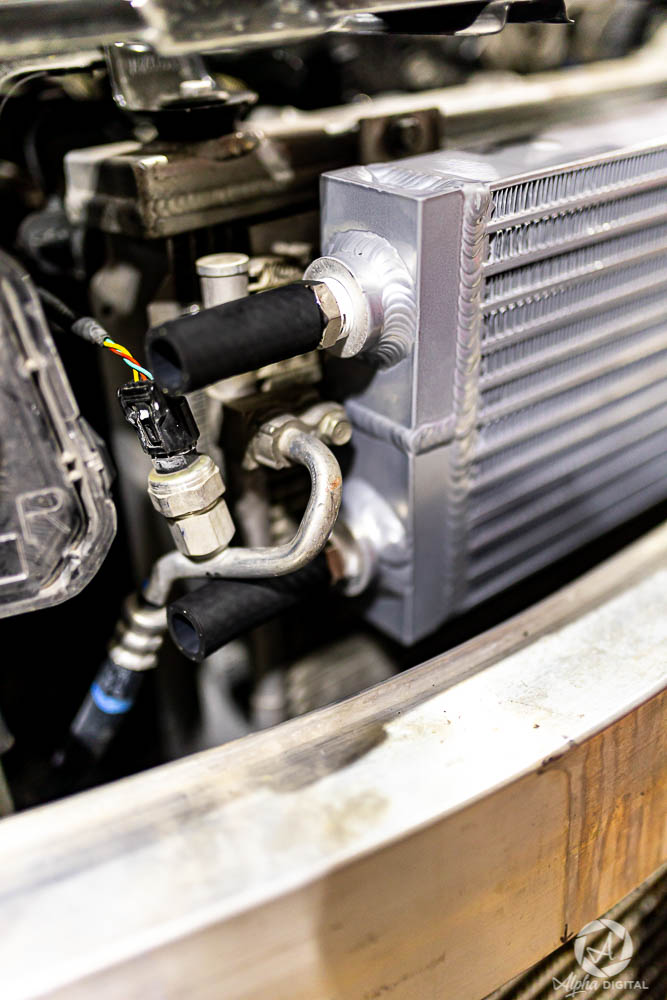
The first thing that needed to be moved was the temp sensor as it was right in the way of where the radiator will go. I just tucked it under the left headlight, but I may move it to a better spot where it can gauge temps better but to be honest im not in a hurry. Right now it reads probably 10 degrees higher than ambient since its in a spot that doesnt get much air flow.
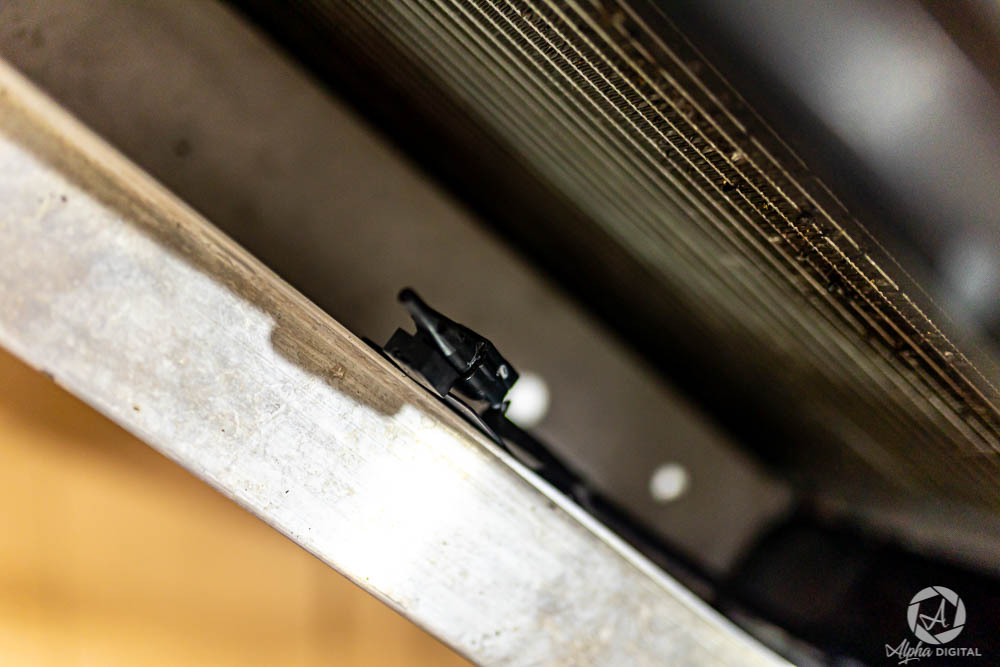
The next thing that needed to be done was trimming this portion. Ultimately, I chopped most of it off but chose to retain the piece below so I could keep airflow going to my intake. Depending on how you choose to mount your radiator this may not be necessary**

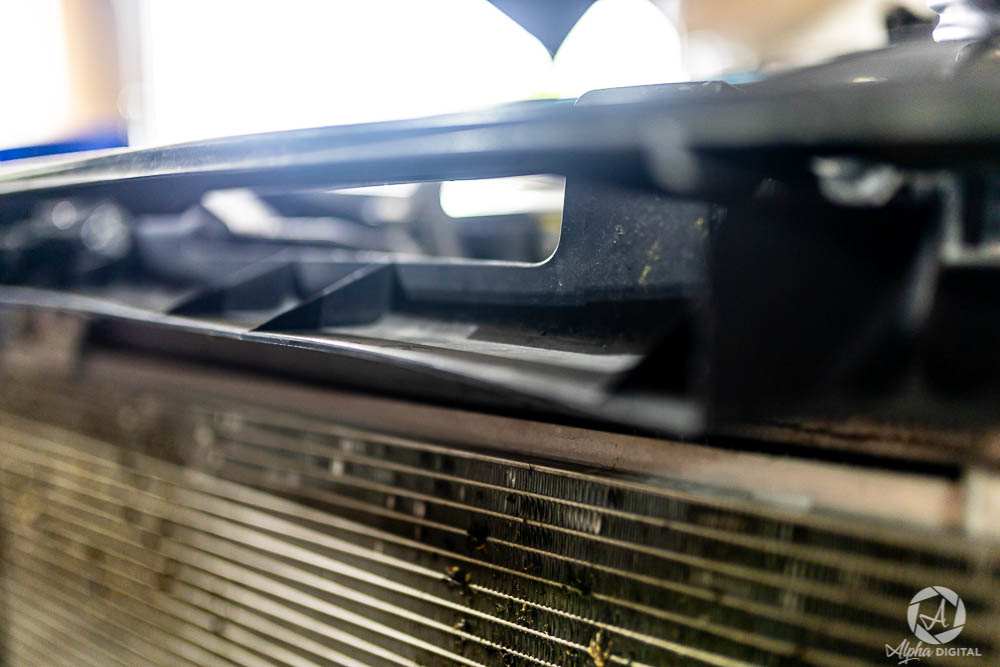
I made sure to retain the piece below that goes with this plastic piece, so that when it came time to put my push clips back in, I could secure it in place and it wouldnt be flopping around everywhere.
When the black shroud goes back on, there will be a spot where you line this up and insert the push clip to secure the plastic piece in place.
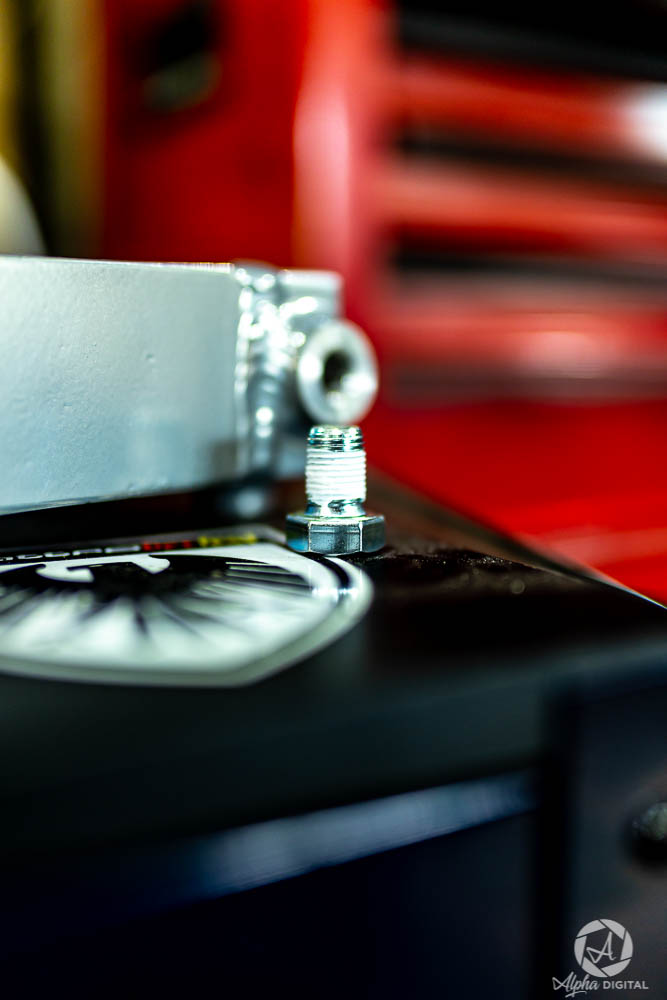
Before I could get the radiator mocked up, I had to run to the hardware store to grab all my nuts and bolts, along with a bolt for the radiators drain. Per the website the size of this is a 1/8-27 NPT plug that was supposed to be included. Mine wasnt however, so I just walked in with the radiator and got one that fit. I teflon taped it and installed it.
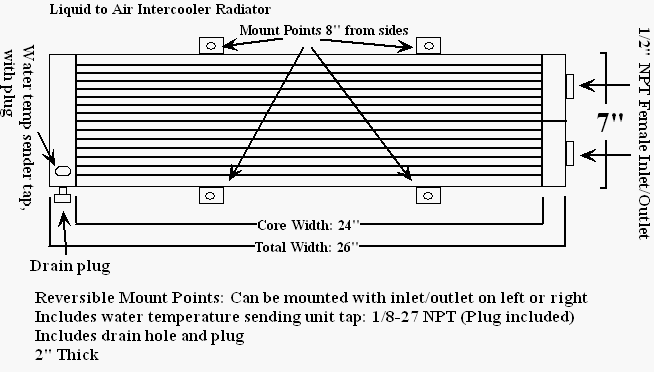
Diagram of the radiator
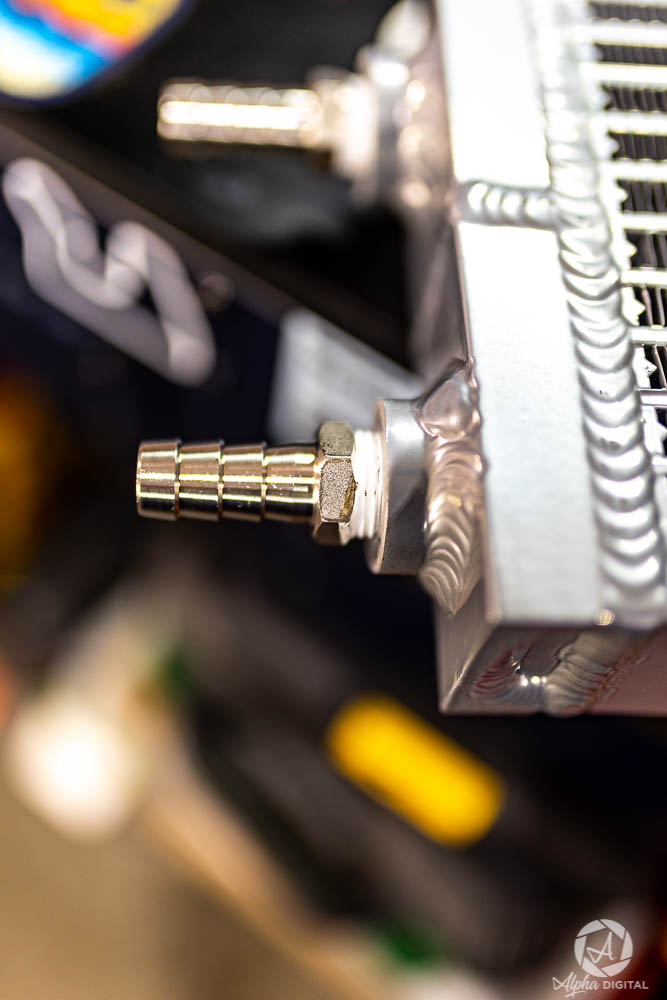
I did the same thing with the barbs and installed it on the radiator.
Now comes trying to figure out how to properly secure this thing to the car. Ideally, you want this radiator to be as close to the driver side headlight as possible so that you can give the hoses enough space to bend in towards the engine bay. This is assuming you are using a straight 1/2 npt to 5/8ths barb fitting. If you use a 90 degree barb/npt it may not be as crucial to get this right next to the headlight.
You can see in this photo that @Chicane_Si has his setup with 90 degree barb fittings
A shot of how his hoses are routed.
Once I decided on how I wanted to mount the rad, I got my drill and bit out and made my holes, big enough for my M8 bolts. Once the holes were made, I got my L brackets mounted and then the radiator mounted to them.
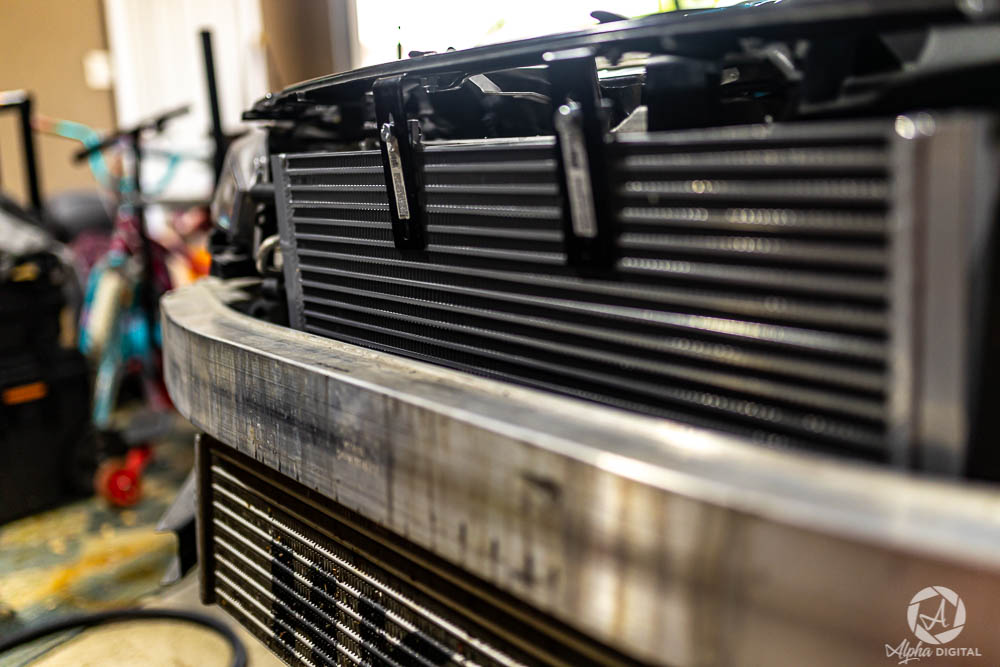
This is how it looked when test fitting. The brackets were rather large, so you can see I will end up needing to trim them.
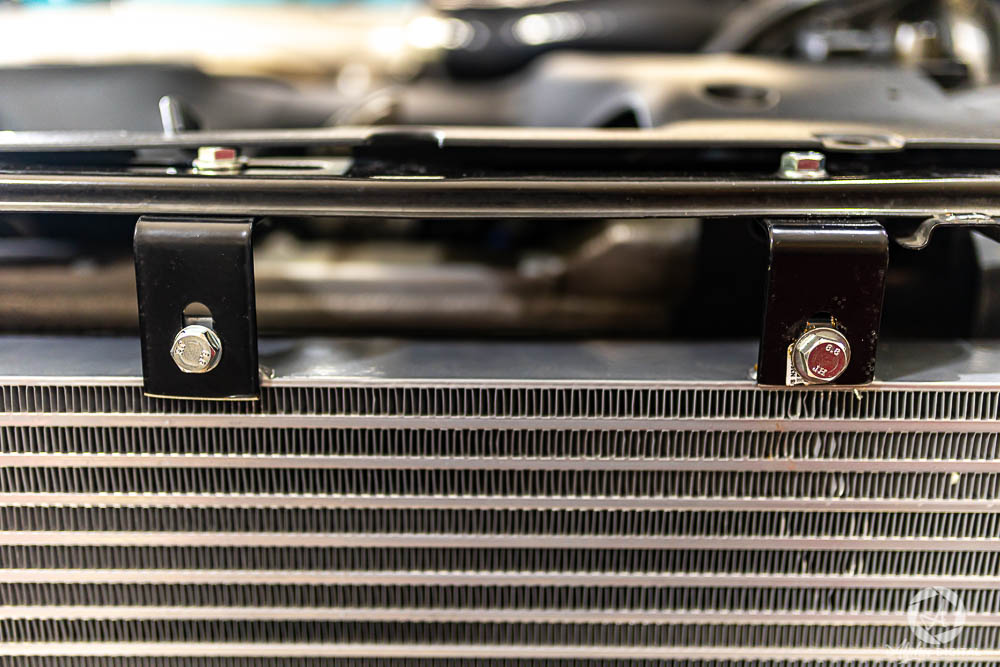
All trimmed up.
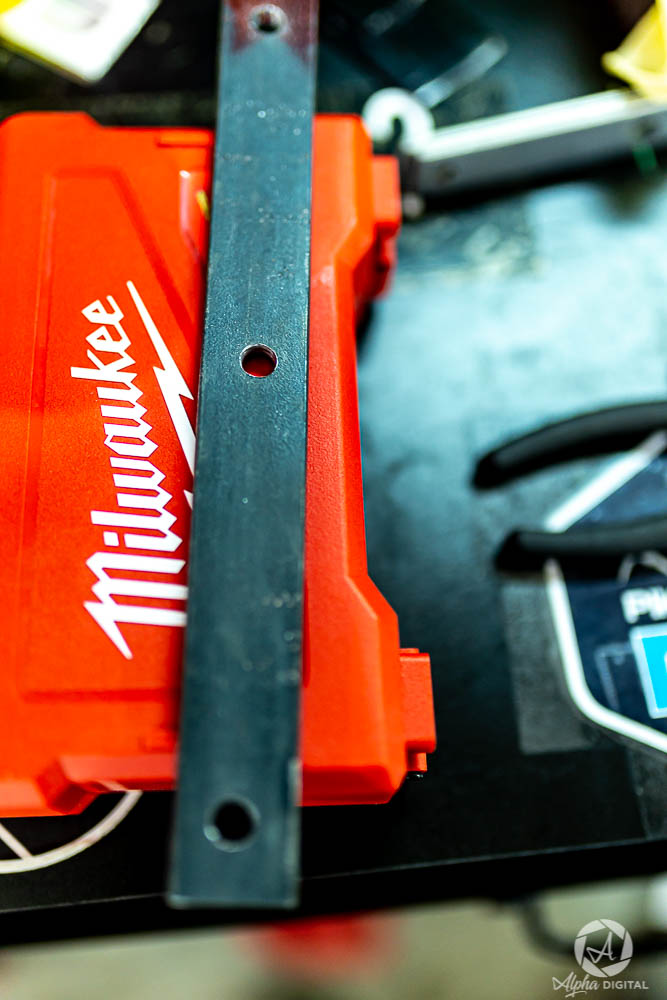
The above photo is my solution for the bottom half of the radiator. Rather than drilling two separate holes for the bottom mounts, I bought one piece of thicker metal from the hardware store and drilled three holes. The two outer holes are so I can mount this bar to the bottom of the radiator. The center hole is so I only have to drill once through the crash bar and use the one long M8 bolt (pictured at the beginning) to secure the radiator to the crash bar. This piece of metal was thick so it wouldnt flex.
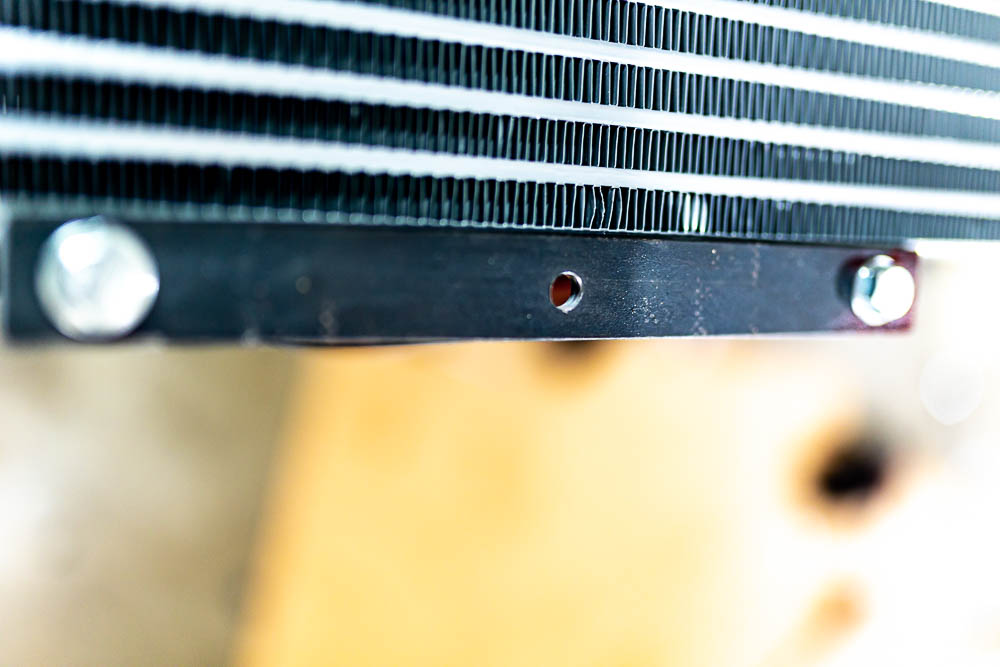
Mounted to the radiator

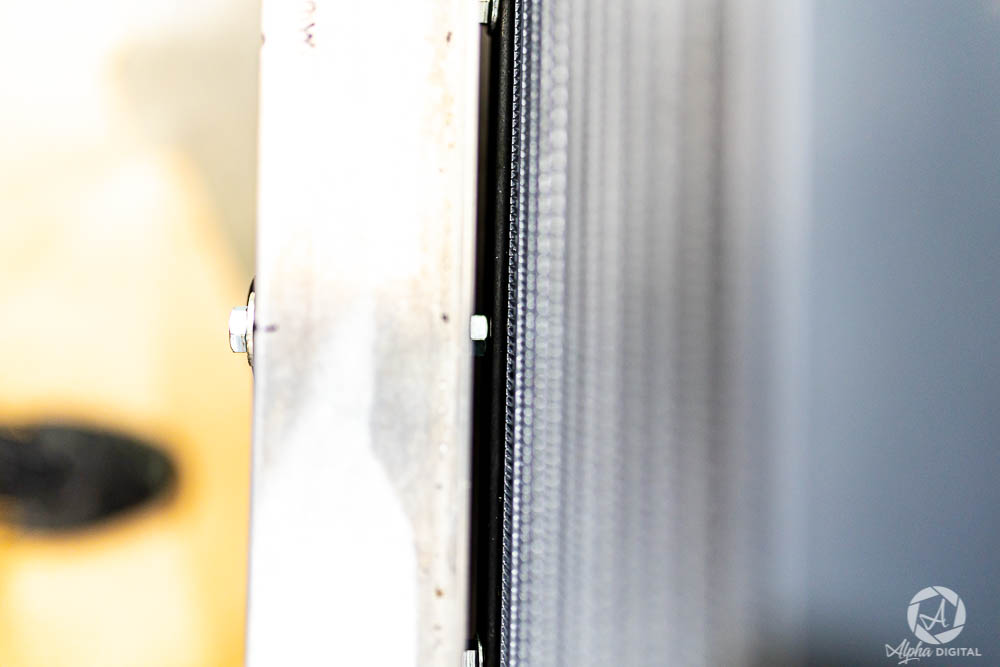
Mounted to the crash bar. This did not cause me problems when I put my bumper back on FYI.
This is a shot from the top looking down. Here is the setup. 1 long M8 bolt, put through the crash bar. 1 nut for the bolt before it hits the metal bar that is secured to the radiator. And then 1 more nut on the backside of that bar. Then, tighten both nuts down so that it secures the radiator in place. This eliminated the need for a spacer.
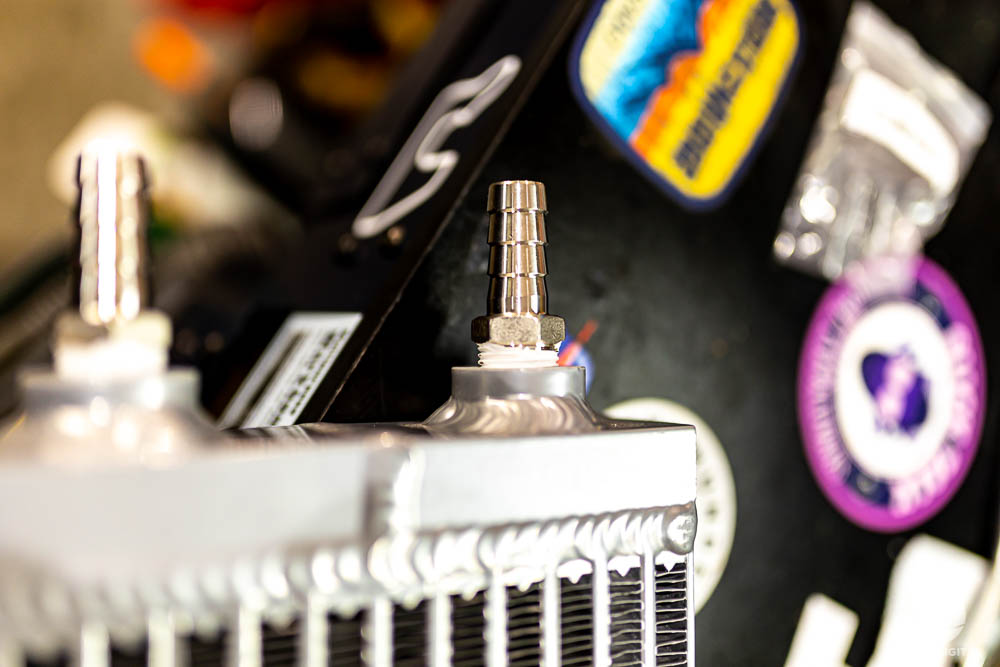
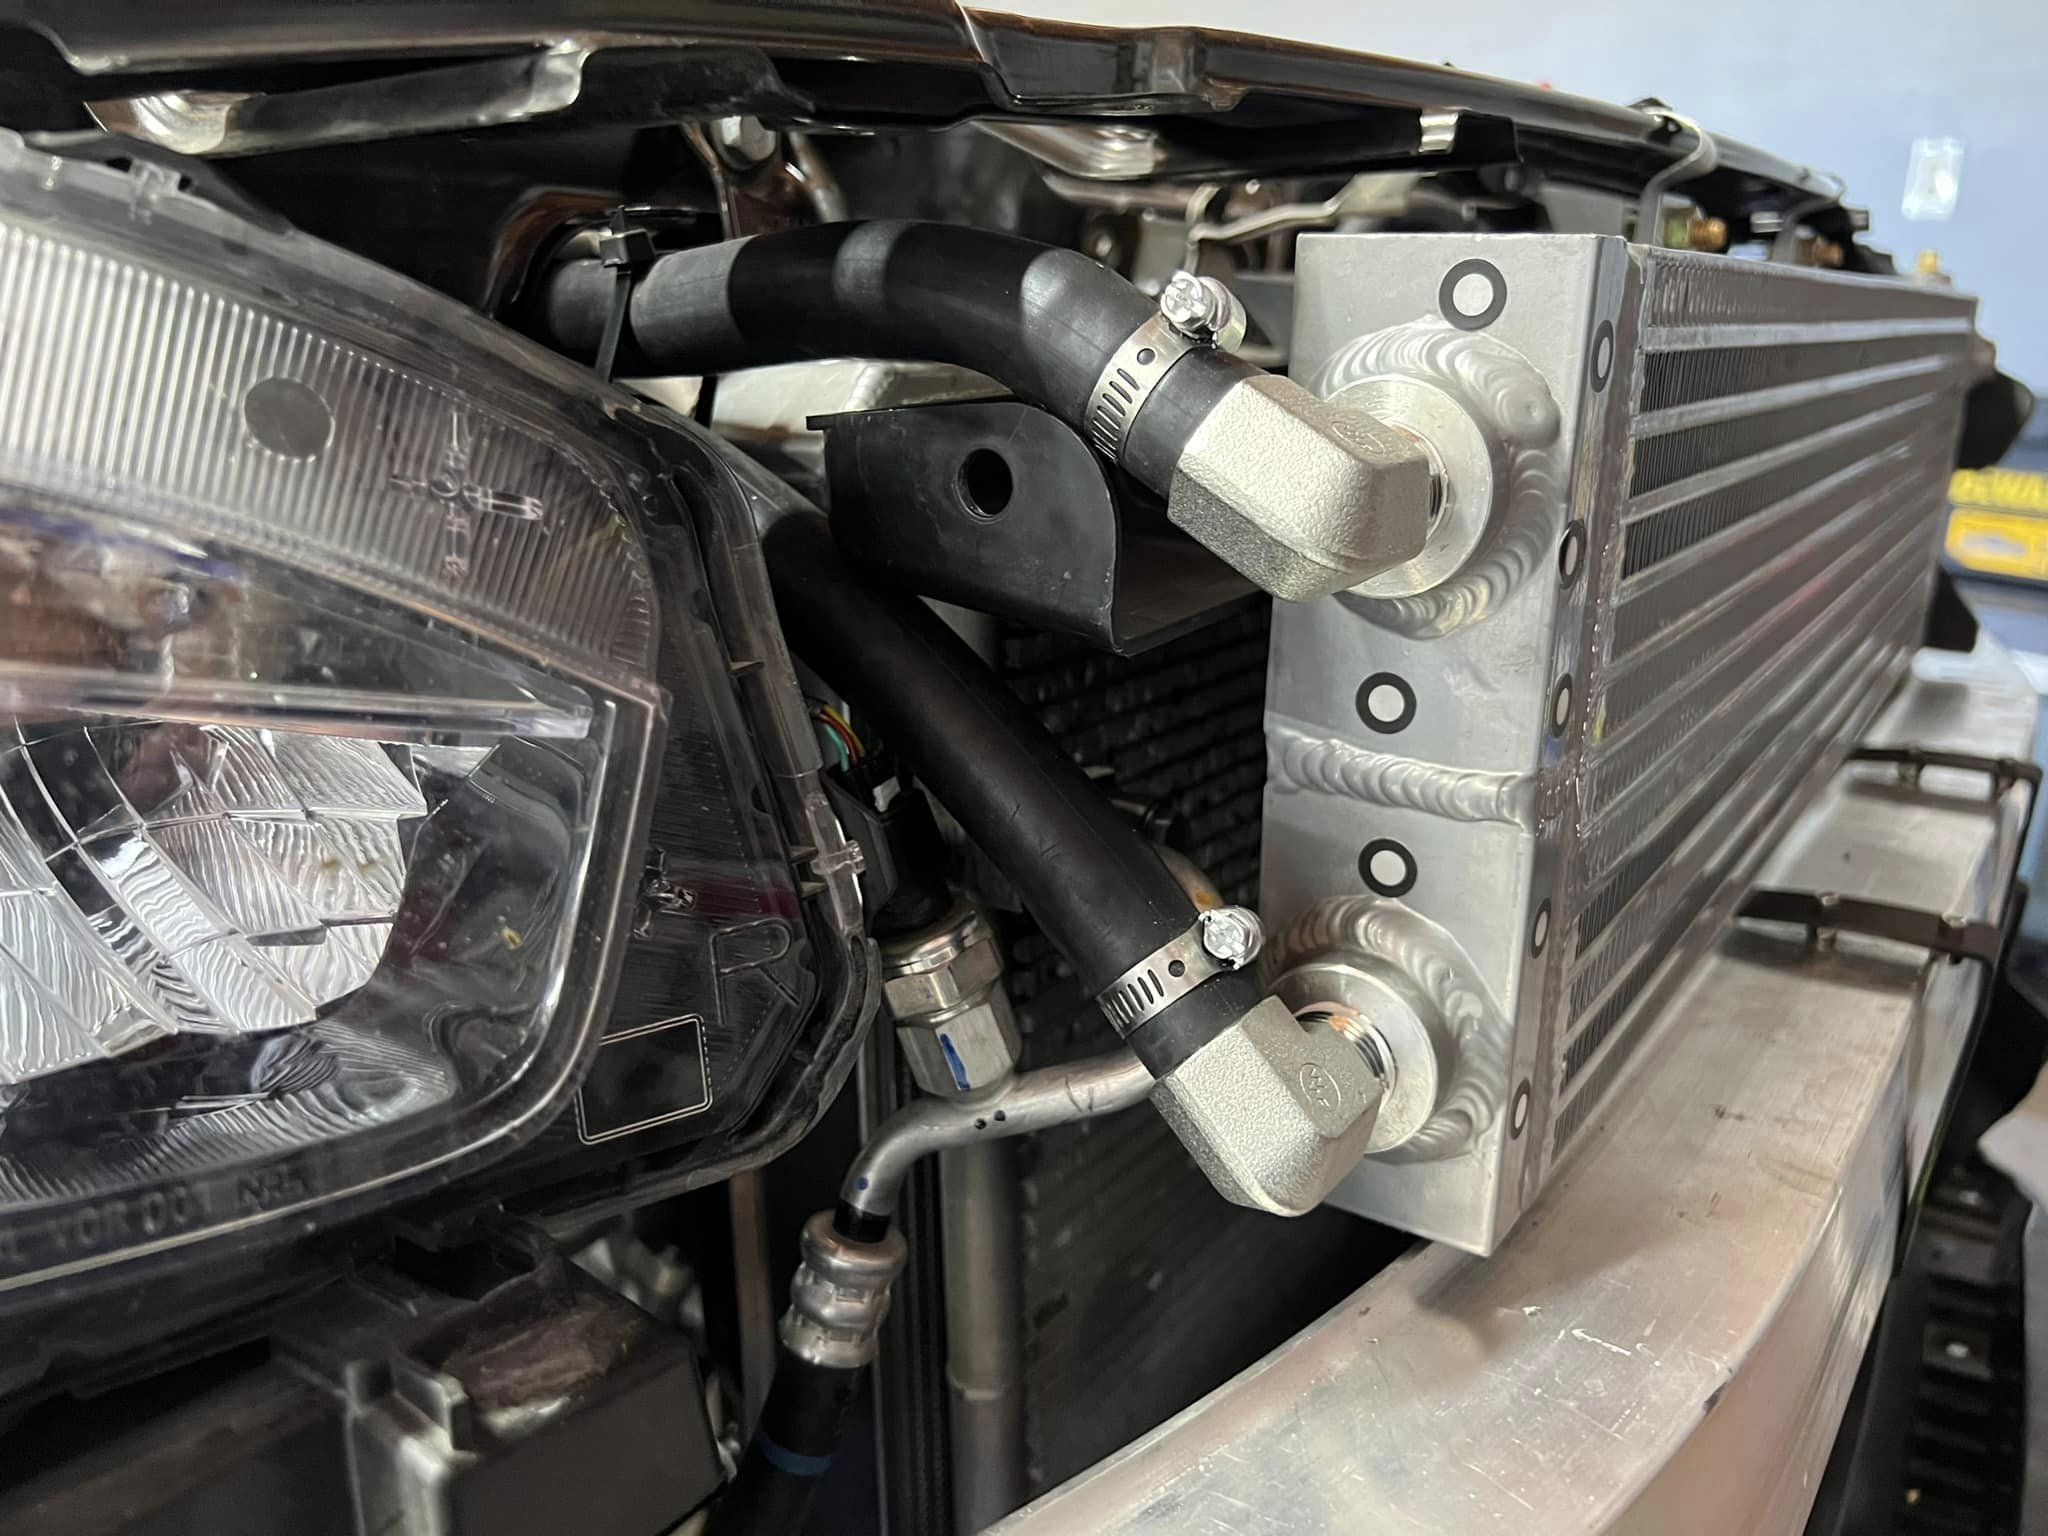
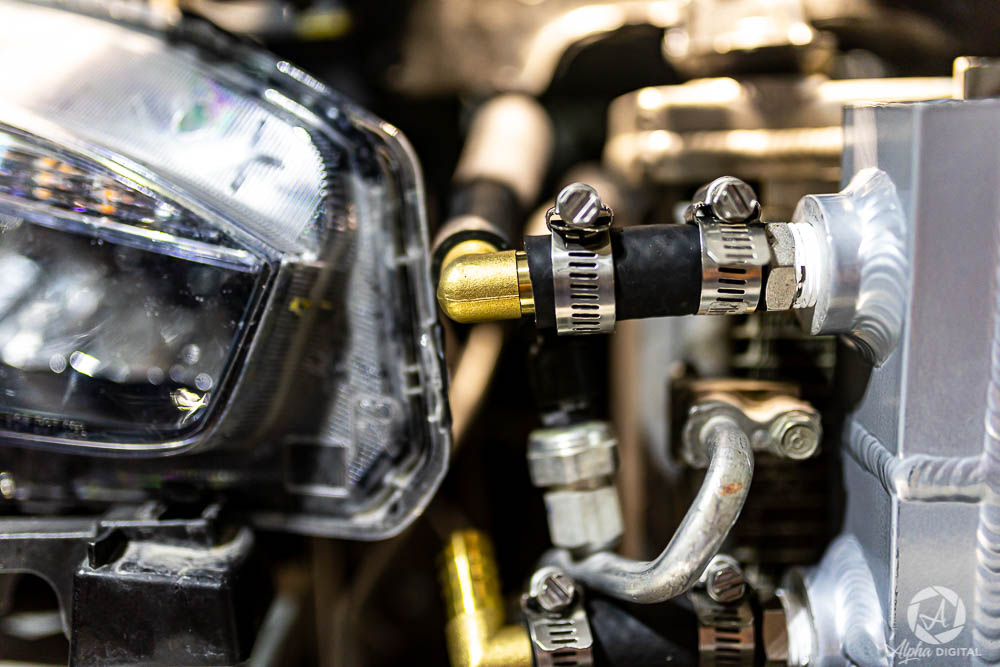
This is how the passenger end looked with it mocked up. This is where I used 2 of my 3 90 degree barb fittings so that I could properly route my hoses into the engine bay.
Fittings and hose clamps on. Looking back on this now I feel like I wouldve tried for 90 degree fittings instead, so that this looks cleaner and there are two less points for potential leaks. Like these 90 Degree Fittings
For reference, the top line will be the one that brings the hot coolant from the motor. The coolant will circulate through the secondary radiator before exiting via the bottom hose and over to the firewall where it will go through the heater core and then back to the motor.

Routed my top hose with its fitting over to the spot where it will be tapped. The bottom hose is routed up and over to the firewall.
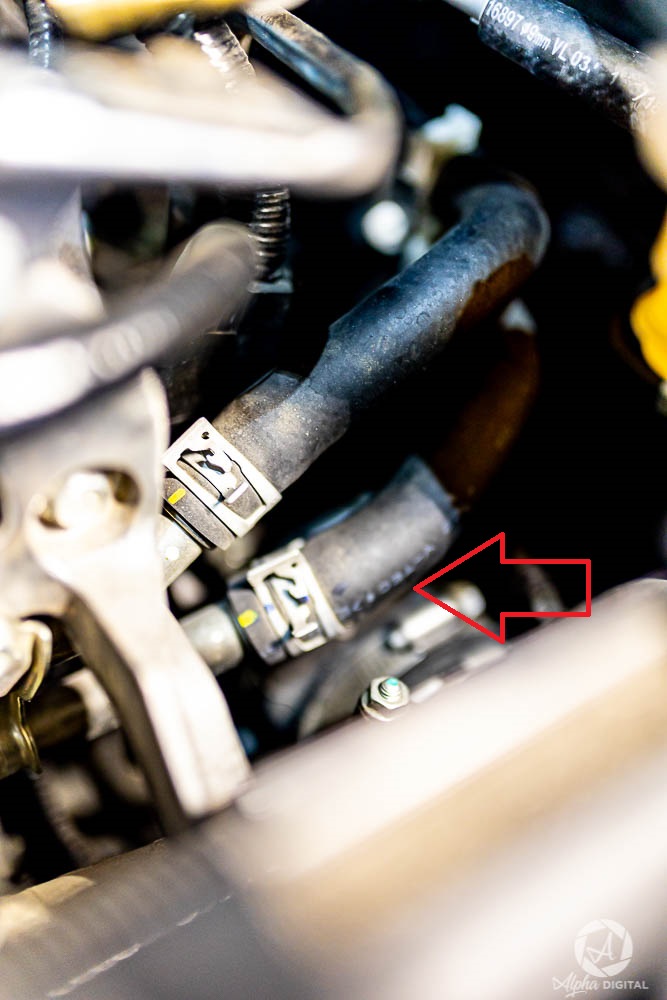
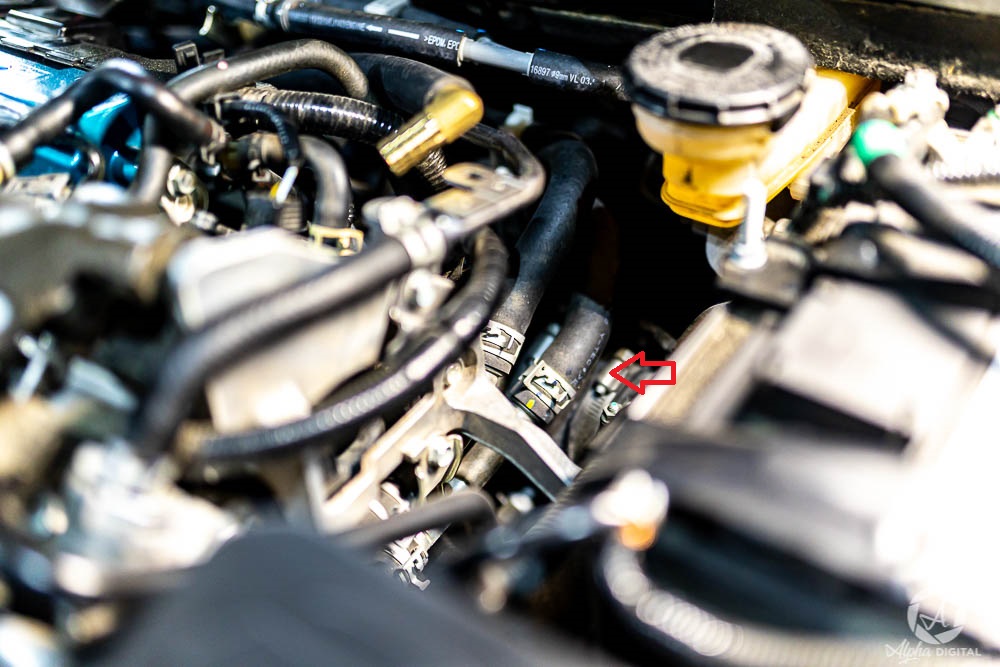
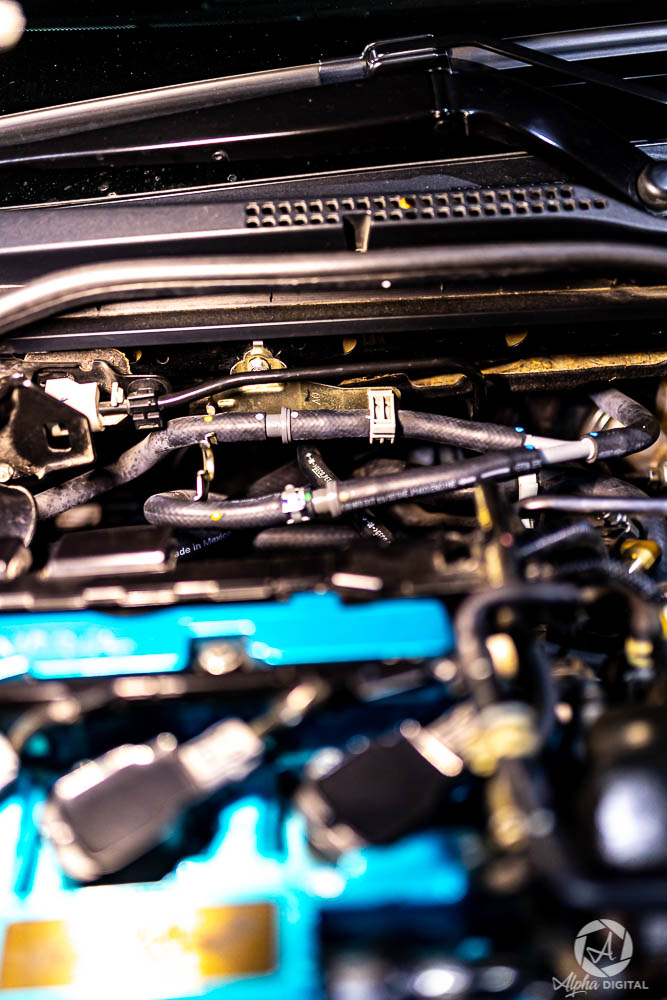
Above is the hose you will want to tap. This hose is the top hose that comes from the firewall. This is the same hose Mishimoto uses in their video detailing the install of their secondary radiator. Skip to 10:40
Believe me when I say I fucked up initially thinking "top hose" I cut the top one of these. This created a fuck ton of extra work for me. Top Hose is reference for the top hose coming from the firewall...
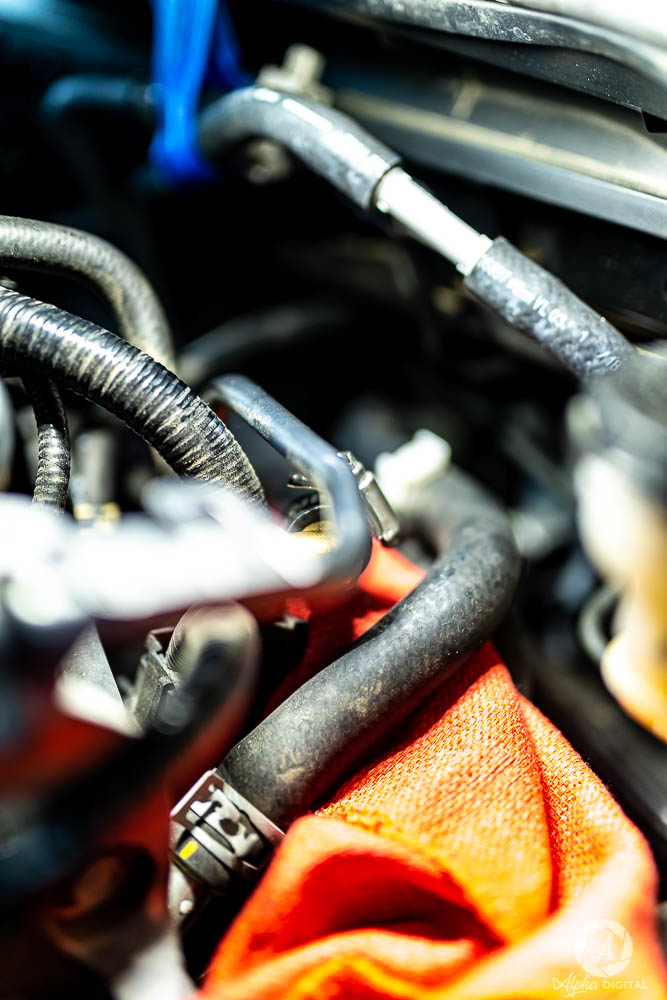
Tapped in.
Pro tip, use shop rags to try and keep your garage floor as coolant free as possible.
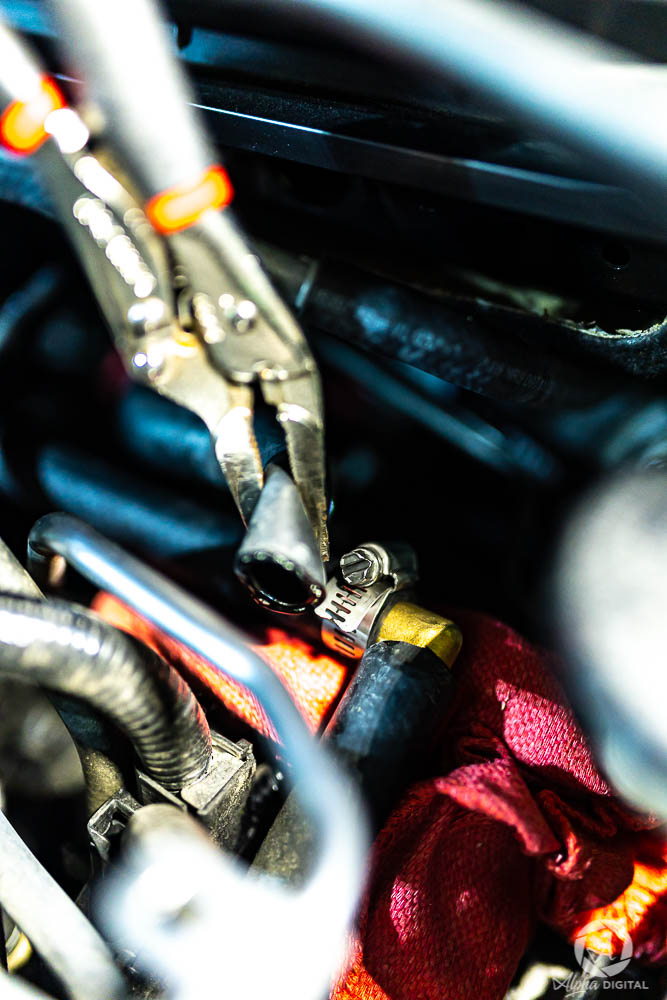
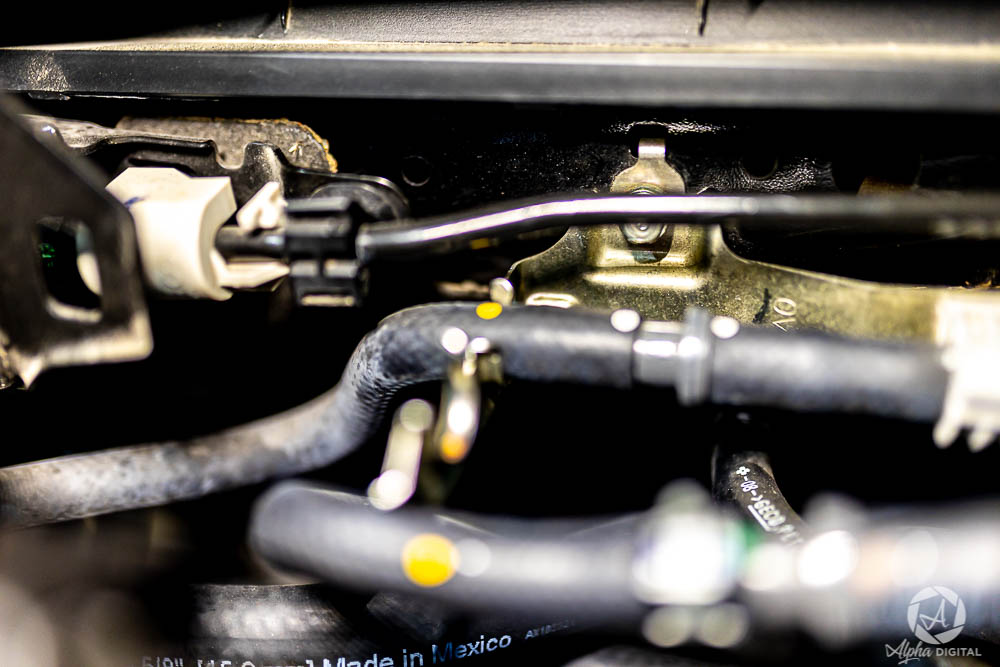
Here is an ultra shitty shot of the hoses that come out of the firewall. The top one is the one you want to begin loosening the clamp on so that you can remove it. You can see I was able to move the clamp for the hose in the photo above so that I could slide the hose off. Those clamps were a pain in the ass. I kind of wish I had a longer needle nose plier set so that I didnt have to reach in so far, like these Pliers
Removing this gold bracket made my life easier. It was 1 10mm.
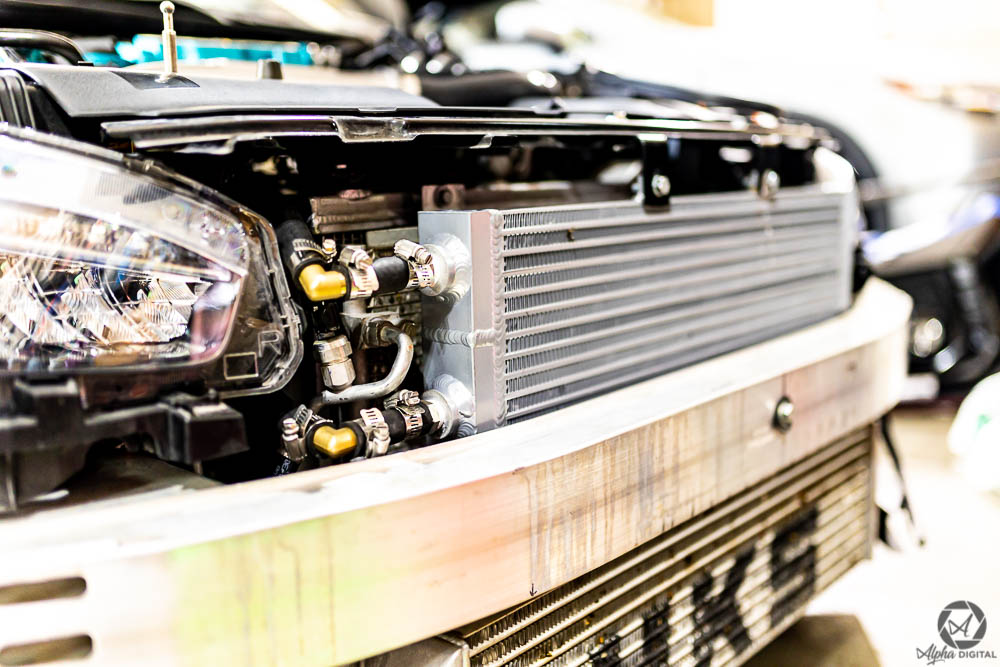
Radiator is secured, 90s are in, clamps are on, and lines are run into the engine bay.
Here is what my lines look like as they come through to the engine bay.

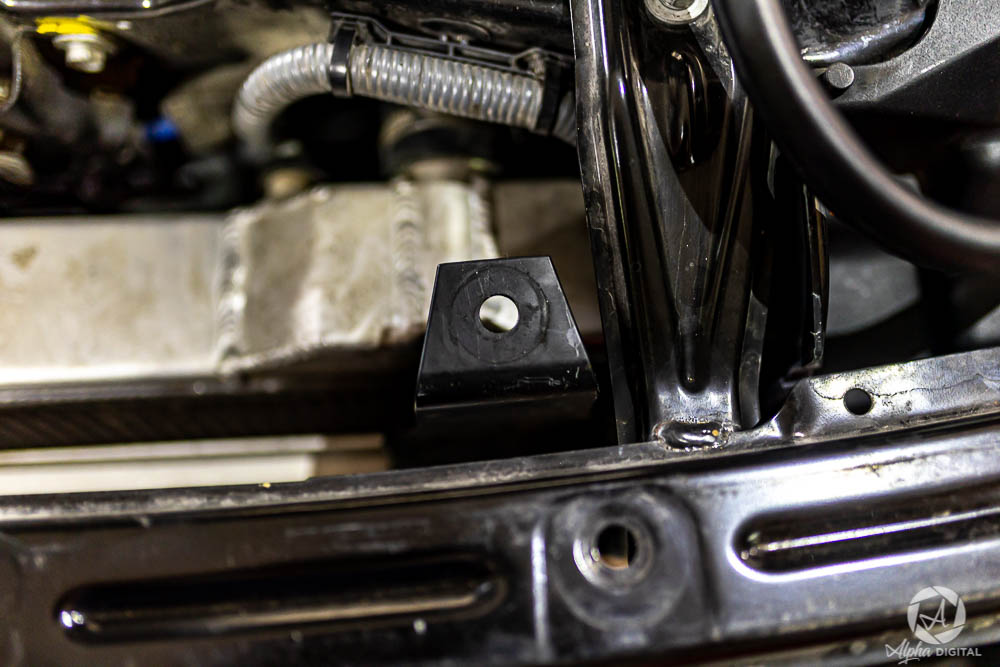
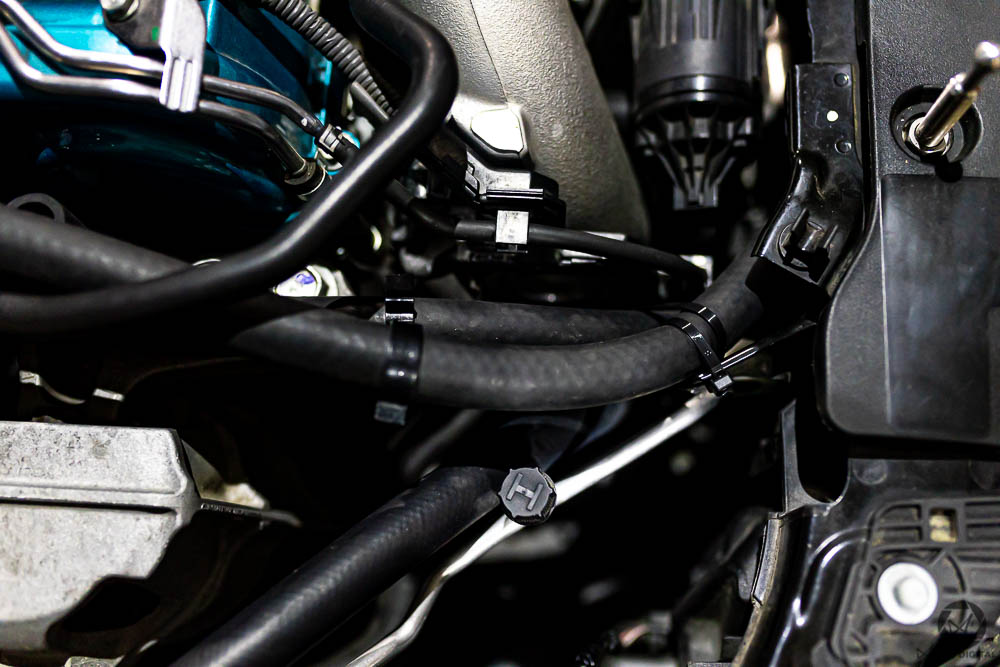
I took a piece of heater hose and cut it down so that I could put it over this bolt for the motor mount. Pretty much, anywhere where the lines are resting against something, I tried to do my best to either give it space or put something in between so it doesnt rub a hole through it eventually. I hope this helps. The lines rest between that motor mount bolt and the valve cover, I only moved it a bit so I could show the hose I put on that bolt.

I also made sure to give the lines some slack by this wire harness for the coil packs
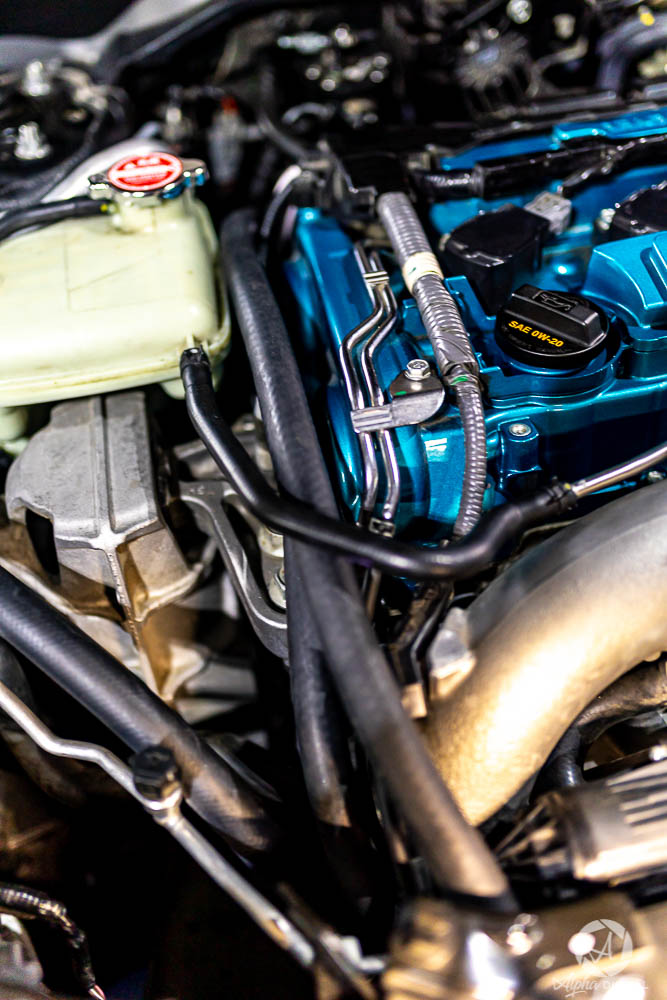
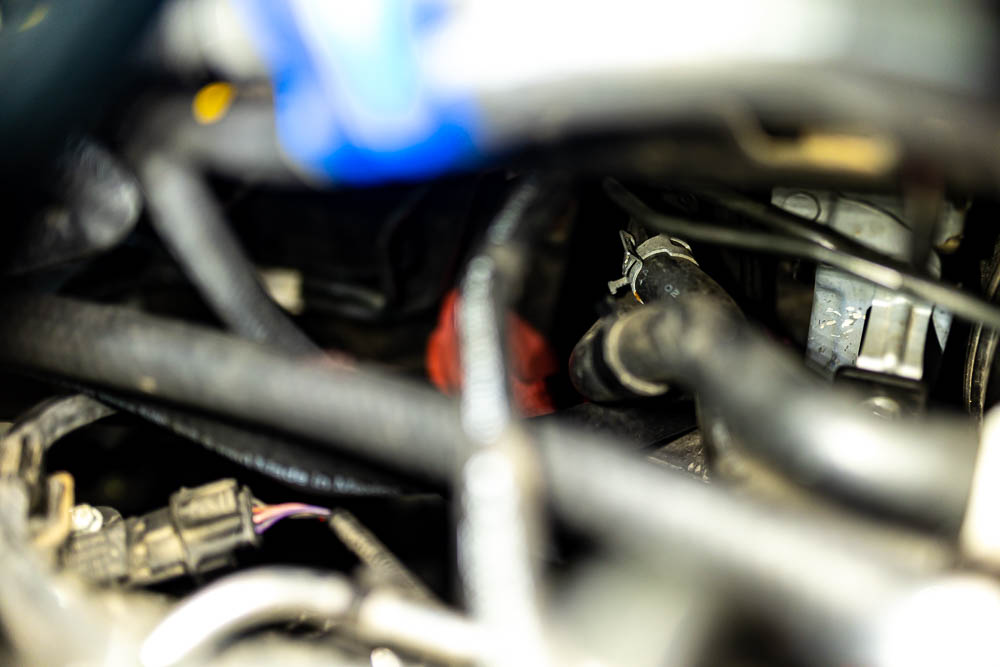
Another shot of the lines.
Once everything was hooked up it was time to start the car. With the front end still jacked up, I made sure to take off my coolant reservoir cap and I started the car and let it idle. Once the car was at operating temperature, I turned the heat on full blast. I made sure to keep an eye on the coolant reservoir, filling it when it got low as the coolant circulated through the entire system. Once I was sure there were no leaks, I turned the car off, put the cap back on, and brought the car back down. I took it for a short drive and came back and let it cool off. I chased one coolant leak on the fitting and then bled the system one more time doing the same thing.
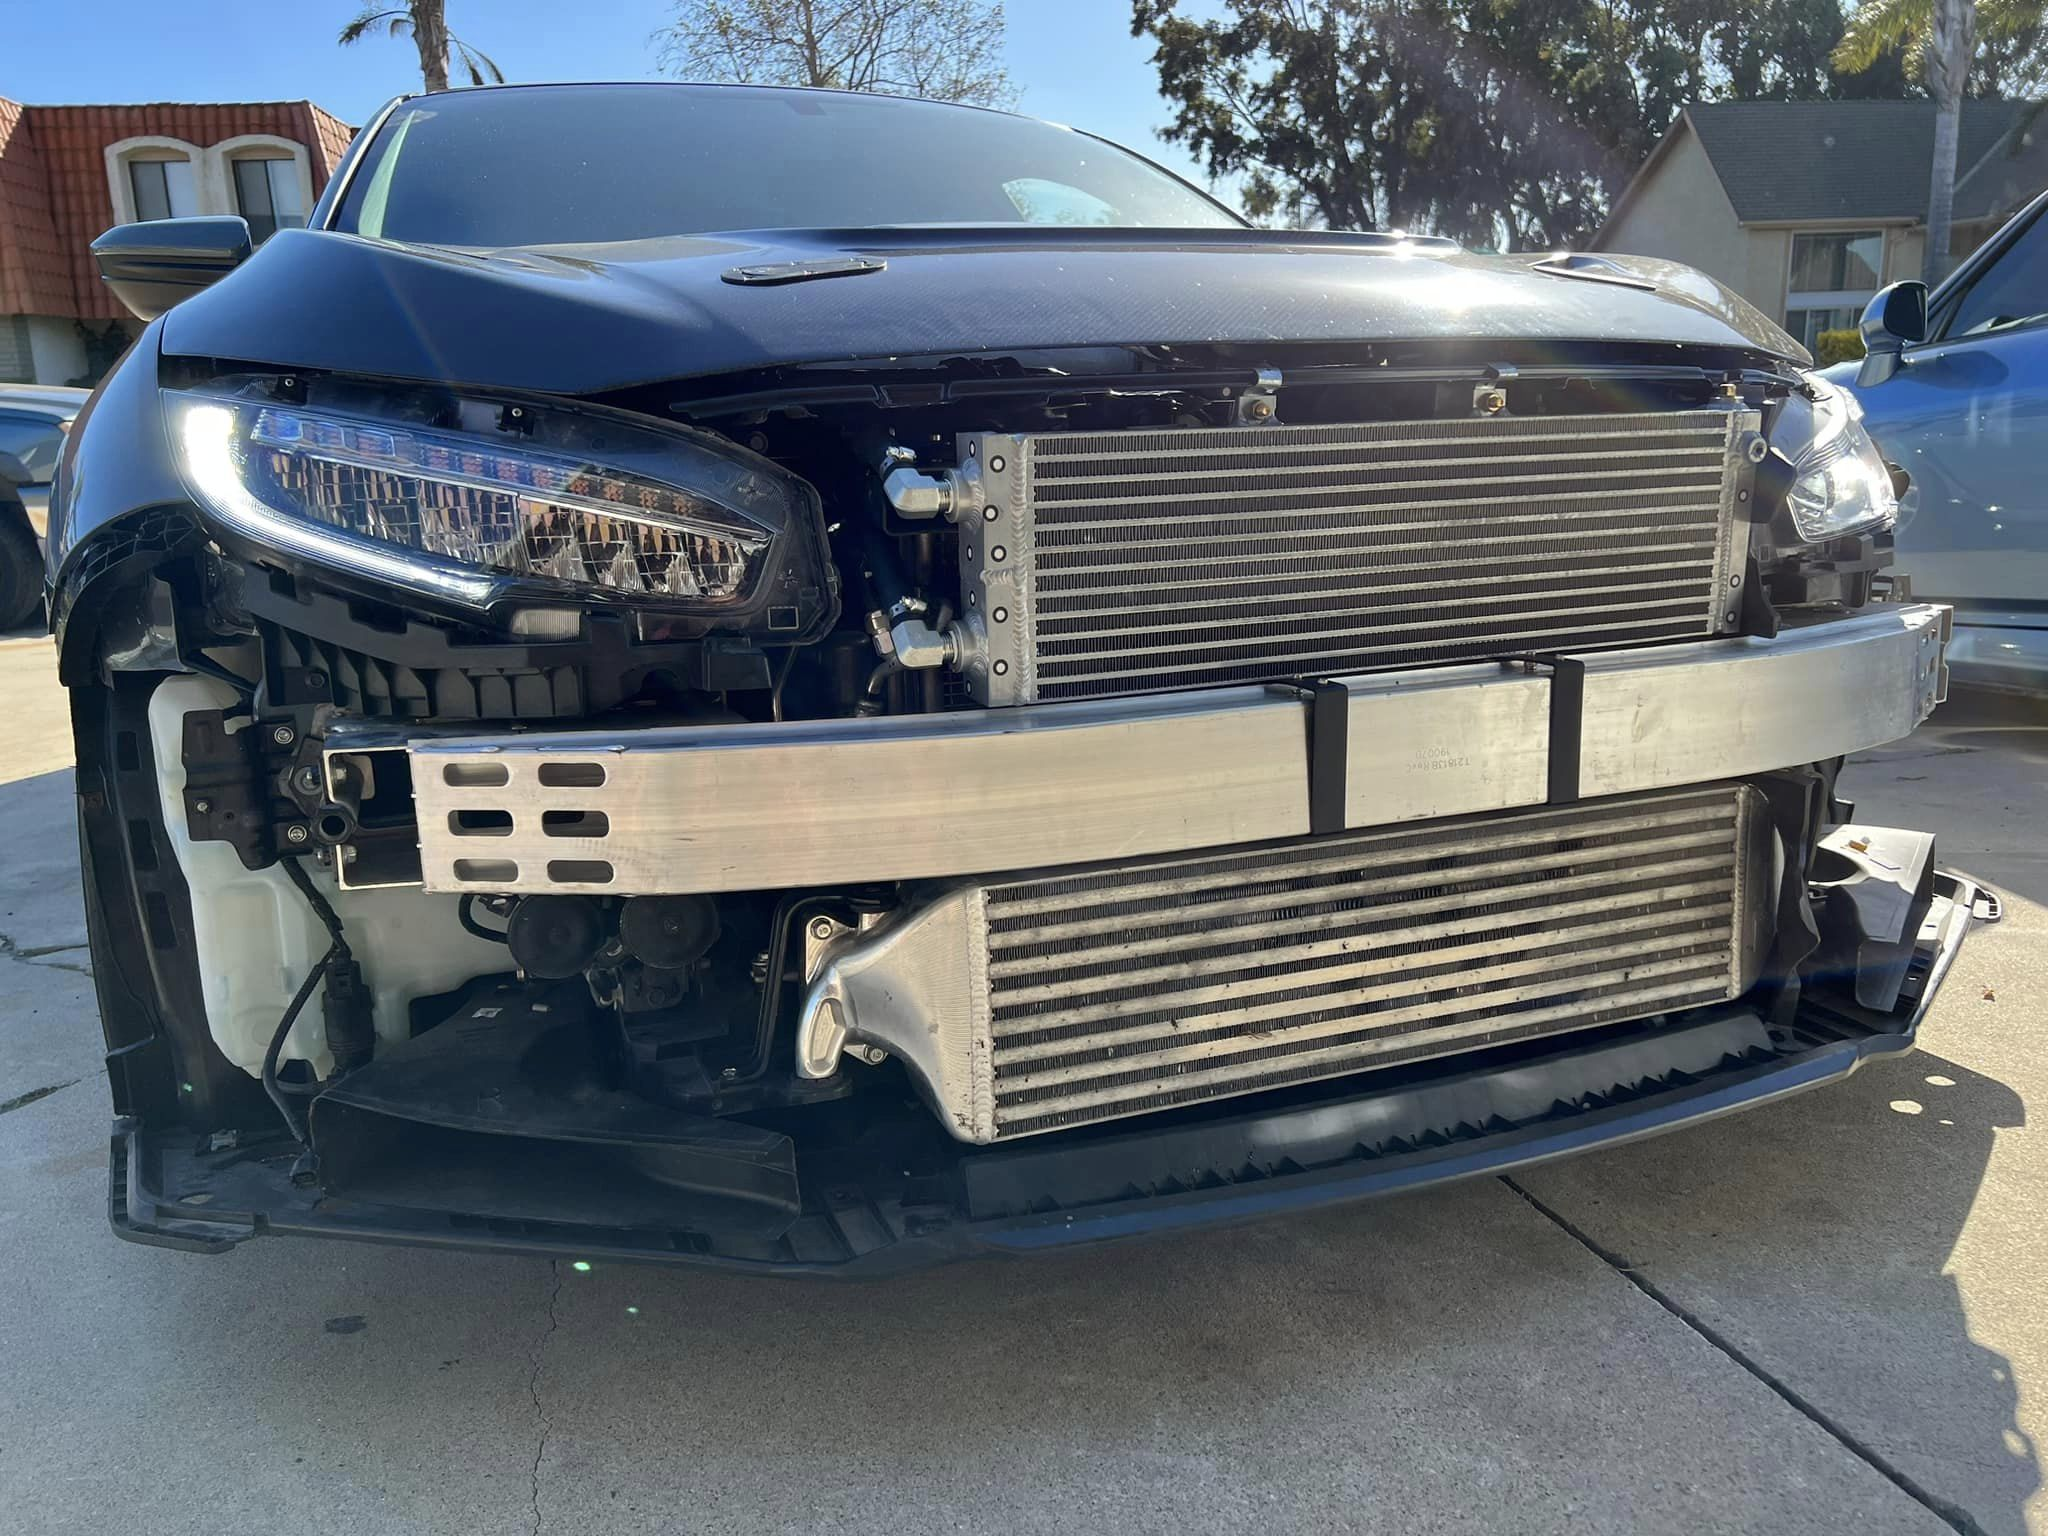
The next day, another bleeding session and short drive. Is this overkill? Maybe. But id rather take care of this now and make sure its well bled and that any leaks in the system are found. It beats discovering it on the track 6 hours from home. Once I was sure the car wasnt leaking anymore, I threw the bumper back on. Luckily, the bolt on the crash bar as well as the two bolts on top did not interfere with anything fitment-wise

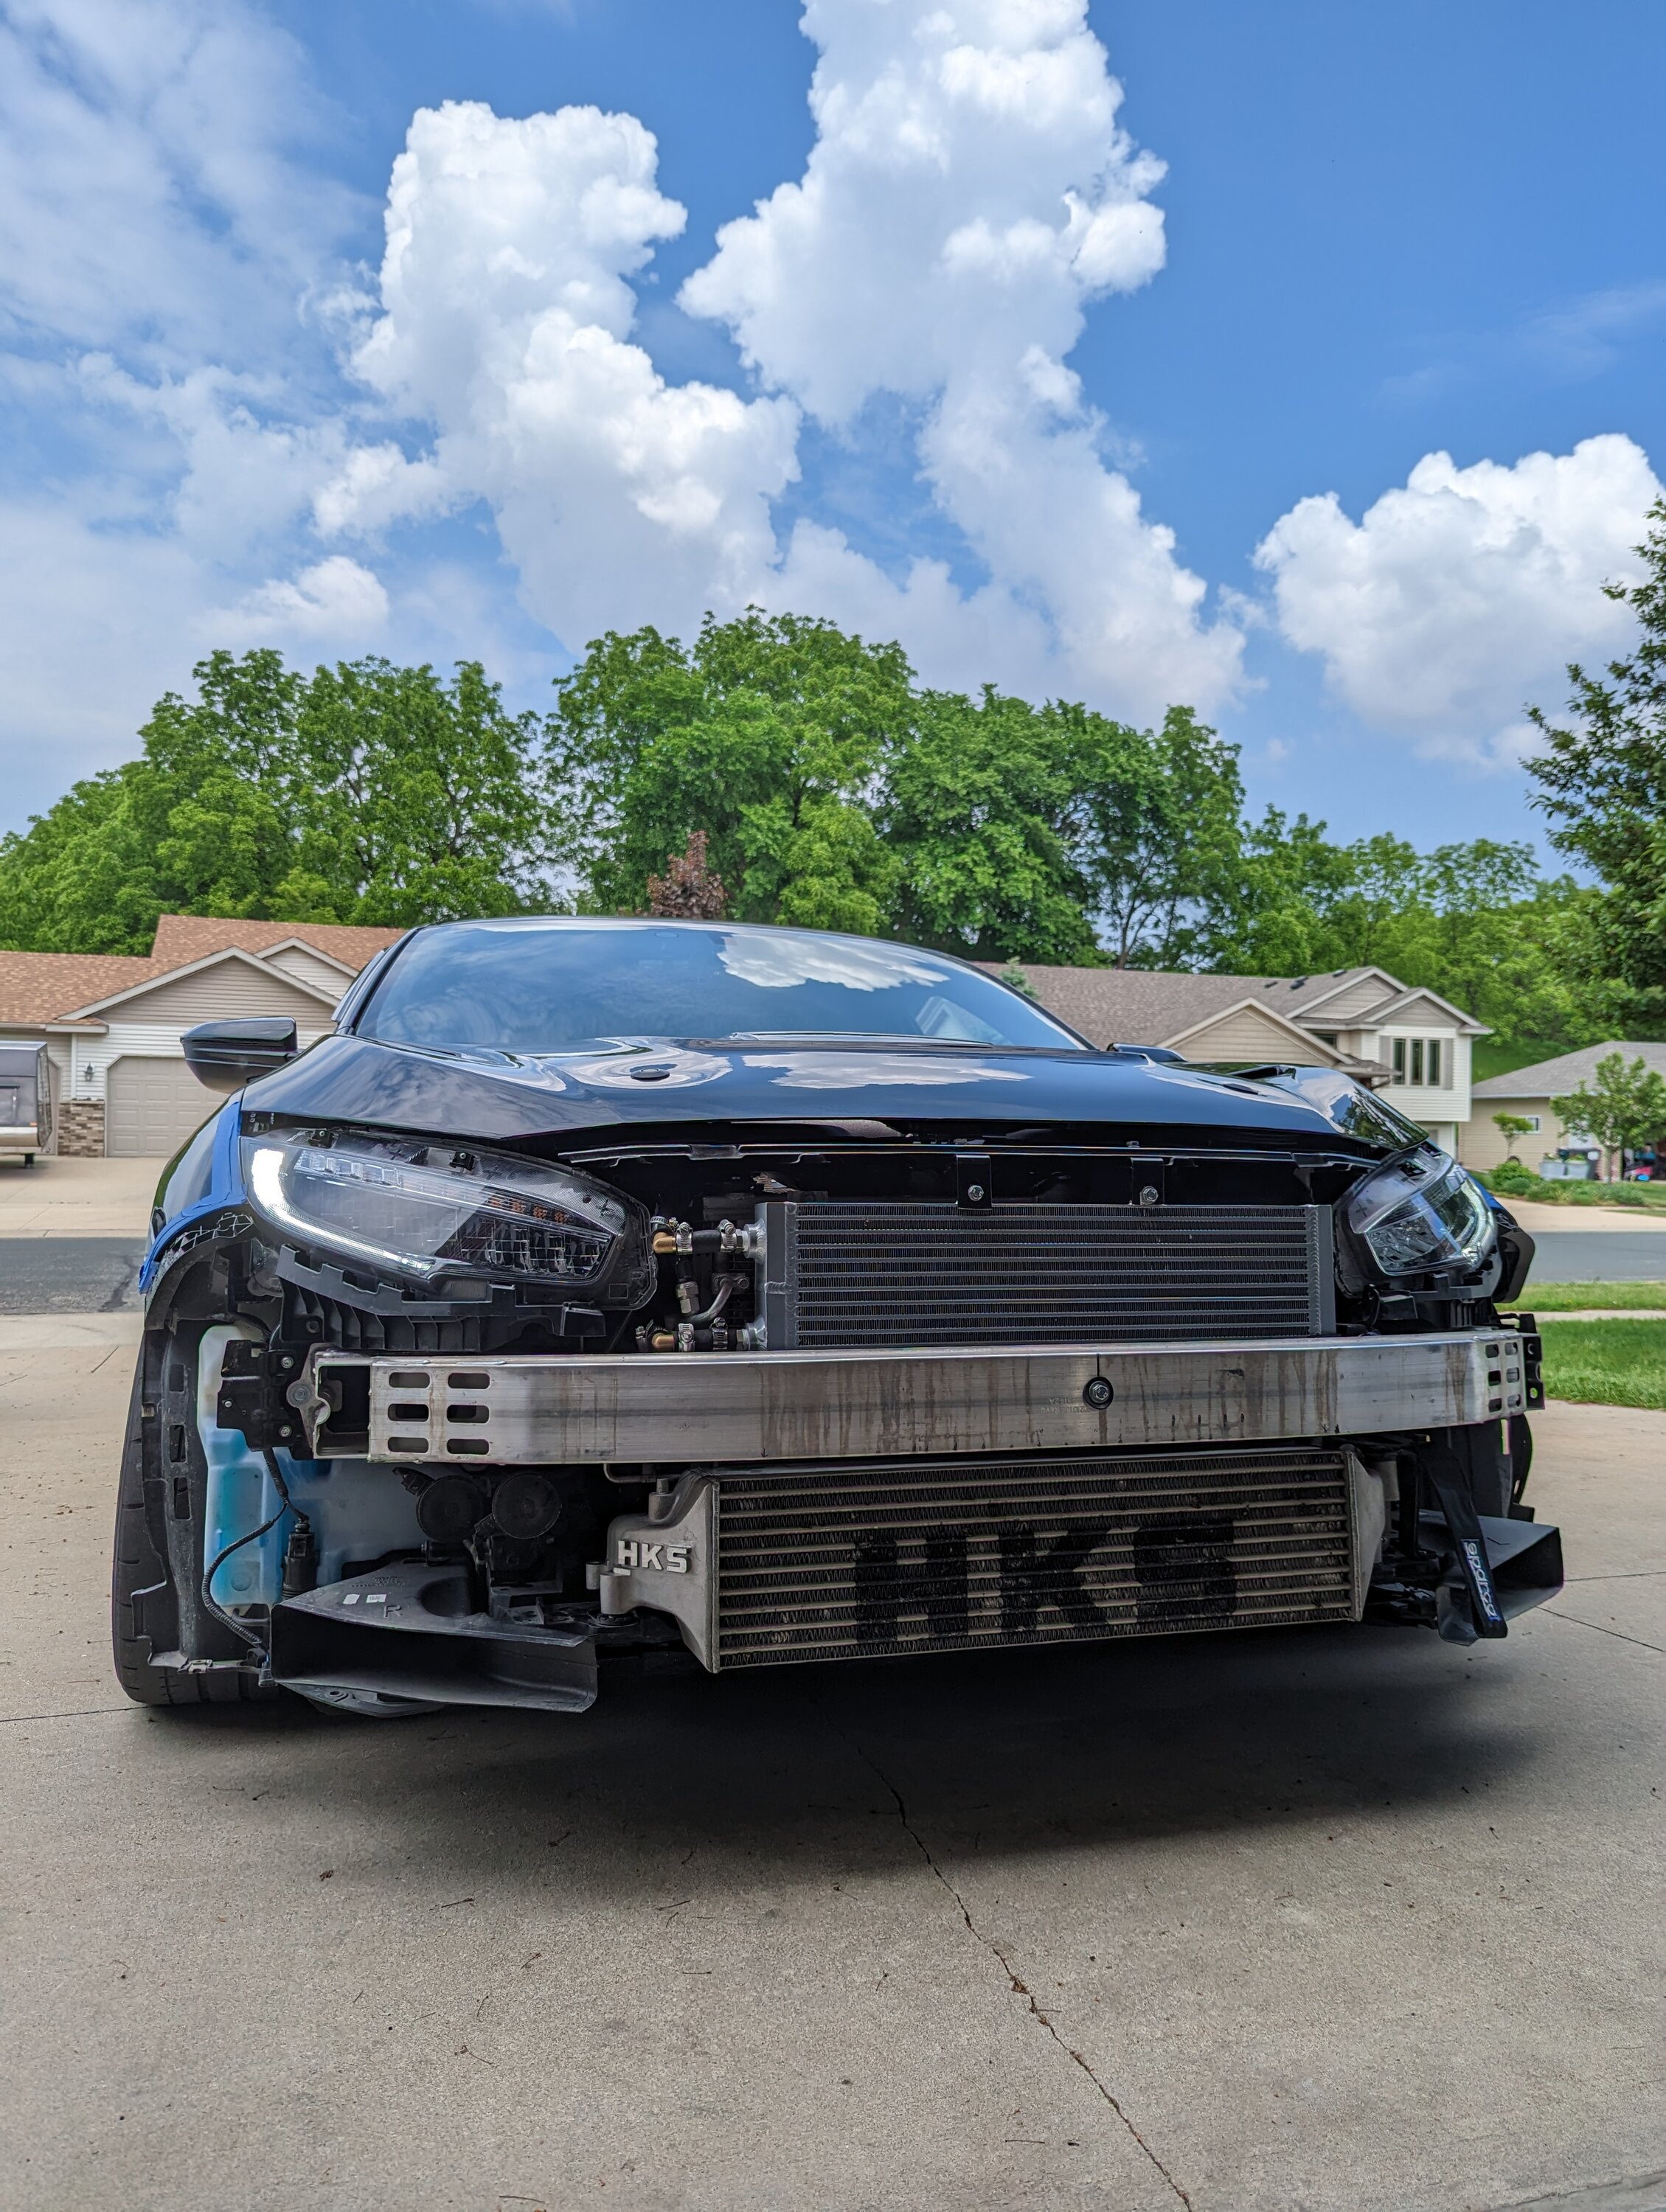
45 minutes prior to this photo, the car had no bumper on
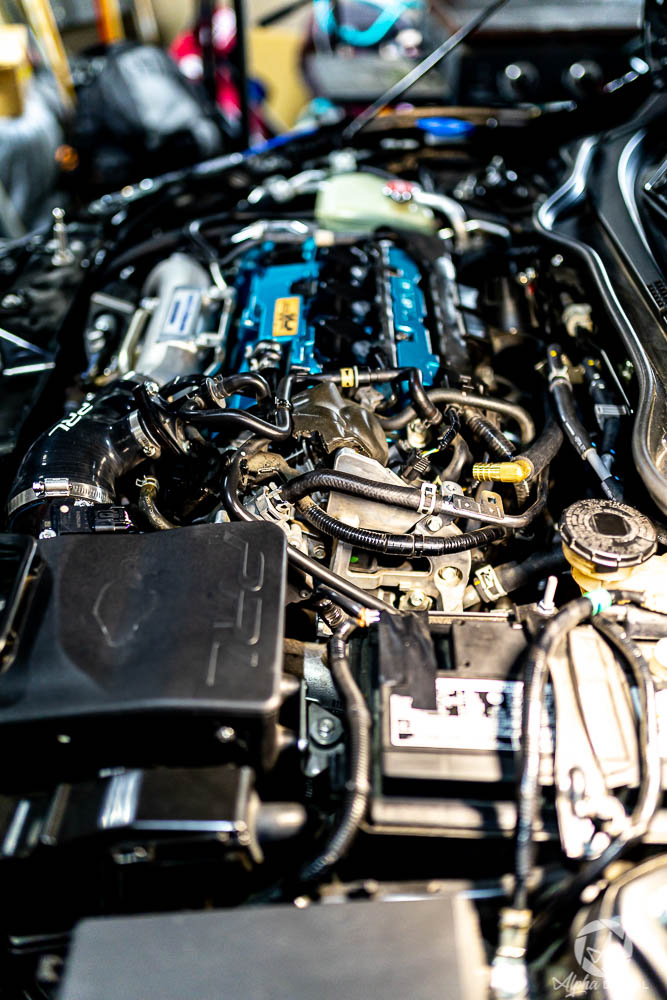
Voila, here we are after a full day of running errands and attending a cars and coffee event. No leaks to be seen yet, I hope it stays that way. Once the car cooled down I opened up the reservoir and saw that it was lower, so I topped it off with coolant.

Initial Observations
I will definitely report back after my next trackday in a week.
If there are any questions please feel free to ask!
Post Install Follow Up
- Setup works great, im very glad I did it!
- I wish instead of teflon tape I wouldve used pipe dope/thread sealant instead. The tape just didnt cut it and after coming back from my track day I noticed two leaks on the fittings. I took the fittings out and redid it with Blue Monster pipe dope instead. So far its holding up, but I havent done another track day yet to see how it holds
- Ideally, using 2 90 degree fittings or maybe 45 degree fittings wouldve been better than the straight fittings I have. This would eliminate two connecting points and 4 hose clamps. Less chance of leaking
- Regular hose clamps suck. Their tension doesnt seem to hold well and they kind of damage the hose itself. I think it wouldve been better to use one of these that can flex with the hose as it warms and cools Clamp
- The car definitely runs cooler just driving around normally, probably about 10 degrees at least. It settles around 170 cruising on the highway. I dont drive this car in the winter, but do in the fall, itll be interesting to see if the car may run too cool..
Many of you are aware of the @.grimace and @siwelnosaj style secondary radiator setup that utilizes a universal air to water radiator that is tapped into the cooling system. This allows the hotter coolant to circulate through the secondary radiator before going into the heater core and back into the motor. This setup has proved to be beneficial for all of those utilizing it including Gridlife competitors @DPL8 and @AR-Delta
I tried my best to take photos and document my process when putting this together. I started on Friday afternoon and finished Sunday morning. I likely couldve been done Saturday, but I had plans that didnt jive with my car work. This install wasnt too difficult, but it definitely required a good bit of work rigging up how to mount it. A second set of hands definitely wouldve been helpful.
Heres what I used, and some links
Materials
- Water to Air Radiator - https://www.siliconeintakes.com/index.php?products_id=1063&osCsid=m3at7gdmrgb4hn9bggfpp9tu20
- 1/2 NPT to 5/8 barb fittings - https://www.amazon.com/gp/product/B07P54QK6Q/ref=ppx_yo_dt_b_asin_title_o09_s00?ie=UTF8&th=1
- 90 degree 5/8ths barb fittings (3) - https://www.amazon.com/gp/product/B07F7DQPV3/ref=ppx_yo_dt_b_asin_title_o09_s01?ie=UTF8&psc=1
- Right angle support brackets (not the exact ones, but mine were similar)- https://www.menards.com/main/hardwa...6c8f-43a8-8ddf-9c8ff5840e35&ipos=27&exp=false
- 10 feet of 5/8ths heater hose from my local auto parts store
- M8 washers
- M8 bolts
- Hose Clamps
Teflon tapeThread Sealer - Blue Monster- File (to file down burrs and sharp edges after making cuts
- Many different types of pliers
- Zip Ties
- Mishimoto Liquid Chill - https://www.mishimoto.com/liquid-ch...4J65ic5beVMmGJ6_HuquMc-gME_xL7goaAk9lEALw_wcB
Things that I wish I had, but needed to borrow
- A strong ass drill with a bit that could make the holes for the bolts and drill through the crash bar
- Sawzall
- Hose Cutter
So Friday I started off by taking my bumper off and then getting all of my stuff together
Here youll see various bolts, washers, nuts, hose clamps, and some rubber washers so I could help control any sort of vibration the added cooler would make. Note: I dont really know if this makes a difference or would help. But I bought them anyways. The shorter M8 bolts were for mounting the L bracket to the brace and then to the radiator. The longer ones were meant to be used for the crash bar portion, The hose clamps are hopefully self explanatory.
With the bumper off and mocking up the install, it was clear that there were going to be things that needed to be trimmed and relocated.
The first thing that needed to be moved was the temp sensor as it was right in the way of where the radiator will go. I just tucked it under the left headlight, but I may move it to a better spot where it can gauge temps better but to be honest im not in a hurry. Right now it reads probably 10 degrees higher than ambient since its in a spot that doesnt get much air flow.
The next thing that needed to be done was trimming this portion. Ultimately, I chopped most of it off but chose to retain the piece below so I could keep airflow going to my intake. Depending on how you choose to mount your radiator this may not be necessary**
I made sure to retain the piece below that goes with this plastic piece, so that when it came time to put my push clips back in, I could secure it in place and it wouldnt be flopping around everywhere.
When the black shroud goes back on, there will be a spot where you line this up and insert the push clip to secure the plastic piece in place.
Before I could get the radiator mocked up, I had to run to the hardware store to grab all my nuts and bolts, along with a bolt for the radiators drain. Per the website the size of this is a 1/8-27 NPT plug that was supposed to be included. Mine wasnt however, so I just walked in with the radiator and got one that fit. I teflon taped it and installed it.
Diagram of the radiator
I did the same thing with the barbs and installed it on the radiator.
Now comes trying to figure out how to properly secure this thing to the car. Ideally, you want this radiator to be as close to the driver side headlight as possible so that you can give the hoses enough space to bend in towards the engine bay. This is assuming you are using a straight 1/2 npt to 5/8ths barb fitting. If you use a 90 degree barb/npt it may not be as crucial to get this right next to the headlight.
You can see in this photo that @Chicane_Si has his setup with 90 degree barb fittings
A shot of how his hoses are routed.
Once I decided on how I wanted to mount the rad, I got my drill and bit out and made my holes, big enough for my M8 bolts. Once the holes were made, I got my L brackets mounted and then the radiator mounted to them.
This is how it looked when test fitting. The brackets were rather large, so you can see I will end up needing to trim them.
All trimmed up.
The above photo is my solution for the bottom half of the radiator. Rather than drilling two separate holes for the bottom mounts, I bought one piece of thicker metal from the hardware store and drilled three holes. The two outer holes are so I can mount this bar to the bottom of the radiator. The center hole is so I only have to drill once through the crash bar and use the one long M8 bolt (pictured at the beginning) to secure the radiator to the crash bar. This piece of metal was thick so it wouldnt flex.
Mounted to the radiator
Mounted to the crash bar. This did not cause me problems when I put my bumper back on FYI.
This is a shot from the top looking down. Here is the setup. 1 long M8 bolt, put through the crash bar. 1 nut for the bolt before it hits the metal bar that is secured to the radiator. And then 1 more nut on the backside of that bar. Then, tighten both nuts down so that it secures the radiator in place. This eliminated the need for a spacer.
This is how the passenger end looked with it mocked up. This is where I used 2 of my 3 90 degree barb fittings so that I could properly route my hoses into the engine bay.
Fittings and hose clamps on. Looking back on this now I feel like I wouldve tried for 90 degree fittings instead, so that this looks cleaner and there are two less points for potential leaks. Like these 90 Degree Fittings
For reference, the top line will be the one that brings the hot coolant from the motor. The coolant will circulate through the secondary radiator before exiting via the bottom hose and over to the firewall where it will go through the heater core and then back to the motor.
Routed my top hose with its fitting over to the spot where it will be tapped. The bottom hose is routed up and over to the firewall.
Above is the hose you will want to tap. This hose is the top hose that comes from the firewall. This is the same hose Mishimoto uses in their video detailing the install of their secondary radiator. Skip to 10:40
Believe me when I say I fucked up initially thinking "top hose" I cut the top one of these. This created a fuck ton of extra work for me. Top Hose is reference for the top hose coming from the firewall...
Tapped in.
Pro tip, use shop rags to try and keep your garage floor as coolant free as possible.
Here is an ultra shitty shot of the hoses that come out of the firewall. The top one is the one you want to begin loosening the clamp on so that you can remove it. You can see I was able to move the clamp for the hose in the photo above so that I could slide the hose off. Those clamps were a pain in the ass. I kind of wish I had a longer needle nose plier set so that I didnt have to reach in so far, like these Pliers
Removing this gold bracket made my life easier. It was 1 10mm.
Radiator is secured, 90s are in, clamps are on, and lines are run into the engine bay.
Here is what my lines look like as they come through to the engine bay.
I took a piece of heater hose and cut it down so that I could put it over this bolt for the motor mount. Pretty much, anywhere where the lines are resting against something, I tried to do my best to either give it space or put something in between so it doesnt rub a hole through it eventually. I hope this helps. The lines rest between that motor mount bolt and the valve cover, I only moved it a bit so I could show the hose I put on that bolt.
I also made sure to give the lines some slack by this wire harness for the coil packs
Another shot of the lines.
Once everything was hooked up it was time to start the car. With the front end still jacked up, I made sure to take off my coolant reservoir cap and I started the car and let it idle. Once the car was at operating temperature, I turned the heat on full blast. I made sure to keep an eye on the coolant reservoir, filling it when it got low as the coolant circulated through the entire system. Once I was sure there were no leaks, I turned the car off, put the cap back on, and brought the car back down. I took it for a short drive and came back and let it cool off. I chased one coolant leak on the fitting and then bled the system one more time doing the same thing.
The next day, another bleeding session and short drive. Is this overkill? Maybe. But id rather take care of this now and make sure its well bled and that any leaks in the system are found. It beats discovering it on the track 6 hours from home. Once I was sure the car wasnt leaking anymore, I threw the bumper back on. Luckily, the bolt on the crash bar as well as the two bolts on top did not interfere with anything fitment-wise
45 minutes prior to this photo, the car had no bumper on
Voila, here we are after a full day of running errands and attending a cars and coffee event. No leaks to be seen yet, I hope it stays that way. Once the car cooled down I opened up the reservoir and saw that it was lower, so I topped it off with coolant.
Initial Observations
- The heat still blows hot which is awesome
- I can tell that cruising temps are about 10 degrees lower. My water temp gauge is definitely lower than previous, Ill have to confirm with Hondata what it is though since mine is off due to the acuity hoses and where the sensor is reading from.
I will definitely report back after my next trackday in a week.
If there are any questions please feel free to ask!
Post Install Follow Up
- Setup works great, im very glad I did it!
- I wish instead of teflon tape I wouldve used pipe dope/thread sealant instead. The tape just didnt cut it and after coming back from my track day I noticed two leaks on the fittings. I took the fittings out and redid it with Blue Monster pipe dope instead. So far its holding up, but I havent done another track day yet to see how it holds
- Ideally, using 2 90 degree fittings or maybe 45 degree fittings wouldve been better than the straight fittings I have. This would eliminate two connecting points and 4 hose clamps. Less chance of leaking
- Regular hose clamps suck. Their tension doesnt seem to hold well and they kind of damage the hose itself. I think it wouldve been better to use one of these that can flex with the hose as it warms and cools Clamp
- The car definitely runs cooler just driving around normally, probably about 10 degrees at least. It settles around 170 cruising on the highway. I dont drive this car in the winter, but do in the fall, itll be interesting to see if the car may run too cool..
Last edited:

")